Introduction
When it comes to breakfast and brunch, few dishes have captured the hearts (and appetites) of food lovers quite like hashbrowns. This crispy, golden comfort food has become a staple on menus across diners and cafes, appealing to both the adventurous and the traditional eater. Whether served as a side to fluffy eggs, crispy bacon, or piled high with toppings like cheese and sour cream, hashbrowns are celebrated for their versatility.
In this article, we’ll dive into a simple yet delectable recipe for homemade shredded hashbrowns. Making hashbrowns from scratch not only allows you to enjoy a fresher taste but also empowers you to customize your dish with wholesome ingredients. By the end of this guide, you’ll be equipped with everything you need to create the perfect batch of crispy, golden hashbrowns that will elevate your breakfast experience.
Understanding Hashbrowns
Hashbrowns have a rich history that dates back to the early 19th century. Their origins can be traced to the United States, where they were first popularized as a convenient way to use leftover potatoes. The name “hashbrown” is derived from the term “hashed brown potatoes,” referring to the method of chopping and frying the potatoes until they reach a delightful crispiness. Over the years, this humble dish has evolved, inspiring various adaptations across the globe.
In the United Kingdom, for example, you may encounter “rosti,” a Swiss-inspired potato dish that often includes additional ingredients like onions or cheese. Meanwhile, in Latin America, similar potato preparations are known as “papas fritas” or “tortas de papa,” showcasing the universal love for fried potatoes. Despite these variations, the core concept remains the same: crispy, golden potatoes that are delicious and satisfying, making them a favorite among many cultures.
While frozen, store-bought hashbrowns can be convenient, nothing compares to the flavor and texture of freshly made ones at home. Homemade hashbrowns allow you to control the ingredients, ensuring that each bite is bursting with flavor. Plus, the satisfaction of preparing them from scratch is a rewarding experience that enhances the enjoyment of your meal.
Choosing the Right Potatoes
When it comes to crafting the perfect hashbrowns, the choice of potatoes is crucial. The ideal variety for this recipe is the russet potato. Known for their high starch content and low moisture levels, russets create a fluffy interior while achieving that coveted crispy exterior when cooked. Their structure holds up beautifully during the shredding process and allows for even cooking, making them a favorite among home cooks and chefs alike.
While there are many potato varieties available, each with its own unique texture and flavor profile, russets stand out for their excellent frying qualities. Other varieties, such as red potatoes or Yukon Golds, may not yield the same level of crispiness due to their waxy texture, which can lead to a mushy result rather than the desired crunch.
When selecting russet potatoes at the grocery store, look for those that are firm, without any soft spots or blemishes. A smooth skin also indicates freshness, and choosing medium to large-sized potatoes will give you the best yield for shredding.
Ingredients Breakdown
Creating homemade shredded hashbrowns requires just a handful of ingredients, yet each plays a vital role in enhancing the dish’s overall flavor and texture. Here’s a closer look at what you’ll need:
– Russet Potatoes: As mentioned, these are the star of the show. Their high starch content makes them the ideal choice for achieving crispy hashbrowns.
– Salt: A fundamental seasoning that brings out the natural flavor of the potatoes. It’s essential to season your hashbrowns adequately to avoid blandness.
– Black Pepper: This adds a subtle kick to your hashbrowns, enhancing the overall flavor profile. Adjust the amount based on your taste preference.
– Garlic Powder: A pinch of garlic powder elevates the flavor with a savory depth. It’s an optional ingredient, but one that can make a big difference.
– Oil or Butter: The cooking fat is crucial for achieving that crispy texture. Butter provides a rich flavor, while oil (such as vegetable or canola) has a higher smoke point, making it ideal for frying.
– Optional Add-Ins: Feel free to customize your hashbrowns with additional ingredients like diced onions, bell peppers, or even shredded cheese for a more flavorful twist.
Step-by-Step Guide to Making Hashbrowns
Prep the Potatoes
The first step in creating your homemade shredded hashbrowns is to prepare the potatoes. This process involves washing and peeling the russet potatoes to ensure optimal flavor and texture. Begin by rinsing the potatoes under cold water to remove any dirt or debris.
Next, using a vegetable peeler, carefully remove the skin. While some may choose to leave the skin on for added texture and nutrients, peeling the potatoes creates a smoother hashbrown that crisps up beautifully in the pan. After peeling, pat the potatoes dry with a clean kitchen towel or paper towel to remove excess moisture, which can hinder the crisping process.
Once your potatoes are prepped, it’s time to shred them. A box grater or a food processor fitted with a shredding attachment works well for this task. Grate the potatoes into a large bowl, ensuring you create long, thin strands. The size of the shreds can affect the final texture, so aim for a uniform thickness for even cooking.
Now that your potatoes are shredded and ready, you’re well on your way to creating delicious, crispy hashbrowns that will impress your family and friends. Stay tuned for the next steps, where we’ll guide you through the cooking process that will bring your homemade hashbrowns to life!
Rinse and Drain: The Significance of Removing Excess Starch for Texture
After shredding your potatoes, the first crucial step is rinsing them under cold water. This process is essential because it removes excess starch, which can cause your hashbrowns to become gummy or overly sticky when cooked. By rinsing, you allow each shred of potato to retain its individuality, leading to a crispier final product. Aim to rinse until the water runs clear, which indicates that most of the starch has been washed away.
Once rinsed, drain the potatoes in a colander, shaking them gently to remove any excess water. This step is vital as moisture is the enemy of crispiness. If you skip this, you may find yourself with hashbrowns that are soft and lacking that desirable crunch.
Dry the Potatoes: Techniques for Ensuring Moisture-Free Potatoes for Better Frying
Drying the potatoes thoroughly is the next step to achieving the perfect hashbrowns. Excess moisture can create steam when frying, preventing the potatoes from browning properly. Here are a couple of effective techniques to ensure your potatoes are as moisture-free as possible:
1. Use a Clean Kitchen Towel: Spread the rinsed and drained potatoes onto a clean, dry kitchen towel. Fold the towel over the potatoes and press down firmly to absorb moisture. You may want to change the towel if it becomes too wet.
2. Paper Towels: Alternatively, you can use paper towels to pat the potatoes dry. Lay out a single layer of shredded potatoes on the paper towels, and then cover with another layer, pressing lightly to soak up any moisture.
Seasoning: How to Balance Flavors Effectively and Adjust to Personal Taste Preferences
Seasoning is where you can truly personalize your hashbrowns. While salt and pepper are the basics, consider adding a pinch of garlic powder, onion powder, or even smoked paprika for an extra layer of flavor. Seasoning should be done after drying the potatoes, as wet potatoes will not absorb flavors as well.
Start with about one teaspoon of salt and half a teaspoon of pepper for every two large potatoes. Mix the seasoning into the potato shreds in a large bowl, ensuring that every piece is evenly coated. Taste the mixture and adjust according to your preference, keeping in mind that some toppings later might add additional saltiness.
Heating the Oil: Tips for Achieving the Right Temperature for Frying
The success of your hashbrowns largely depends on the cooking temperature. You want your oil hot enough to create a sizzle when the potatoes hit the pan but not so hot that they burn before cooking through.
A good rule of thumb is to heat your oil to about 375°F (190°C). If you don’t have a thermometer, you can test the oil by dropping in a small piece of potato. If it sizzles and bubbles immediately, the oil is ready. Use a neutral oil with a high smoke point, such as canola or vegetable oil, for best results.
Cooking Process: Detailed Instructions on Spreading, Pressing, and Flipping the Hashbrowns for Even Cooking
Now that your oil is heated and your potatoes are seasoned, it’s time to cook!
1. Spread and Press: Carefully add enough shredded potatoes to the pan to cover the bottom in a thin layer. Use a spatula to spread them evenly across the pan, pressing down gently to ensure good contact with the oil.
2. Cooking: Allow the hashbrowns to cook undisturbed for about 4 to 5 minutes. This will allow a crispy crust to form on the bottom.
3. Flipping: Once the edges start to look golden brown, it’s time to flip! Use a large spatula to carefully lift a section of the hashbrown and flip it over. If it breaks apart, don’t worry; just patch it back together in the pan.
4. Final Cooking: Cook for another 4 to 5 minutes on the other side, until it’s golden brown and crispy.
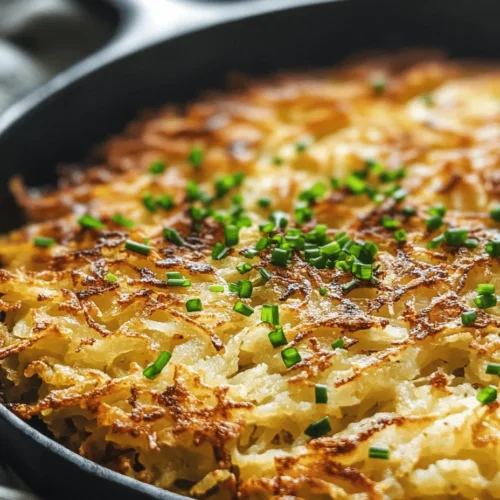
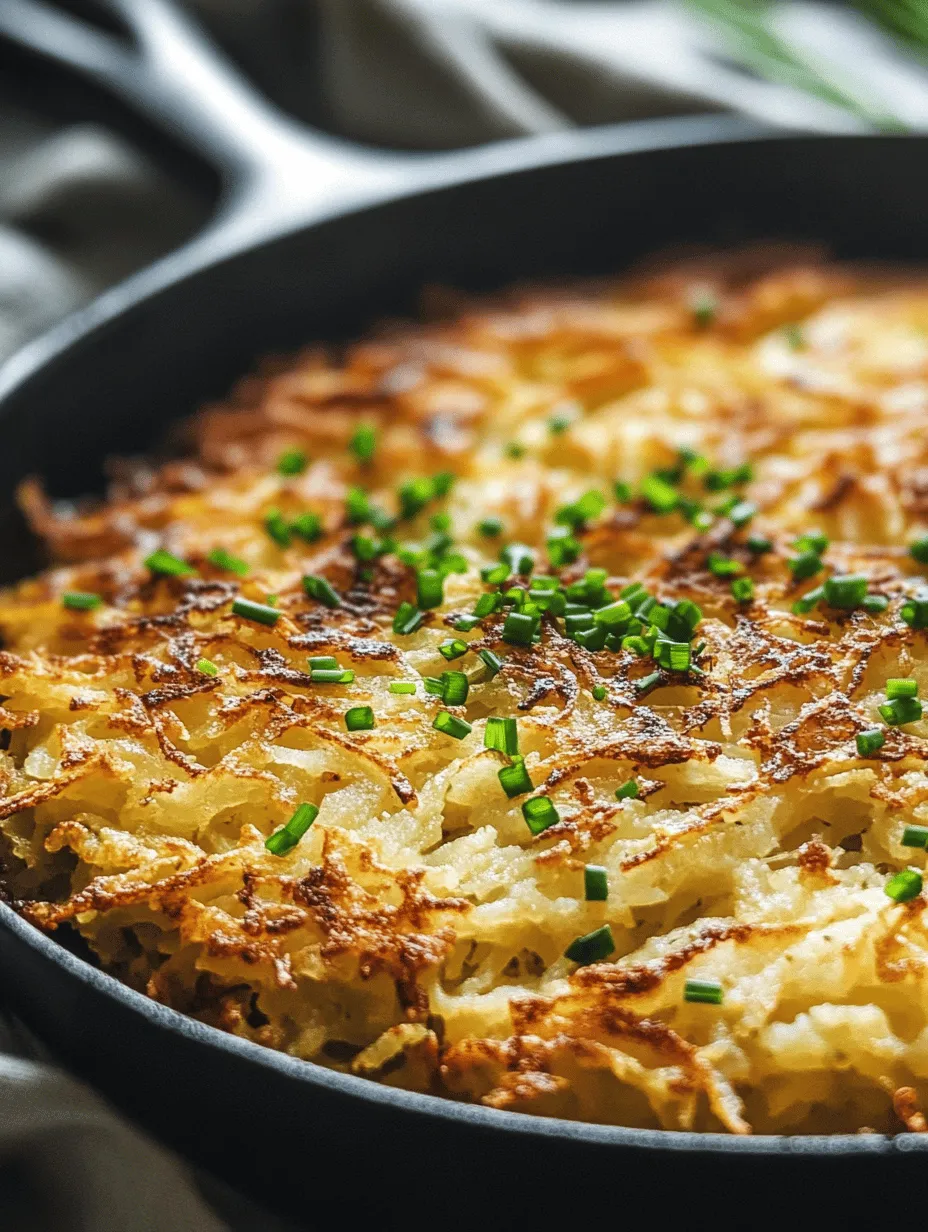
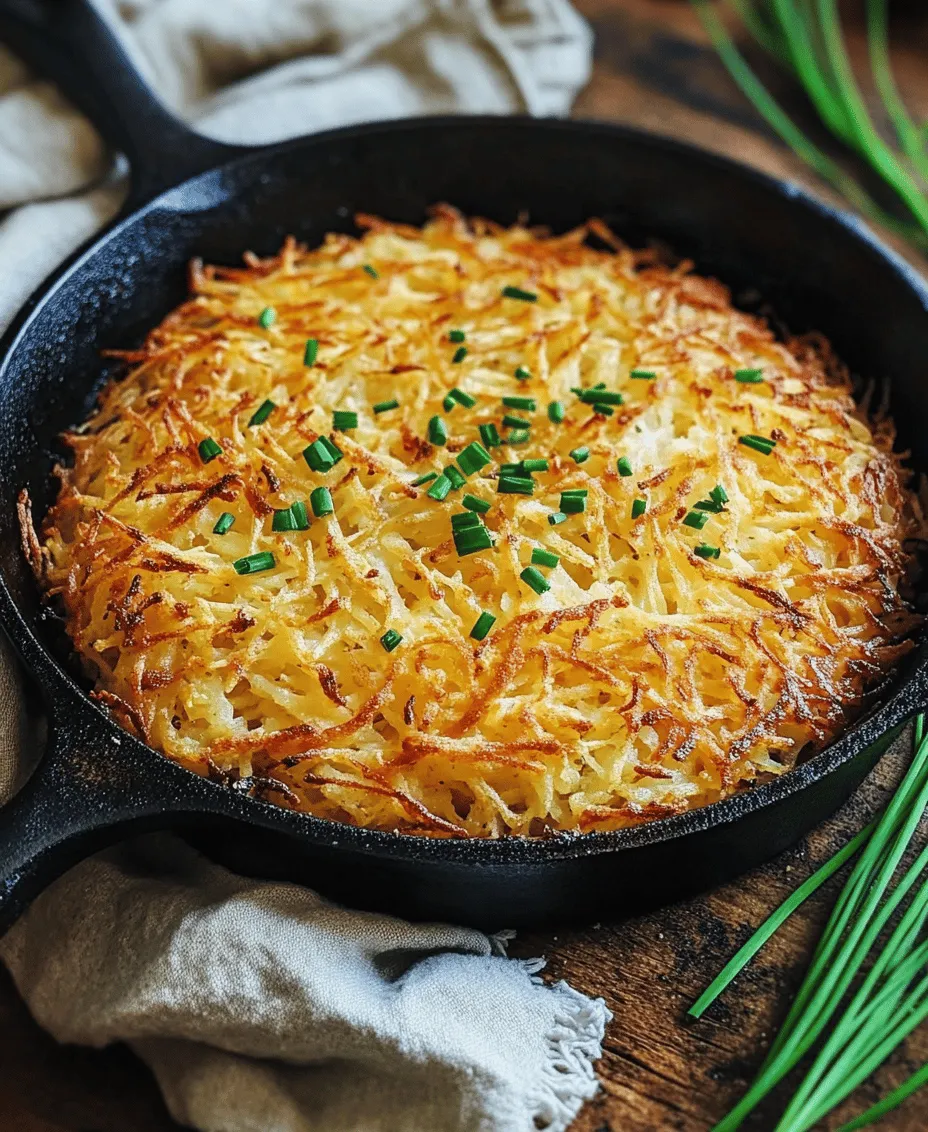
Visual Indicators for Knowing When to Flip and When They Are Done
Keep an eye on the color and texture of your hashbrowns. When the edges start to turn golden and the surface appears dry and crispy, it’s time to flip. Once both sides are browned, you can take a fork and press down gently to check for firmness; if it feels crispy and solid, your hashbrowns are ready.
For the best results, serve your hashbrowns immediately while they’re warm and crispy!
Serving Suggestions
Hashbrowns are incredibly versatile and can be served in various delightful ways:
– Standalone Dish: Simply plate your hashbrowns as a hearty side dish that pairs perfectly with breakfast staples.
– Breakfast Platter: Create a breakfast feast by serving hashbrowns alongside fried or poached eggs, crispy bacon, or savory sausage links.
– Vegetable Pairings: Add sautéed bell peppers, onions, or spinach to your plate for a colorful and nutritious breakfast.
– Garnishing Options: Elevate your dish with fresh herbs such as chives or parsley sprinkled on top. You can also add a dollop of sour cream or a drizzle of hot sauce for an added kick of flavor.
Storing and Reheating Hashbrowns
If you find yourself with leftovers, proper storage is key to maintaining their texture.
1. Best Practices for Storing: Allow the hashbrowns to cool completely before transferring them to an airtight container. They can be stored in the refrigerator for up to 3 days or frozen for longer storage.
2. Techniques for Reheating: To reheat, avoid microwaving, as this will make them soggy. Instead, place the hashbrowns back in a hot skillet with a little oil over medium heat. Cook for a few minutes on each side until they are heated through and regain their crispiness.
Nutritional Information
Potatoes are an excellent source of vitamins and minerals, including vitamin C, potassium, and B vitamins. By making hashbrowns at home, you control the ingredients and avoid unnecessary additives found in many frozen varieties.
To make your hashbrowns healthier, consider using less oil or opting for a healthier cooking method, such as baking or air-frying. Serving them with a side of fresh vegetables can also enhance the nutritional profile of your meal.
Conclusion
Making homemade shredded hashbrowns is not just about cooking; it’s about embracing the joy of preparing food from scratch. The satisfaction of creating a crispy, golden-brown dish that can be customized to your taste is unparalleled.
Experiment with different seasonings, serving options, and cooking techniques to make this recipe your own. Share the warmth of home-cooked meals with family and friends, creating memories around the table. Whether enjoyed as a breakfast staple or a delightful side dish, homemade hashbrowns are a comforting addition to any meal. So roll up your sleeves and let the aroma of freshly cooked hashbrowns fill your kitchen!