Introduction
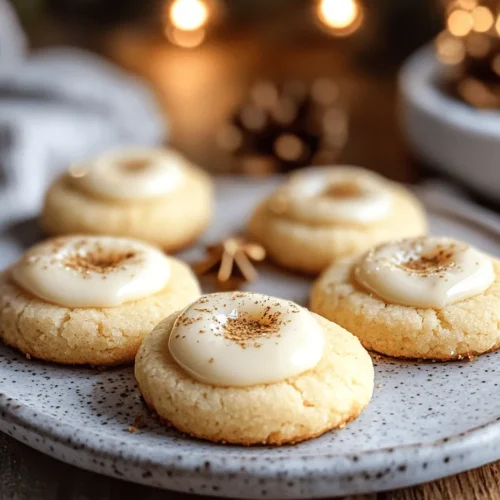
In the world of festive baking, few treats capture the spirit of the holiday season quite like eggnog thumbprint cookies. These delightful cookies combine the rich, creamy flavor of eggnog with a buttery cookie base, creating a perfect balance that is sure to impress family and friends. The combination of sweet and spiced flavors invokes the warmth and joy synonymous with holiday gatherings. Whether you’re hosting a festive celebration or searching for the ideal giftable treat, these cookies are not only delicious but also easy to make.
In this article, we will delve into the origins of eggnog, explore the significance of thumbprint cookies, and provide a detailed step-by-step recipe that will guide you through the process of making these festive delights.
The Allure of Eggnog in Holiday Baking
Eggnog, a beloved holiday beverage, has a rich history that dates back centuries. Traditionally made with eggs, milk or cream, sugar, and spices, it is often spiked with rum or whiskey, making it a staple during winter festivities. The drink’s creamy texture and spiced flavor profile make it a perfect complement to various holiday treats, including cakes, pastries, and, of course, cookies.
Understanding the cultural significance of eggnog during the holidays is essential. Its origins can be traced back to medieval England, where it was enjoyed by the aristocracy. Over time, it evolved into the festive drink we know today, becoming a symbol of celebration and merriment. In many households, preparing and enjoying eggnog together is a cherished tradition, marking the beginning of the festive season.
The unique flavors and ingredients that make eggnog stand out—like nutmeg, cinnamon, and vanilla—are often mirrored in holiday baked goods. Incorporating eggnog into cookie recipes adds a layer of richness and nostalgia, making these cookies a perfect addition to any holiday cookie platter. Moreover, the role of eggnog in traditional holiday recipes cannot be overstated. It adds not just flavor but also moisture, making baked goods tender and decadent.
The History of Thumbprint Cookies
Thumbprint cookies have a long and varied history, with their origins believed to stem from Europe, particularly in Scandinavian and Jewish traditions. These cookies are characterized by their unique shape, where a small indentation is made in the center, typically filled with jam, chocolate, or other sweet fillings. The name “thumbprint” aptly describes the method used to create the iconic indentation, often made with the thumb or the back of a spoon.
Over the years, thumbprint cookies have evolved, leading to a wide range of variations around the world. In Sweden, they are known as “Hallongrotta,” filled with raspberry jam, while in Jewish communities, they are often filled with poppy seed or nut mixtures. This versatility has contributed to their popularity, making them a beloved treat during various holidays and celebrations.
As thumbprint cookies gained popularity in the United States, they became a holiday staple, appearing on cookie trays and at festive gatherings. The evolution of thumbprint cookies has seen a shift towards incorporating seasonal flavors, leading to the rise of unique versions that reflect the tastes of the season. The eggnog thumbprint cookie is one such innovation, marrying the classic cookie design with the rich, holiday flavors of eggnog, nutmeg, and cinnamon.
Recipe Overview
Eggnog thumbprint cookies are not only visually appealing but also boast a delightful flavor profile that combines the rich creaminess of eggnog with a buttery cookie base. The cookies are tender and melt-in-your-mouth delicious, making them a hit among both adults and children.
The appeal of these cookies lies in their festive appearance and the ability to personalize the filling. While traditional versions often call for fruit jams, eggnog thumbprint cookies can be filled with a variety of options, including spiced buttercream, caramel, or even a decadent chocolate ganache. This makes them an excellent choice for holiday cookie exchanges, parties, or simply as a sweet treat to enjoy with family.
In terms of key ingredients, eggnog thumbprint cookies rely on staples like all-purpose flour, unsalted butter, sugar, and, of course, eggnog. Each ingredient plays a crucial role in achieving the perfect texture and flavor. The combination of granulated and brown sugar adds depth to the sweetness, while the addition of extracts enhances the holiday spirit.
When it comes to serving suggestions, these cookies are perfect for pairing with a glass of your favorite holiday beverage, be it eggnog, hot cocoa, or spiced cider. They also make for an excellent gift when presented in festive tins or boxes, showcasing the thoughtfulness behind homemade treats.
Ingredients Breakdown
To create the perfect eggnog thumbprint cookies, let’s take a closer look at each ingredient and its role in the recipe:
All-Purpose Flour
All-purpose flour is the backbone of the cookie, providing structure and texture. It is essential for achieving the right balance between chewiness and tenderness. The protein content in all-purpose flour helps create a stable cookie without making it too dense.
Baking Powder and Baking Soda
Both of these leavening agents play a crucial role in giving the cookies their light and airy texture. Baking powder helps create a slight rise, while baking soda aids in browning and contributes to the overall flavor profile. Together, they ensure that the cookies have a soft and tender bite.
Unsalted Butter
Using unsalted butter is preferred in baking as it allows for better control over the salt content in the cookies. Butter adds a rich flavor and creates a tender crumb, making it an essential ingredient for achieving the perfect texture. Make sure your butter is at room temperature for easy creaming with the sugars.
Sugars
A combination of granulated sugar and brown sugar is used in the recipe to achieve the ideal sweetness and depth of flavor. Granulated sugar contributes to the cookie’s crispness, while brown sugar adds moisture and a hint of caramel flavor, creating a well-rounded taste.
Extracts
Vanilla and rum (or eggnog) extracts are essential for enhancing the flavor of the cookies. Vanilla extract provides a warm, sweet note, while rum or eggnog extract amplifies the seasonal flavor, making each bite reminiscent of the traditional holiday drink.
Egg and Eggnog
The egg acts as a binding agent, helping to hold the cookie dough together while also adding moisture. The addition of eggnog not only infuses the cookies with its signature flavor but also contributes to their richness and tenderness.
Icing
While not a mandatory component, icing can elevate the cookies’ presentation and add an extra layer of sweetness. A simple icing made from powdered sugar and a splash of eggnog or milk can beautifully complement the flavors of the cookie.
With these ingredients in hand, you are well on your way to creating delicious eggnog thumbprint cookies. As we move forward, we will detail the step-by-step instructions to guide you through the baking process, ensuring your cookies turn out perfectly festive and delectable. Stay tuned for the full recipe and tips for the best results!
Step-by-Step Instructions for Eggnog Thumbprint Cookies
Prepping Your Workspace and Gathering Tools
Before you dive into the delightful world of baking Eggnog Thumbprint Cookies, it’s essential to prepare your workspace and gather all necessary tools. This organization will not only save you time but also make the process smoother and more enjoyable.
Equipment Needed:
– Mixing Bowls: You will need a large mixing bowl for the dough and a small bowl for the icing preparation.
– Baking Sheets: Ensure you have at least two baking sheets to allow for batch baking.
– Parchment Paper: Line your baking sheets with parchment paper to prevent sticking and facilitate easy cleanup.
Tips for an Efficient Baking Process:
1. Clean Your Space: Start with a clean countertop to work on. Clear away any clutter to give yourself plenty of room to maneuver.
2. Gather Ingredients: Measure out all your ingredients—flour, sugar, butter, eggs, eggnog, and spices—before you start. This will help you avoid interruptions and ensure you don’t forget any components.
3. Preheat the Oven: Set your oven to 350°F (175°C) to preheat while you mix the dough, so it’s ready when you are.
Mixing the Dough
Now that your workspace is ready, it’s time to mix the dough. This is a crucial step that determines the texture and flavor of your cookies.
Detailed Steps on Combining Dry and Wet Ingredients:
1. In a large mixing bowl, whisk together the dry ingredients: flour, baking powder, nutmeg, and salt. This ensures that the leavening agent and spices are evenly distributed throughout the flour.
2. In a separate bowl, cream together the softened butter and sugar until light and fluffy. This process typically takes about 3-5 minutes using an electric mixer. The incorporation of air during this step is vital for the cookies’ texture.
3. Add the egg and vanilla extract to the butter-sugar mixture, mixing until just combined. Then, slowly incorporate the eggnog. This is where the festive flavor truly begins to shine.
4. Gradually add the dry ingredients to the wet mixture, stirring gently with a wooden spoon or spatula until just combined. Remember, overmixing can lead to tough cookies, so stop mixing as soon as you no longer see dry flour.
Shaping and Baking the Cookies
Once your dough is mixed, it’s time to shape and bake your thumbprint cookies.
Techniques for Rolling Dough Balls and Creating Indentations:
1. Take about 1 tablespoon of dough and roll it into a ball between your palms. Aim for uniformity in size for even baking.
2. Place the dough balls on the prepared baking sheet, leaving about 2 inches of space between each ball. This space allows for spreading during baking.
3. Using your thumb (or the back of a measuring spoon), gently press down the center of each ball to create a well for the filling. Be careful not to press too hard; you want an indentation, not a hole.
Tips for Achieving an Even Bake and the Perfect Golden Edge:
1. Bake the cookies in a preheated oven for about 12-15 minutes or until the edges are lightly golden. Keep an eye on them, as oven temperatures can vary.
2. Rotate the baking sheet halfway through baking to ensure even cooking. This is especially important if your oven has hot spots.
3. Let the cookies cool on the baking sheet for about 5 minutes before transferring them to a wire rack to cool completely.
Making the Icing
The icing adds a delicious finishing touch to your Eggnog Thumbprint Cookies.
Step-by-Step Guide to Preparing the Icing:
1. In a small mixing bowl, combine powdered sugar, a splash of eggnog, and vanilla extract. Adjust the consistency with more powdered sugar or eggnog as needed until it reaches a drizzle-able texture.
2. For added flavor, consider mixing in a pinch of nutmeg or cinnamon.
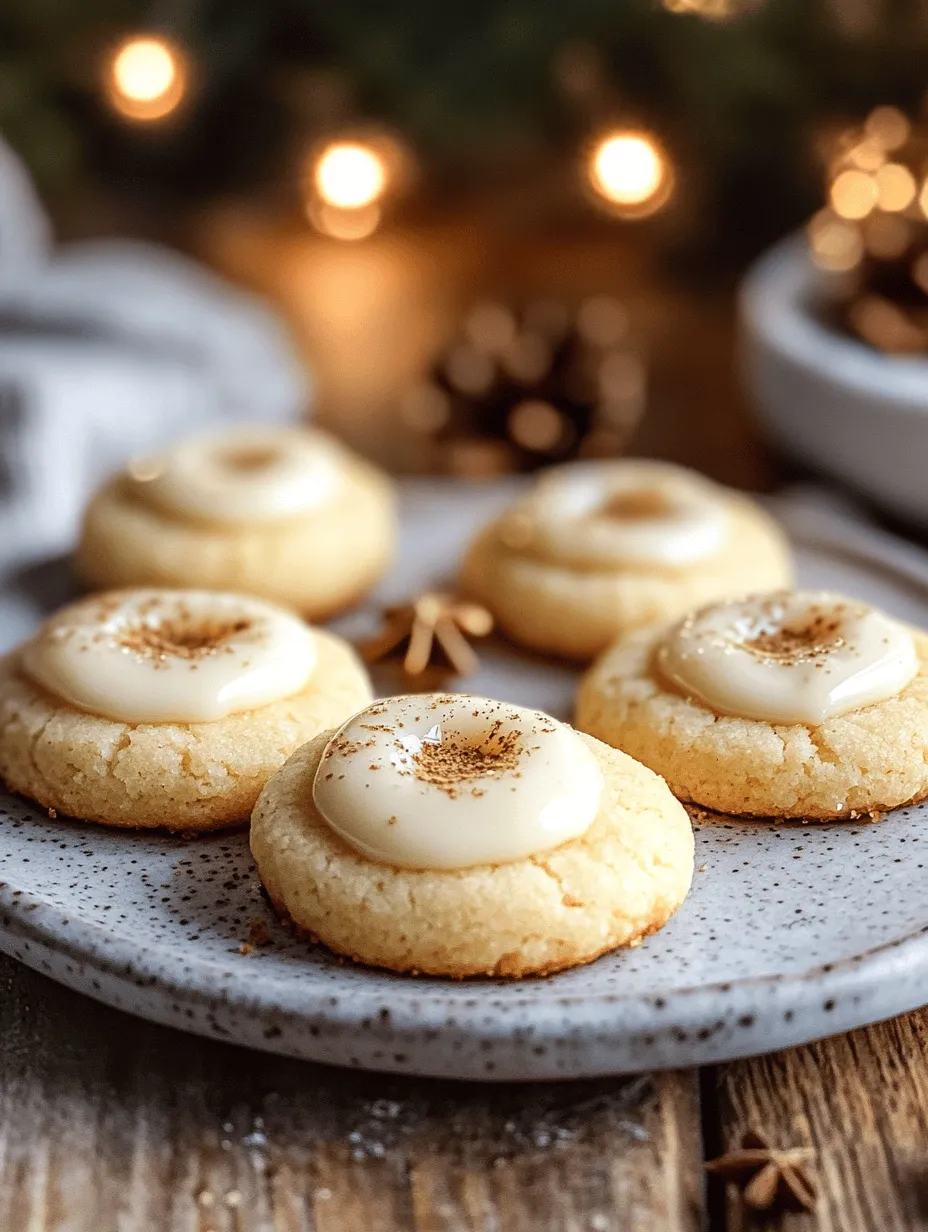
Techniques for Drizzling and Garnishing with Nutmeg:
1. Once the cookies are completely cool, use a spoon or piping bag to drizzle the icing over each cookie, allowing it to cascade down the sides.
2. Finish with a light dusting of freshly grated nutmeg on top of the icing for an extra touch of holiday warmth.
Variations and Customizations
Eggnog Thumbprint Cookies are versatile, and you can explore various flavor combinations and dietary modifications to suit different palates.
Exploring Different Flavor Combinations:
– Substituting Extracts for a Unique Twist: Instead of vanilla extract, try almond or rum extract for a different flavor profile. Each variation will lend a unique character to your cookies.
– Alternative Fillings for the Thumbprint Center: While traditional recipes may call for eggnog-flavored icing, feel free to experiment with fruit preserves (like cranberry or raspberry), chocolate ganache, or even spiced pumpkin filling for a seasonal twist.
Dietary Modifications:
– Gluten-Free Options: Substitute all-purpose flour with a gluten-free baking blend that works as a 1:1 replacement. Ensure the blend contains xanthan gum for proper texture.
– Dairy-Free Options: Replace butter with a dairy-free margarine or coconut oil, and use a non-dairy eggnog alternative. These substitutions will still yield delicious results.
Storing and Serving Suggestions
To keep your Eggnog Thumbprint Cookies fresh and delectable, proper storage is essential.
Best Practices for Storing Your Cookies:
1. Room Temperature Storage: Store the cooled cookies in an airtight container at room temperature for up to one week. Layer parchment paper between the cookies to prevent them from sticking together.
2. Freezing for Later: If you wish to make these cookies ahead of time, you can freeze the unbaked dough balls. Simply roll them and place them on a baking sheet in the freezer until solid. Transfer to a resealable freezer bag and store for up to three months. When ready to bake, thaw and proceed with creating the indentations and baking.
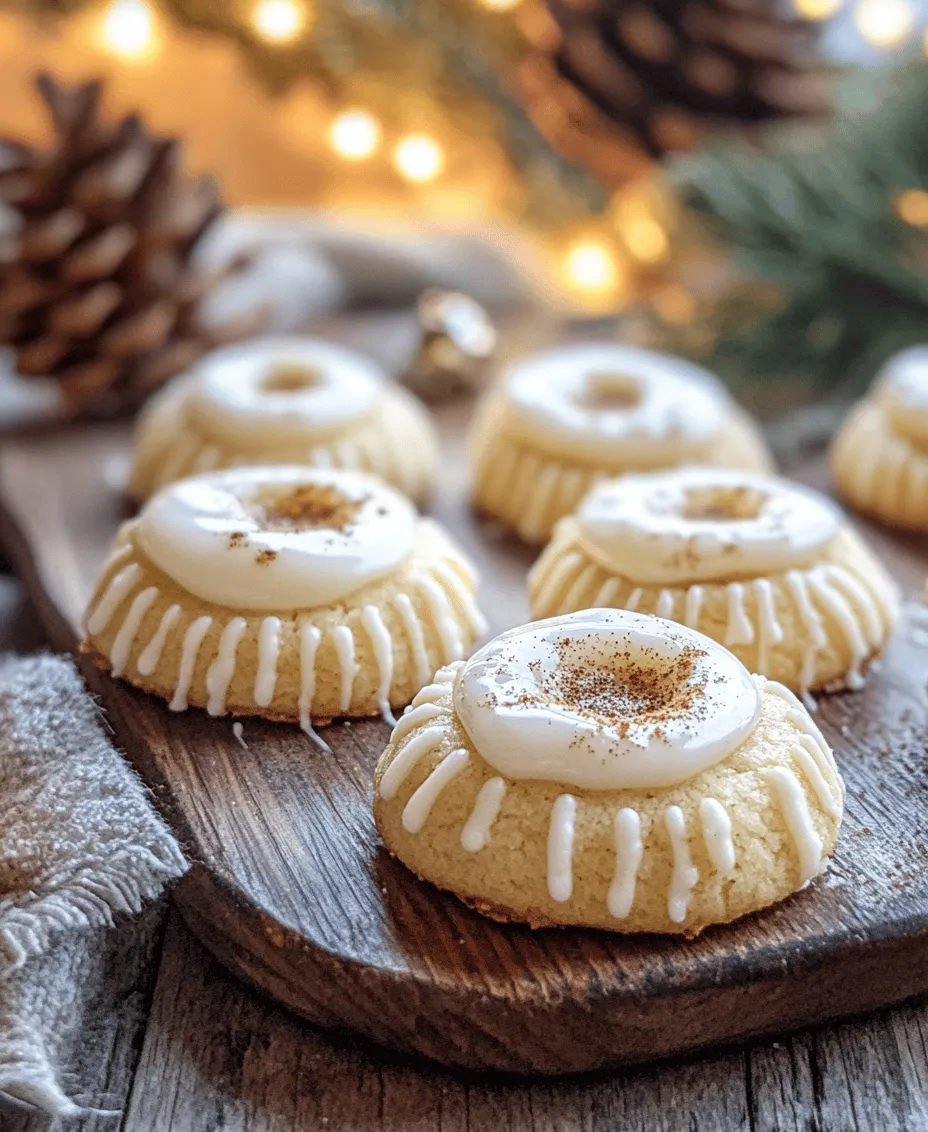
Creative Ways to Present and Serve Eggnog Thumbprint Cookies During the Holidays:
1. Festive Platter: Arrange your cookies on a decorative platter with holiday-themed decorations. Consider adding sprigs of holly or pinecones to enhance the seasonal atmosphere.
2. Gift Packaging: Package individual cookies in cellophane bags tied with a ribbon for thoughtful homemade gifts. Include a label with the cookie name and any dietary notes.
3. Cookie Exchange: These cookies are perfect for holiday gatherings and cookie exchanges. Their unique flavor will surely impress friends and family.
Conclusion
Eggnog thumbprint cookies are not just a treat; they are a celebration of the flavors and traditions that define the holiday season. With their creamy eggnog flavor and delightful texture, these cookies are sure to become a cherished addition to your holiday baking repertoire. By following the detailed instructions and tips provided in this article, you can create a batch of these festive delights that will spread joy and warmth among your loved ones. Embrace the spirit of the season and enjoy the process of baking these delicious cookies that are perfect for sharing and celebrating. Whether enjoyed with a cup of hot cocoa or gifted to friends, these cookies encapsulate the essence of holiday cheer.