Introduction
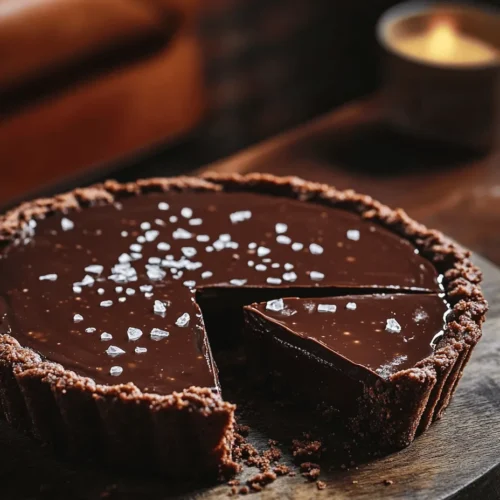
Chocolate desserts have a magical allure that captivates the hearts and taste buds of many. From the rich, decadent flavors to the velvety textures, chocolate is synonymous with indulgence and comfort. Among the myriad of chocolate desserts, the Salted Dark Chocolate Tart stands out as a quintessential treat that perfectly balances richness and finesse. The combination of deep, luscious dark chocolate paired with the subtle crunch and contrast of sea salt creates an unforgettable taste experience that elevates any occasion.
This tart is not just a dessert; it’s a statement. Ideal for gatherings, celebrations, or a simple evening treat, the Salted Dark Chocolate Tart offers a sophisticated yet approachable way to satisfy your chocolate cravings. The deep cocoa notes of the tart, complemented by the gentle sprinkle of sea salt, provide a symphony of flavors that dance on the palate, making each bite a delightful indulgence.
In this article, we will delve into the art of crafting this exquisite dessert, exploring the essential ingredients that contribute to its success and guiding you through the step-by-step process of creating your very own Salted Dark Chocolate Tart. Whether you’re a seasoned baker or a novice in the kitchen, this recipe is designed to empower you to create a dessert that not only looks impressive but also delivers on taste.
Understanding the Ingredients
To create an exceptional Salted Dark Chocolate Tart, it’s crucial to understand the role of each ingredient involved. Each component contributes to the overall texture, flavor, and quality of the tart, culminating in a dessert that is both satisfying and memorable.
The Role of All-Purpose Flour in Tart Crusts
All-purpose flour is the backbone of the tart crust, providing the necessary structure and texture. When combined with fat, flour forms gluten, which gives the crust its stability. For our Salted Dark Chocolate Tart, the flour should be measured accurately to ensure that the crust holds its shape while still being tender and flaky. The balance of flour is essential; too much can lead to a tough crust, while too little can result in a tart that crumbles apart.
The Significance of Unsweetened Cocoa Powder
Unsweetened cocoa powder is a star ingredient in this recipe, enhancing the chocolate flavor without adding extra sweetness. The cocoa powder used in the crust not only deepens the chocolate notes but also contributes to the overall color and richness of the tart. Choosing a high-quality cocoa powder with a rich flavor profile is essential to achieving that intense chocolate experience that this tart promises.
The Function of Powdered Sugar
Powdered sugar, with its fine texture, plays a dual role in the tart crust. First, it contributes to the overall sweetness, balancing the bitterness of the dark chocolate. Second, its fine granules help create a smoother dough, which is vital for achieving a tender texture. Unlike granulated sugar, powdered sugar dissolves more readily, ensuring that the crust remains light and flaky.
Cubed Unsalted Butter: The Key to Flakiness
Butter is the secret to achieving a perfectly flaky tart crust. When cold, cubed unsalted butter is cut into the flour mixture, it creates small pockets of fat that will melt during baking, resulting in a flaky texture. Using unsalted butter allows for greater control over the overall saltiness of the tart, letting the sea salt sprinkle serve as the finishing touch. For optimal results, ensure that the butter is chilled before use, as this is essential in maintaining the desired texture of the crust.
Egg Yolk and Ice Water: Binding the Dough
Egg yolk and ice water are crucial for binding the tart dough together. The egg yolk adds richness and a beautiful color to the crust, while the fat content helps tenderize it. Ice water is added gradually to ensure that the dough comes together without overworking it, which can develop gluten and lead to a tough crust. The right balance of moisture is key to creating a dough that is easy to roll and shape, setting the foundation for the tart.
Dark Chocolate: Choosing the Right Variety
The choice of dark chocolate significantly impacts the flavor profile of the tart. When selecting dark chocolate, look for a variety with a cocoa percentage of at least 60% to achieve the desired depth of flavor. Chocolates with higher cocoa content often have more complex flavor notes, which will enhance the overall experience of the tart. Quality matters; investing in premium chocolate will yield a more luxurious and satisfying dessert.
Heavy Cream: The Secret to a Silky Filling
Heavy cream is the magical ingredient that transforms melted chocolate into a velvety filling. The high-fat content of heavy cream ensures that the filling is rich and creamy, creating that luscious mouthfeel that chocolate lovers adore. When combined with dark chocolate, heavy cream forms a ganache that is smooth and indulgent, providing a perfect contrast to the flaky tart crust.
Vanilla Extract: Enhancing Flavor Depth
Vanilla extract is often an unsung hero in chocolate desserts. It enhances the overall flavor depth, complementing the rich chocolate without overpowering it. A splash of pure vanilla extract can elevate the tart, bringing out nuanced flavors that enhance the chocolate experience. When selecting vanilla, opt for pure extract for the best results.
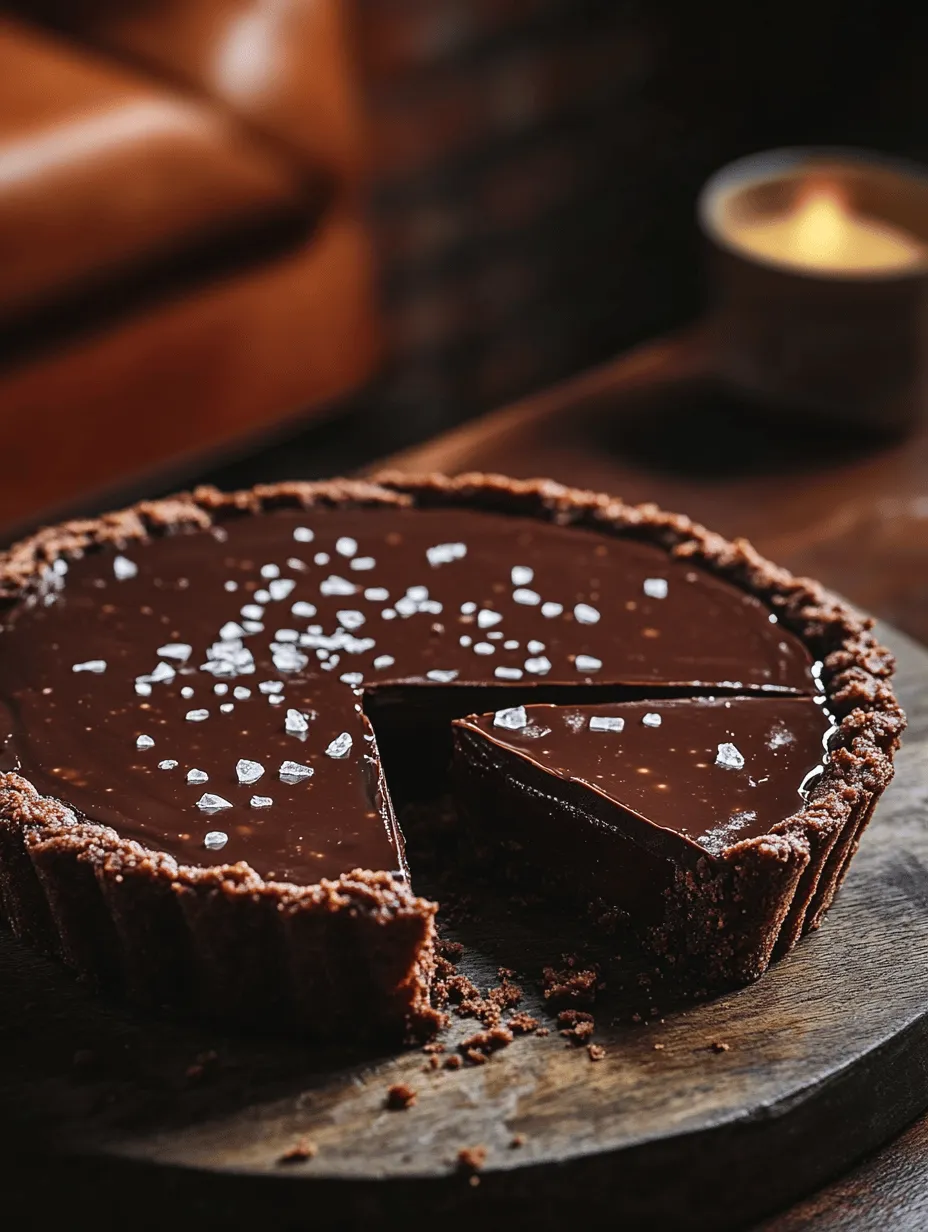
Sea Salt Flakes: The Finishing Touch
The final touch that elevates the Salted Dark Chocolate Tart is the sprinkle of sea salt flakes. This addition is not merely for decoration; it plays a significant role in balancing the sweetness of the chocolate and enhancing its flavor. The contrast between the rich, sweet chocolate filling and the salty flakes creates a delightful taste sensation that keeps you coming back for more.
Step-by-Step Instructions for the Salted Dark Chocolate Tart
Now that we have a thorough understanding of the ingredients and their roles, let’s dive into the step-by-step process of making the Salted Dark Chocolate Tart. Follow these instructions carefully for a successful outcome.
Making the Tart Crust
1. Prepare the Ingredients: Gather all your ingredients, including all-purpose flour, unsweetened cocoa powder, powdered sugar, unsalted butter, egg yolk, and ice water. It’s essential to have everything ready before you start to streamline the process.
2. Mix the Dry Ingredients: In a large mixing bowl, combine 1 ½ cups of all-purpose flour, ½ cup of unsweetened cocoa powder, and ¼ cup of powdered sugar. Whisk these dry ingredients together until they are evenly blended. This step ensures that the cocoa powder and sugar are distributed throughout the flour, resulting in a uniform dough.
3. Cut in the Butter: Next, add ½ cup of cubed unsalted butter to the dry mixture. Using a pastry cutter or your fingertips, cut the butter into the flour mixture until it resembles coarse crumbs with small pea-sized pieces of butter remaining. This process is essential for achieving a flaky texture in the crust.
4. Add Egg Yolk and Water: In a small bowl, whisk together one egg yolk and 3-4 tablespoons of ice water. Gradually add the egg mixture to the flour and butter mixture, stirring gently until the dough begins to come together. Be careful not to overmix; you want to maintain those small bits of butter for flakiness.
5. Form the Dough: Transfer the dough onto a lightly floured surface and gently knead it just until it forms a cohesive ball. Flatten the dough into a disk shape, wrap it in plastic wrap, and refrigerate for at least 30 minutes. Chilling the dough is crucial, as it allows the gluten to relax and helps maintain the crust’s structure during baking.
6. Roll Out the Dough: After the dough has chilled, remove it from the refrigerator and let it sit at room temperature for a few minutes. This will make it easier to roll out. On a lightly floured surface, roll the dough into a circle, about 1/8 inch thick, ensuring that it’s large enough to fit your tart pan.
7. Transfer to Tart Pan: Carefully transfer the rolled-out dough into a 9-inch tart pan with a removable bottom. Gently press the dough into the corners and sides of the pan, trimming any excess dough that hangs over the edges. Use a fork to prick the bottom of the crust to prevent it from puffing up during baking.
8. Chill Again: Place the tart shell back in the refrigerator for an additional 15-20 minutes. This step ensures that the crust remains firm during baking and helps prevent shrinkage.
9. Pre-Bake the Tart Shell: Preheat your oven to 350°F (175°C). Once the oven is preheated, remove the tart shell from the refrigerator and line it with parchment paper. Fill the paper with pie weights or dried beans to keep the crust from rising. Bake for 15-20 minutes, or until the edges appear set and the crust is slightly firm to the touch.
10. Cool the Tart Shell: Once baked, remove the tart shell from the oven and gently lift out the parchment paper with the weights. Allow the crust to cool completely on a wire rack before adding the chocolate filling.
As we continue, we will explore the process of creating the sumptuous dark chocolate filling and assembling the tart to perfection. Stay tuned for the next part of this delightful journey into the world of decadent desserts!
Importance of Chilling for Texture
When it comes to crafting the perfect salted dark chocolate tart, chilling is not just an optional step; it is a crucial part of the process that helps achieve the desired texture and consistency. Chilling the tart allows the filling to firm up, creating a decadent and smooth chocolate experience that melts in your mouth. Without proper chilling, the filling could remain too soft, leading to a messy presentation and a less enjoyable eating experience.
Preheating the Oven
Before you dive into the rolling and baking of the crust, it’s essential to preheat your oven to 350°F (175°C). Preheating ensures that your tart crust bakes evenly and develops a beautifully golden color. This initial heat is vital for activating the leavening agents in your crust, which creates a light and flaky texture.
Why Temperature Control is Crucial for Baking
Temperature control plays a vital role in baking. When baking pastries and desserts, even a slight deviation from the ideal temperature can affect the outcome. For instance, if the oven is too hot, the crust may brown too quickly, leaving the inside undercooked. Conversely, an oven that is not hot enough may result in a dense and soggy crust. Thus, always ensure your oven is properly calibrated and reaches the correct temperature before placing your tart inside.
Rolling and Baking the Crust
Once your dough has chilled for at least 30 minutes, it’s time to roll it out. On a lightly floured surface, take the chilled dough and roll it into a circle about 1/8-inch thick. This thickness is essential for achieving a sturdy yet delicate crust that can hold the rich chocolate filling without becoming too hard or crumbly.
When transferring the rolled-out dough to your tart pan, gently wrap it around your rolling pin and unroll it over the pan. Press the dough into the corners and edges, ensuring there are no air pockets. Trim any excess dough hanging over the edges.
After you have shaped the crust, it’s time to bake it. Use a fork to prick the bottom of the crust, preventing it from puffing up during baking. Line the crust with parchment paper and fill it with pie weights or dried beans to maintain its shape. Bake for 15 minutes, then remove the weights and parchment and bake for an additional 5-10 minutes until golden brown.
Tips for Achieving a Perfectly Rolled and Baked Crust
1. Chill the Dough: Make sure to chill the dough before rolling to prevent it from becoming too soft.
2. Flour Your Surface: Always flour your surface to avoid sticking.
3. Use a Rolling Pin: A good-quality rolling pin helps achieve an even thickness.
4. Don’t Overwork the Dough: Handle the dough gently to avoid toughening it.
5. Watch the Baking Time: Keep an eye on the crust as it bakes; it can go from perfect to overdone quickly.
Preparing the Chocolate Filling
While your crust is cooling, it’s time to prepare the luscious chocolate filling. Begin by finely chopping high-quality dark chocolate; this will help it melt evenly and smoothly. You can use a mix of bittersweet and semi-sweet chocolate, depending on your taste preferences.
Techniques for Melting Chocolate Smoothly
To melt the chocolate, you can use a double boiler method or a microwave. If you choose the double boiler, place a heatproof bowl over a pot of simmering water, ensuring the bowl does not touch the water. Stir the chocolate until it melts completely. For the microwave method, place the chopped chocolate in a microwave-safe bowl and heat in 30-second intervals, stirring in between until fully melted.
Both methods require careful attention, as chocolate can easily scorch or seize. If you notice any graininess, you can add a small amount of vegetable oil or cream to smooth it out.
Filling the Tart
Once your chocolate is melted and smooth, allow it to cool slightly before adding the other ingredients. In a separate bowl, whisk together eggs, sugar, and a pinch of salt until combined. Slowly pour the melted chocolate into the egg mixture while continuously whisking to avoid cooking the eggs. This technique, known as tempering, ensures a smooth filling without any curdled bits.
With the filling ready, pour it into the pre-baked tart crust, ensuring an even distribution. Gently tap the tart pan on the countertop to remove any air bubbles and to help the filling settle.
Chilling for the Perfect Set
After filling the tart, it’s time for another chilling session. Place the tart in the refrigerator for at least 2-3 hours, or until the filling is fully set. This step is crucial as it allows the flavors to meld and the filling to achieve that desired creamy texture.
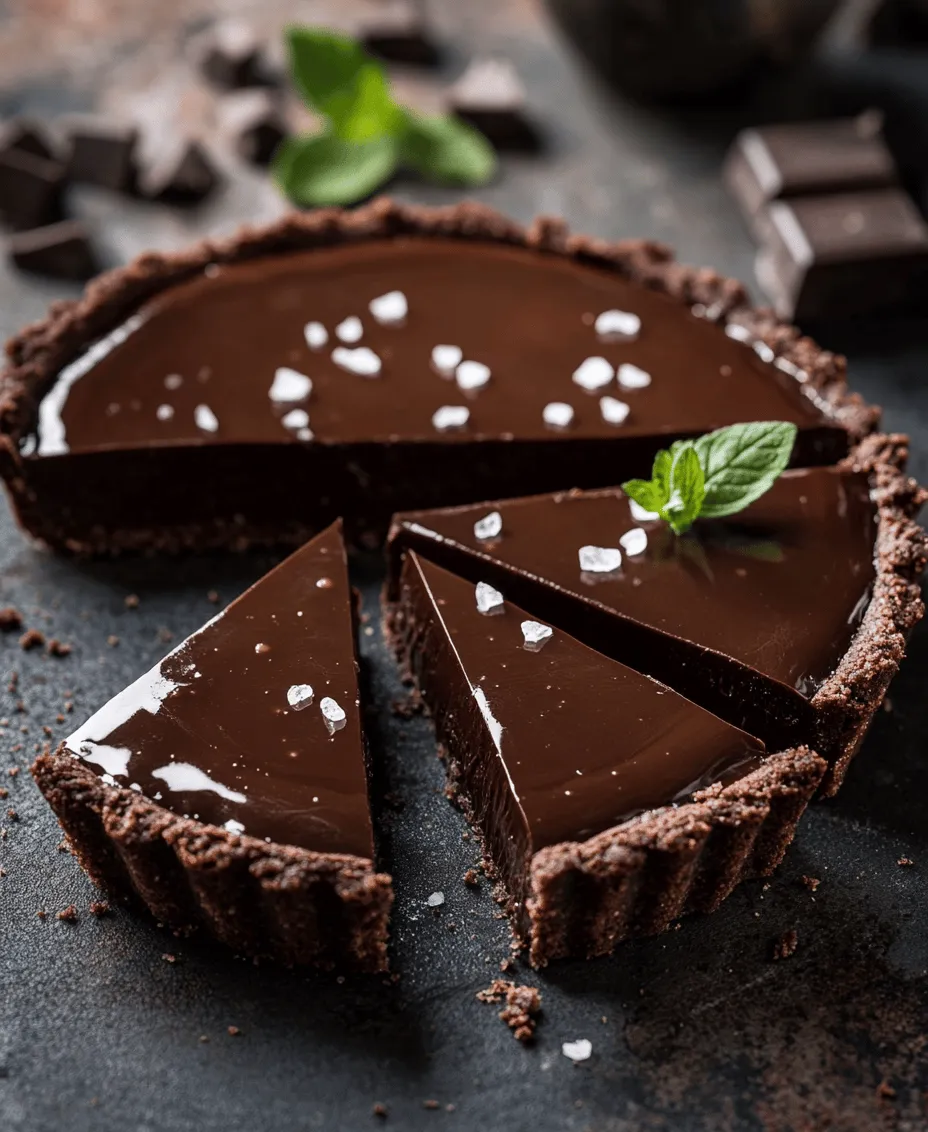
Serving Suggestions
When your salted dark chocolate tart is perfectly chilled and set, it’s time to serve! Here are some ideas to elevate your presentation and enhance the overall experience:
1. Presentation Ideas:
– Dust the tart with cocoa powder or powdered sugar for a beautiful finish.
– Add a sprinkle of sea salt on top for contrast and enhanced flavor.
– Garnish with fresh berries or edible flowers for a pop of color.
2. Best Beverages to Accompany the Tart:
– Wine Pairing: A rich port or a glass of robust red wine complements the deep chocolate flavors beautifully.
– Coffee: A strong espresso or a creamy cappuccino makes for a delightful pairing.
– Tea: Consider a chai or a smoky black tea to contrast the sweetness of the tart.
3. Complementary Desserts for a Sweet Spread:
– Create a dessert table with mini cheesecakes, fruit tarts, or chocolate mousse cups to offer variety.
– Seasonal fruit, like poached pears or a berry compote, can be a refreshing addition.
4. Seasonal Serving Ideas:
– For holidays, decorate the tart with seasonal spices like nutmeg or cinnamon.
– Incorporate it into a festive dessert buffet during celebrations such as Thanksgiving or Christmas, serving alongside spiced desserts.
Nutritional Information
Understanding the nutritional profile of your delicious salted dark chocolate tart can help you enjoy it mindfully. Here’s a basic breakdown:
– Calories: Approximately 350-400 calories per slice (1/8 of the tart).
– Fat: About 25g per slice, with healthy fats from the dark chocolate and butter.
– Sugar: Around 20g, which contributes to the rich sweetness of the filling.
– Protein: Approximately 5g per slice, primarily from the eggs.
Discussion on Portion Control and Indulgence
While this tart is undoubtedly a treat, practicing portion control can help you enjoy it guilt-free. Consider slicing it into smaller portions to savor the flavor without overindulging. Remember, the quality of the ingredients and the experience of making and enjoying the tart is what truly matters.
The Art of Indulgence: Why We Love Chocolate Desserts
Chocolate desserts have a unique place in our hearts and cultures. The psychological benefits of enjoying chocolate can be attributed to its ability to release endorphins, promoting feelings of happiness and pleasure. On a cultural level, chocolate has been revered in various cuisines, symbolizing luxury and celebration.
From the rich chocolate cakes of Europe to the traditional mole sauces in Mexico, chocolate desserts reflect a history of indulgence and joy shared across generations.
Conclusion
As you take a moment to appreciate the delightful salted dark chocolate tart you’ve created, remember the joy of baking and the satisfaction of sharing this experience with friends and family. Whether it’s for a special occasion or simply to indulge in a moment of sweetness, this tart is sure to impress. Embrace the art of baking and let your passion for chocolate lead you to create memorable dessert experiences that will be cherished for years to come.