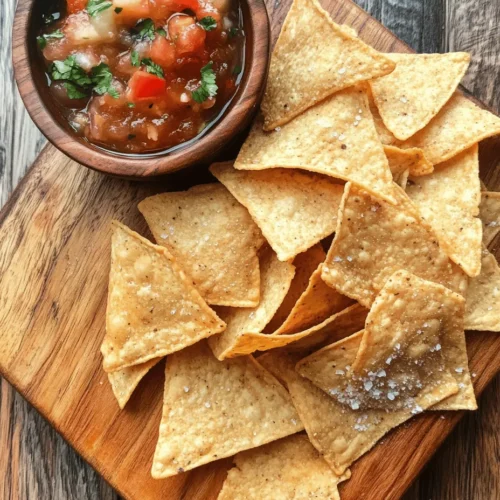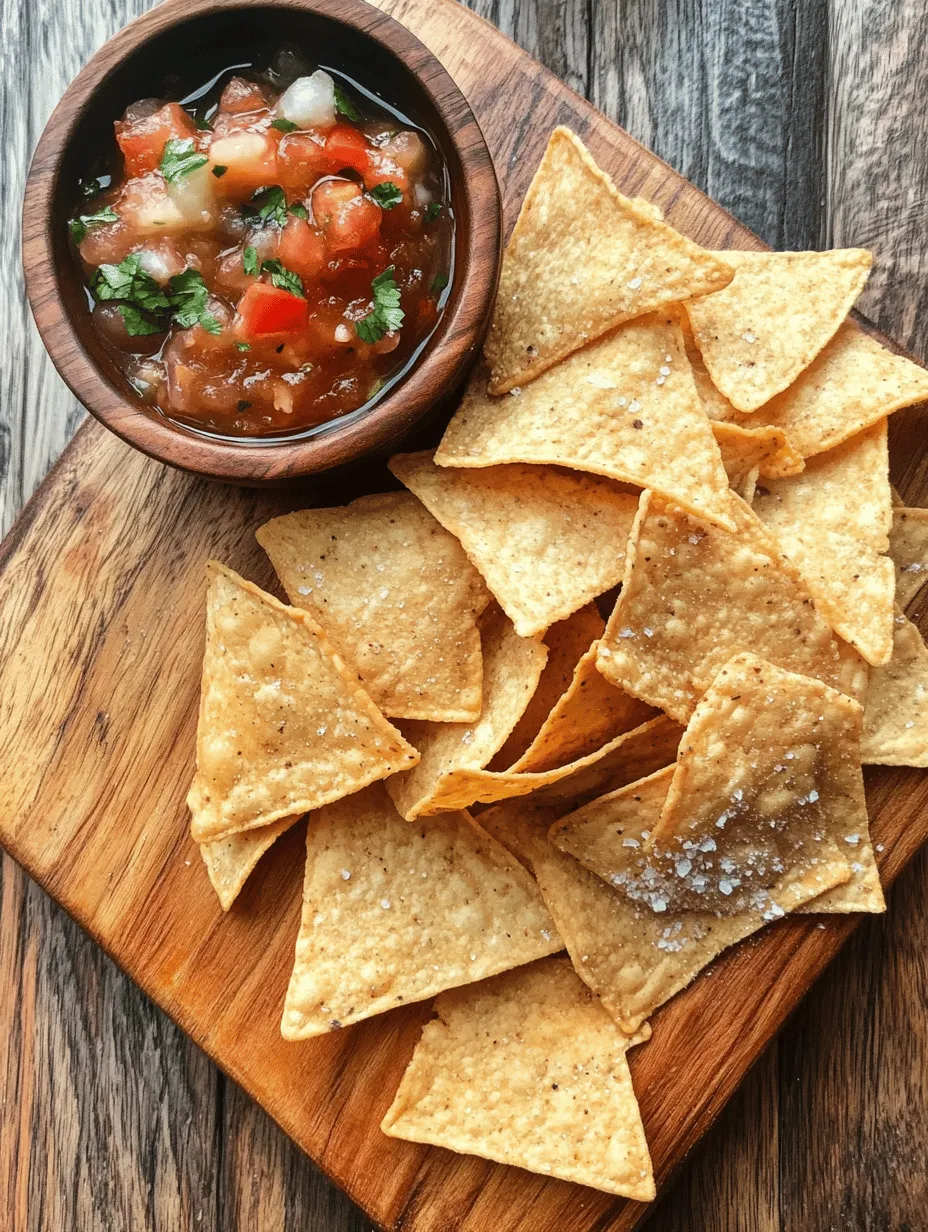
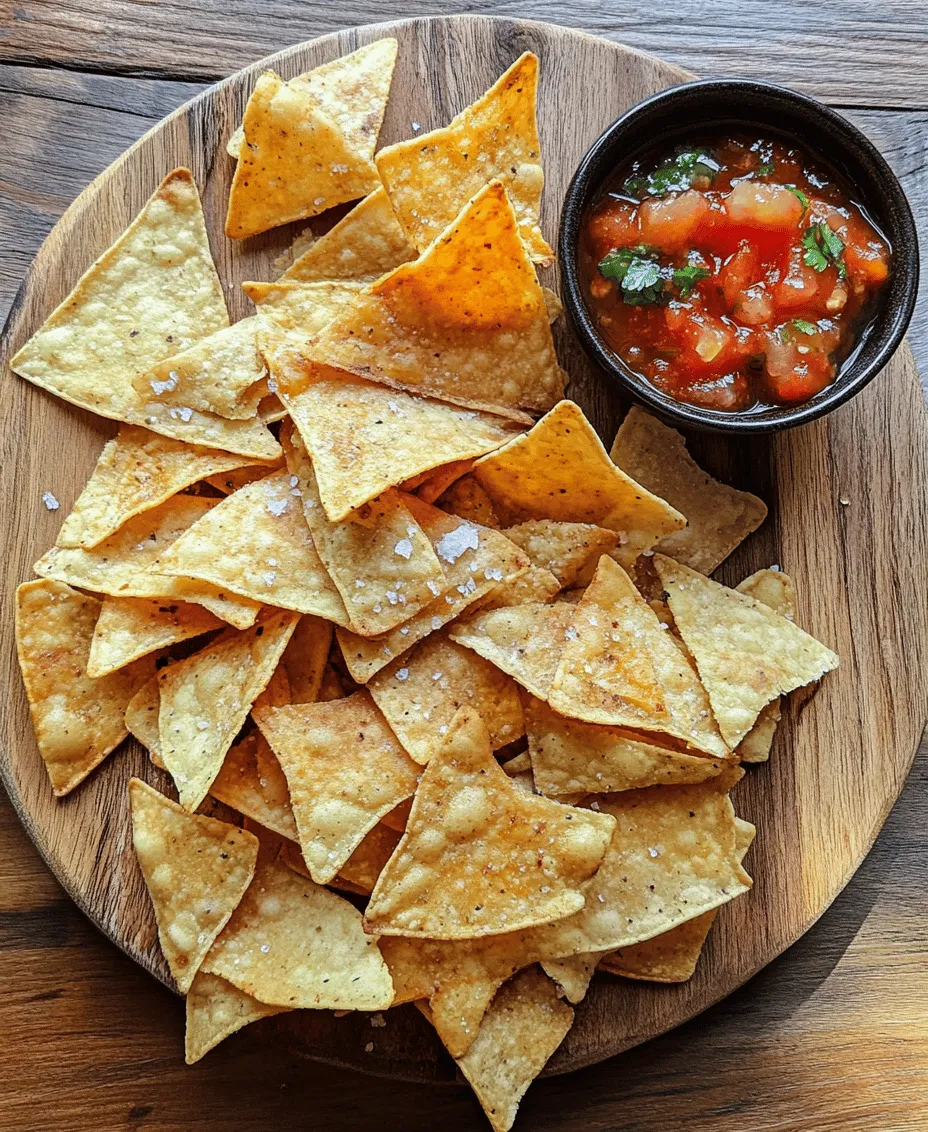
Exploring the world of homemade snacks can lead to delightful culinary experiences, and there’s nothing quite like the satisfying crunch of crispy baked tortilla chips. These chips are a staple in many households, beloved for their versatility and ability to pair with an array of dips and toppings. This simple recipe not only offers a healthier alternative to store-bought chips but also allows for customization in flavors and serving options. With minimal ingredients and easy instructions, you can whip up a batch in no time and elevate your snacks for parties, movie nights, or casual munching. Let’s dive into the delightful process of creating these crispy baked tortilla chips.
Understanding the Basics of Tortilla Chips
The Origin of Tortilla Chips
Tortilla chips have a rich history rooted in Mexican cuisine. They are believed to have originated in the 1940s when a clever entrepreneur named Rebecca Webb Carranza began frying leftover tortillas at her family’s tortilla factory in Los Angeles. This innovative approach not only utilized surplus tortillas but also created a new snack that would soon become a favorite across the United States. Initially enjoyed as an accompaniment to salsa and guacamole, tortilla chips have since evolved into a beloved snack enjoyed on their own or as part of elaborate dishes like nachos.
From their humble beginnings, tortilla chips have undergone a transformation, moving from traditional corn masa to various interpretations, including flavored, baked, and even gluten-free options. Today, they are a staple at parties, restaurants, and homes, showcasing their enduring popularity in modern cuisine.
The Appeal of Homemade Chips
Making your own tortilla chips at home comes with a plethora of benefits. First and foremost is freshness; homemade chips are free from preservatives and artificial flavors often found in store-bought varieties. You can control the quality of the ingredients, ensuring a healthier snack that is both delicious and satisfying.
Another advantage is customization. When you make your own chips, you can experiment with flavors and seasonings that suit your palate. Whether you prefer classic sea salt, zesty lime, or spicy chili powder, the options are endless. Plus, you can adjust the thickness and shape of the chips to create the perfect crunch.
In contrast, store-bought tortilla chips can be overly processed and often contain unhealthy fats and excessive sodium. By opting for homemade, you not only enhance the taste but also embrace a healthier lifestyle. Plus, there’s a certain satisfaction that comes from creating your own snacks, making every bite feel even more rewarding.
Ingredients Breakdown
Essential Ingredients for Crispy Baked Tortilla Chips
To create the perfect crispy baked tortilla chips, you’ll need just a few essential ingredients. Each plays a vital role in achieving that delightful crunch and flavor.
– Corn Tortillas: The foundation of your tortilla chips. When selecting tortillas, you may encounter various options, including white, yellow, and blue corn tortillas. Each type offers a unique flavor profile and texture. Yellow corn tortillas are the most common and provide a slightly sweeter taste, while blue corn tortillas add a nuttier flavor and vibrant color. For the best results, choose high-quality tortillas that are soft and pliable, as they will yield the most satisfying chips.
– Olive Oil: This healthy fat not only helps crisp up the chips but also adds a rich flavor. Extra virgin olive oil is the best choice, as it is cold-pressed and retains more nutrients and antioxidants. Unlike other oils, olive oil provides a subtle, fruity flavor that enhances the overall taste of your chips. Additionally, it offers numerous health benefits, including heart-healthy monounsaturated fats and anti-inflammatory properties.
– Sea Salt: Proper seasoning is crucial for enhancing the flavor of your tortilla chips. Sea salt is preferred for its clean taste and mineral content, which can elevate the overall flavor profile. You can also experiment with different types of salt, such as Himalayan pink salt or smoked sea salt, for added depth. However, if you’re watching your sodium intake, consider using salt alternatives or simply reducing the amount you sprinkle on your chips.
Optional Ingredients for Flavor Variations
While the basic recipe for crispy baked tortilla chips is delightful on its own, you can take it to the next level by incorporating additional flavors. Here are some suggestions for optional ingredients that can elevate the taste of your tortilla chips:
– Spices and Herbs: Consider adding a dash of cumin, paprika, or chili powder to the olive oil before brushing it onto the tortillas. Fresh herbs like cilantro or dried oregano can also lend a unique flavor to your chips.
– Cheese: For a cheesy twist, sprinkle grated cheese, such as cheddar or parmesan, over the chips before baking. This adds both flavor and texture, creating a more indulgent snack.
– Lime Zest: A sprinkle of lime zest can provide a refreshing citrus note that beautifully complements the corn flavor of the chips. If you enjoy a bit of tang, you might also consider a squeeze of fresh lime juice over the finished chips.
Dips and Pairings
The beauty of crispy baked tortilla chips lies in their versatility, especially when it comes to pairing them with dips. They are the perfect vehicle for a variety of delicious accompaniments. Here are some popular options:
– Guacamole: This creamy avocado dip is a classic pairing that adds richness and flavor to your chips. The smooth texture contrasts beautifully with the crunch of the tortilla chips.
– Salsa: Whether you prefer a fresh pico de gallo or a zesty store-bought salsa, the combination of flavors is irresistible. The bright acidity of salsa balances out the chips’ crunchiness.
– Queso Dip: For those who enjoy indulgent snacks, a warm cheese dip is an excellent addition. The melted cheese creates a gooey texture that pairs perfectly with crispy chips.
Step-by-Step Instructions
Preparing Your Kitchen
Before you start making your crispy baked tortilla chips, it’s essential to prepare your kitchen and gather the necessary tools. Here’s what you’ll need for a smooth cooking experience:
1. Baking Sheets: A couple of baking sheets will be necessary for spreading out the tortilla triangles. Make sure they are large enough to accommodate all the chips without overcrowding, which can lead to uneven baking.
2. Oven: Preheat your oven to 350°F (175°C). A properly preheated oven ensures that the chips bake evenly, achieving that desired crunch.
3. Cooking Brush: A pastry brush or silicone brush will be useful for applying the olive oil evenly across the tortillas. This step is crucial for achieving a crispy texture.
4. Knife or Pizza Cutter: For cutting the tortillas into triangles, a sharp knife or pizza cutter will work well. Ensure you have a cutting board to protect your countertops.
5. Mixing Bowl: A small mixing bowl can be useful if you decide to combine your olive oil with spices or herbs before applying it to the tortillas.
With your kitchen prepped and tools gathered, you are now ready to embark on the journey of creating your crispy baked tortilla chips. The next step will detail how to transform simple corn tortillas into a delightful snack that will be a hit at any gathering. Stay tuned for the step-by-step instructions that will guide you through this delicious process.
Tips for Setting Up Your Workspace Efficiently
Before diving into the delicious world of baking your crispy tortilla chips, it’s essential to set up your workspace for maximum efficiency. A well-organized kitchen can make the entire cooking process smoother and more enjoyable. Here are some tips to ensure an optimal workspace:
1. Gather Your Ingredients: Collect all the necessary ingredients—corn tortillas, oil, salt, and any spices or seasonings you wish to use. Having everything in one place saves time and minimizes distractions.
2. Prepare Your Tools: Ensure you have the required tools at hand: a cutting board, a sharp knife or pizza cutter for cutting tortillas, a baking sheet, parchment paper (optional), a brush or spray for oiling, and a mixing bowl.
3. Clean Your Work Area: A clean workspace not only keeps things organized but also helps in maintaining hygiene. Wipe down surfaces, and ensure your baking sheet is free of any residues from previous cooking.
4. Preheat the Oven: While you prepare your chips, preheat your oven to the right temperature. This ensures that your chips start cooking immediately once they are placed in the oven, contributing to optimal crispiness.
5. Create a Trash Area: Set up a designated area for scraps and waste, such as the remnants of tortillas or any unused ingredients. This will keep your workspace tidy and make cleanup easier.
Now that your kitchen is ready, let’s dive into the detailed baking instructions!
Detailed Baking Instructions
1. Preheating the Oven
Preheating your oven is a crucial step that many home cooks overlook. Set your oven to 350°F (175°C). The importance of the right temperature cannot be overstated; it ensures that the tortilla chips will cook evenly and achieve that perfect crispy texture. An oven that isn’t preheated can lead to uneven cooking, resulting in some chips being undercooked while others may burn.
2. Oiling the Tortillas
Once your oven is preheated, it’s time to oil the tortillas. This step is vital for achieving that satisfying crunch. You can use either a brush or a spray bottle to apply oil. Here’s how to do it effectively:
– Brush Method: Use a pastry brush to lightly coat each side of the tortilla with oil. Aim for even coverage without soaking the tortillas—too much oil can lead to greasy chips.
– Spray Method: If you’re using a spray bottle, hold it about 6 inches away from the tortilla and spray lightly on both sides. This method offers a more even distribution of oil.
Remember, the goal is to enhance flavor and texture without making the chips overly oily.
3. Cutting the Tortillas
Next, it’s time to cut the tortillas into uniform triangles. Consistency in size is key, as it ensures that all chips cook at the same rate. Here are the best practices for cutting:
– Stacking: You can stack two or three tortillas on top of each other, which allows you to cut multiple chips at once. Use a sharp knife or a pizza cutter for clean, even cuts.
– Triangles: Cut each tortilla into six to eight equal triangles, depending on your preference for chip size. This method creates ample surface area for seasoning and helps them bake evenly.
4. Baking the Chips
Now, place the cut tortilla triangles on a baking sheet. It’s best to line the sheet with parchment paper for easier cleanup and to prevent sticking. Spread the chips out in a single layer, ensuring they do not overlap. Overlapping can cause some chips to steam rather than bake, resulting in a less crispy texture.
Bake the chips in the preheated oven for about 10-15 minutes. Here’s how to monitor them:
– Check Frequently: Keep an eye on the chips, especially after the first 10 minutes. They can go from perfectly crisp to burnt quite quickly.
– Flip Halfway: For even cooking, flip the chips halfway through the baking time using tongs. This ensures all sides get that desirable crunch.
5. Cooling
Once the chips are golden brown and crispy, remove them from the oven and let them cool on the baking sheet for a few minutes. Cooling is crucial; it allows the chips to firm up even more. If you eat them while they’re still hot, you might find them a bit chewy. For that optimal crunch, let them rest on a wire rack if you have one, allowing air to circulate around them.
Serving Suggestions
Now that your crispy baked tortilla chips are ready, it’s time to explore creative ways to enjoy them!
1. Dips
One of the most classic ways to enjoy tortilla chips is to pair them with delicious dips. Here are some popular options:
– Salsa: Fresh tomato salsa brings a burst of flavor and freshness. You can make a simple pico de gallo or opt for a smoother, blended salsa for a different texture.
– Guacamole: Creamy and rich, guacamole complements the crunch of tortilla chips perfectly. Add lime juice, cilantro, and diced onions for a vibrant dip.
– Queso: Melted cheese dip, known as queso, is a crowd-pleaser. You can make a simple queso by melting cheese and mixing in jalapeños or tomatoes.
– Bean Dip: A hearty bean dip made from black beans or refried beans, topped with cheese and spices, can transform your chips into a satisfying meal.
2. Incorporating Chips into Meals
Tortilla chips can also be more than just a snack; they can be incorporated into meals for added texture and flavor. Consider these ideas:
– Nachos: Layer your chips with cheese, beans, jalapeños, and any other toppings you love. Bake until the cheese melts for a delicious nacho platter.
– Salads: Crumbled tortilla chips can add a delightful crunch to salads. Toss them in a taco salad for a fun twist or sprinkle over a traditional green salad for added texture.
Storing Leftover Chips
If you happen to have leftover tortilla chips (which is rare, but it can happen!), proper storage is essential to maintain their freshness and crunch.
1. Best Practices for Storing
– Airtight Container: Store the chips in an airtight container to prevent them from becoming stale. If you have a resealable plastic bag, squeeze out as much air as possible before sealing.
– Cool Completely: Ensure the chips have cooled completely before storing. Any residual heat can cause condensation, leading to soggy chips.
2. Reheating Tips
If you want to enjoy your leftover chips later, reheating them is simple:
– Oven Method: Preheat your oven to 350°F (175°C) and spread the chips out on a baking sheet. Heat for about 5-7 minutes until they are warm and crispy again.
– Air Fryer Method: An air fryer also works wonders for reheating. Just a few minutes at a low temperature can restore their crispiness without adding oil.
Nutritional Information
Health Benefits of Homemade Tortilla Chips
Homemade tortilla chips offer a healthier alternative to store-bought options. Here’s a breakdown of their benefits:
– Control Over Ingredients: When you make your tortilla chips at home, you control the ingredients. You can use high-quality corn tortillas and choose healthier oils, like olive or avocado oil.
– Lower in Sodium and Additives: Many commercial tortilla chips are loaded with sodium and preservatives. Making them yourself allows you to adjust seasoning to your taste without compromising health.
– Nutritional Profile: Corn tortillas are a good source of fiber and essential nutrients. Homemade chips retain these benefits without added unhealthy fats.
Comparing Homemade Chips vs. Commercial Options
Homemade tortilla chips typically have a lower fat content and fewer calories compared to their commercial counterparts, especially those that are fried. By baking instead of frying, you enjoy a tasty snack that satisfies your cravings without the guilt.
Conclusion
In conclusion, crafting your own crispy baked tortilla chips is not only an easy and enjoyable kitchen project but also a rewarding way to indulge in a healthier snack option. With just a few basic ingredients and simple steps, you can create a versatile treat that can be paired with a variety of dips or enjoyed on its own. Whether you’re entertaining guests or simply treating yourself, these homemade tortilla chips are sure to impress. Embrace the joy of snacking with this delightful recipe and discover the difference of homemade goodness.