Introduction
The joy of creating delicious treats for loved ones is an essential part of celebrating special occasions, especially Valentine’s Day. Among the simplest yet most delightful options are Rice Krispie Valentine Hearts. These charming, chewy confections not only embody the spirit of love with their heart-shaped form but also offer an easy and fun way to engage with family and friends in the kitchen. The process of making these treats can become a cherished tradition, turning simple ingredients into heartfelt gifts that express affection and creativity.
Rice Krispie treats have long been a favorite for their delightful crunch and chewy texture, and by shaping them into hearts, they take on a new meaning during the season of love. Whether you are planning to surprise a partner, create fun snacks for a classroom party, or engage your children in a cooking project, these Rice Krispie Valentine Hearts are sure to bring smiles and sweet memories.
In this article, we will explore the ingredients, step-by-step instructions, and creative variations to enhance your Rice Krispie Valentine Hearts experience. With a few simple steps, you can whip up these delightful treats that not only taste great but also look festive and inviting.
Understanding the Essentials of Rice Krispie Valentine Hearts
Before diving into the recipe, let’s take a closer look at the ingredients and tools you’ll need to craft the perfect Rice Krispie Valentine Hearts. Understanding the essentials will set the foundation for your culinary success and ensure your treats turn out beautifully every time.
Ingredients Overview
1. Rice Krispies Cereal: The star ingredient in this recipe, Rice Krispies provide the signature crunch and texture. This delightful cereal is made from crisped rice, which adds a light and airy quality to the treats.
2. Marshmallows: The gooey goodness of marshmallows acts as the binding agent in this recipe. When melted, they create a sweet, sticky mixture that holds the Rice Krispies together. For the best results, use fresh, soft marshmallows, as older marshmallows can become hard and difficult to melt.
3. Unsalted Butter: Using unsalted butter allows you to control the saltiness of your treats. The butter not only adds flavor but also contributes to the creamy texture of the melted marshmallow mixture. Be sure to melt it gently to avoid browning and maintain a smooth consistency.
4. Food Coloring (Optional): To enhance the festive nature of your Valentine hearts, consider adding a few drops of food coloring. This is an excellent opportunity to create vibrant pinks, reds, or even purples to match the theme of love.
5. Sprinkles or Decorative Toppings (Optional): Sprinkles, edible glitter, or heart-shaped candies can make your Rice Krispie Valentine Hearts even more special. These decorative elements add a playful touch and make your treats visually appealing.
Tools Required for Preparation
To create your Rice Krispie Valentine Hearts, you’ll need a few essential kitchen tools. Having everything ready will streamline the process and make your cooking experience enjoyable.
1. Saucepan: A medium-sized saucepan is perfect for melting the butter and marshmallows together. Choose one with a heavy bottom to prevent burning and ensure even heat distribution.
2. Spatula: A rubber spatula or wooden spoon will help you mix the melted ingredients and incorporate the Rice Krispies. Opt for a spatula with a heat-resistant handle for safety during cooking.
3. Heart-Shaped Cookie Cutter: This tool is crucial for achieving the iconic heart shape. Choose a cutter that’s a suitable size for your treats—about 2 to 4 inches works well.
4. Wax Paper or Parchment Paper: Lining your baking dish with wax or parchment paper will make it easy to remove the Rice Krispie mixture once cooled. It also aids in cleanup, preventing the treats from sticking to the pan.
Now that we have a clear understanding of the ingredients and tools required, let’s move on to the exciting part—making our Rice Krispie Valentine Hearts!
Step-by-Step Guide to Making Rice Krispie Valentine Hearts
Creating Rice Krispie Valentine Hearts is a straightforward process that can be completed in just a few steps. Follow this detailed guide to ensure your treats turn out perfectly.
Melting the Butter and Marshmallows
1. Prepare Your Workspace: Before you start cooking, make sure to clear your kitchen counter and gather all your ingredients and tools. This will help you stay organized and focused.
2. Melt the Butter: Place your saucepan over low to medium heat. Add the unsalted butter and allow it to melt slowly. Stir occasionally to prevent it from browning. The goal is to have melted butter that is completely liquid without any browning.
3. Add Marshmallows: Once the butter is melted, add the marshmallows to the saucepan. Continue to stir gently as the marshmallows begin to soften and melt. This step is crucial—be patient and keep the heat low to avoid scorching.
4. Achieve a Smooth Consistency: As the marshmallows melt, they will begin to blend with the butter. Keep stirring until you achieve a smooth, homogeneous mixture. This should take about 3 to 5 minutes. If you notice any lumps, continue stirring until they dissolve completely. A smooth consistency is key to ensuring your Rice Krispie mixture is evenly combined.
Incorporating Color
5. Add Food Coloring: If you’re using food coloring, now is the time to add it to the melted marshmallow mixture. Start with a few drops and stir well. You can always add more until you reach your desired color. Aim for a vibrant hue that reflects the spirit of Valentine’s Day.
6. Ensure Even Distribution: To achieve an even color throughout the mixture, make sure to stir thoroughly. Scrape the sides and bottom of the saucepan to incorporate all the ingredients evenly. This will ensure that every bite of your Rice Krispie hearts is beautifully colored.
Mixing in the Rice Krispies
7. Combine Rice Krispies: Once your marshmallow mixture is smooth and colored, it’s time to add the Rice Krispies. Remove the saucepan from the heat and gradually fold in the Rice Krispies cereal. Use your spatula to gently mix until all the cereal is well-coated. This step requires some care—over-mixing can crush the cereal and affect the texture of your treats.
8. Tips for Coating: To make this step easier, consider using a large mixing bowl. Transfer the marshmallow mixture to the bowl, then add the Rice Krispies. This will give you more space to fold the ingredients together. Be sure to coat all the cereal without leaving any dry patches.
9. Overcoming Challenges: If you find it difficult to mix the ingredients, you can lightly grease your spatula with cooking spray or butter. This will prevent the mixture from sticking and make it easier to work with.
With a firm understanding of the ingredients, tools, and initial steps, you’re well on your way to creating delightful Rice Krispie Valentine Hearts. Stay tuned for the next part, where we will shape these sweet treats into hearts and add finishing touches to make them truly special!

Shaping the Hearts
Once your Rice Krispie mixture is ready, it’s time to shape these delightful treats into hearts. This step is crucial, as the visual appeal of your Rice Krispie Valentine Hearts will undoubtedly add to their charm.
Techniques for Pressing the Mixture into the Baking Dish
Begin by preparing a baking dish—an 8×8 inch square dish works perfectly for this recipe. To prevent sticking, line the dish with parchment paper, allowing some overhang for easy removal later.
The key to shaping your hearts lies in how you press the mixture into the dish. First, allow the mixture to cool slightly, about 5 minutes, so it’s easier to handle. Use a spatula or a piece of wax paper to evenly spread the mixture across the dish, pressing it firmly into the corners. The mixture should be tightly packed to ensure your hearts hold their shape once cut.
For a neat finish, dampen your hands with a little water or cooking spray before pressing down. This will prevent the sticky mixture from adhering to your fingers. Aim for an even thickness of about 1 inch across the entire surface.
Guidance on Using the Heart-Shaped Cookie Cutter Effectively
After the mixture has cooled enough to handle but is still warm, it’s time to cut out the heart shapes. Use a heart-shaped cookie cutter for this task, pressing down firmly to achieve clean edges. If your cutter sticks, try lightly greasing it with cooking spray or oil.
Gently lift the hearts from the baking dish with a knife or spatula, taking care not to break them. If you find the shapes are difficult to remove, refrigerating the dish for 10-15 minutes can help firm up the mixture, making cutting easier.
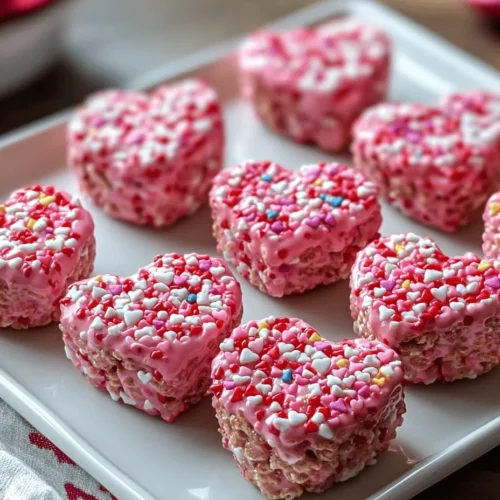
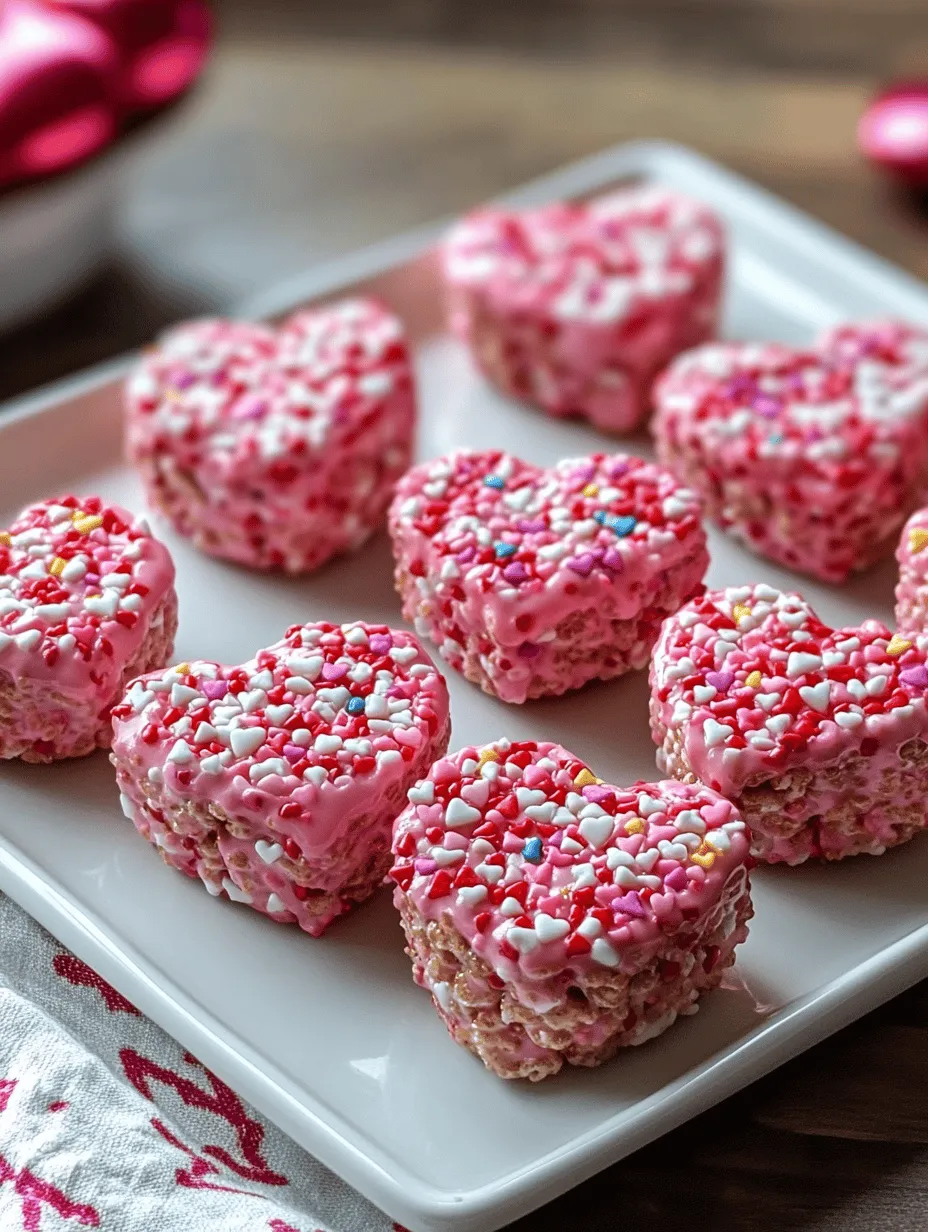
Decorating Your Hearts
Now that your Rice Krispie hearts are shaped, it’s time to get creative with decorations! Decorating not only enhances the visual appeal of your treats but also adds an extra layer of flavor and fun.
Ideas for Various Sprinkles and Toppings
Sprinkles are a simple yet effective way to liven up your treats. Consider using colored sprinkles, edible glitter, or heart-shaped sprinkles to align with the Valentine’s theme. You might also opt for chocolate drizzle—melt white chocolate or dark chocolate and drizzle it over the tops for a sophisticated touch.
Additionally, crushed nuts, mini chocolate chips, or shredded coconut can add interesting textures to your Rice Krispie hearts. Feel free to mix different toppings, creating a beautiful mosaic of colors and flavors.
Creative Decorating Suggestions for Different Occasions
While this recipe is perfect for Valentine’s Day, its versatility allows for adaptation for other occasions. For example, for birthdays, use colorful sprinkles and add a birthday candle on top. For Halloween, incorporate themed sprinkles like orange and black or drizzle with orange chocolate. For Christmas, use red and green sprinkles or even a peppermint flavor infusion.
Cooling and Serving Suggestions
Once decorated, it’s essential to allow your Rice Krispie Valentine Hearts to cool completely before serving. This step ensures the chocolate and toppings set properly, preventing any messy situations when serving.
Importance of Allowing the Treats to Cool Completely
Cooling your treats for at least 30 minutes at room temperature is ideal. If you’re short on time, placing them in the refrigerator can speed up the process, but avoid freezing as it can change the texture of the Rice Krispies.
Presentation Ideas for Serving Rice Krispie Valentine Hearts
When it comes to serving, presentation can make a world of difference. Consider placing the hearts on a decorative plate, or for an extra special touch, wrap them in cellophane and tie with a ribbon for gifting. You can also arrange them in a heart-shaped box or a mason jar for a charming display.
For an elegant touch, consider using cupcake liners to serve each heart individually. This not only adds color but also makes for easy clean-up.
Creative Variations and Customizations
One of the best aspects of Rice Krispie treats is their adaptability. Personalizing your Rice Krispie Valentine Hearts can make them even more special and tailored to your taste.
Flavor Infusions
Enhancing the flavor of your Rice Krispie mixture is a straightforward process. Adding extracts such as vanilla or almond can give your hearts a delightful twist. Simply mix in about a teaspoon of extract with the melted marshmallows before combining with the Rice Krispies.
Additionally, consider incorporating mix-ins like chocolate chips, dried fruits, or nuts. These not only add flavor but also a delightful crunch.
Themed Variations
Adaptation for different holidays or themes is simple. For Easter, use pastel colors in your sprinkles and shape your treats like eggs. For Halloween, consider using orange and black sprinkles, and add a touch of pumpkin spice to your mixture. Changing up the colors and shapes can keep this treat relevant year-round.
Nutritional Information
Understanding the nutritional content of your treats can help you enjoy them in moderation while making informed choices.
Caloric Breakdown per Serving
On average, one Rice Krispie Valentine Heart contains approximately 100 calories, though this can vary based on specific ingredients and toppings used. When making these treats, keep in mind the size of your hearts; larger sizes will naturally increase the caloric content.
Discussion on Moderation and Balance in Treats
While these sweet treats are delightful, moderation is key. Enjoying them as an occasional treat rather than a daily indulgence can help maintain a balanced diet. Consider serving them alongside fresh fruits or nuts to create a more balanced snack experience.
Conclusion
Creating Rice Krispie Valentine Hearts is not just about making a sweet treat; it’s about sharing love and joy with those around you. This simple recipe invites creativity and personalization, making it a perfect activity for families or anyone looking to spread a little extra love. By following the steps outlined in this article, you can ensure your Rice Krispie hearts are not only delicious but also a delightful representation of affection during the Valentine season.
Whether you keep them for yourself or gift them to someone special, these treats are sure to create lasting memories. So gather your ingredients, get creative with decorations, and enjoy the process of making and sharing these charming Rice Krispie Valentine Hearts!