Cheeseburgers are a beloved staple of American cuisine, known for their juicy patties, melted cheese, and an array of toppings that cater to every palate. Their popularity transcends many culinary boundaries, leading to countless adaptations and variations. Among these, cheeseburger pockets stand out as a fun and convenient twist on the classic cheeseburger, combining the familiar flavors we all love into a portable, easy-to-eat format. This recipe is not only a hit among families looking for quick meal options but also serves as a delightful choice for gatherings, parties, and even casual dinners.
The appeal of cheeseburger pockets lies in their ease of preparation and versatility. These pockets are perfect for those hectic weeknights when time is of the essence, yet you still want to serve something satisfying and delicious. They can also be tailored to suit various tastes, allowing for creative additions or substitutions based on personal preferences. Whether you’re hosting a game night or simply looking to indulge in a comforting meal, cheeseburger pockets deliver on flavor and fun.
Understanding the Cheeseburger Pocket
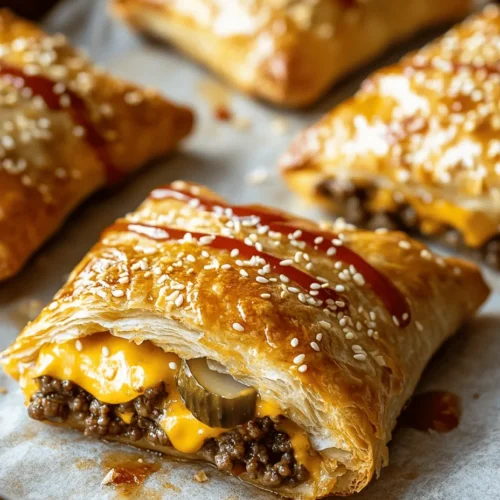
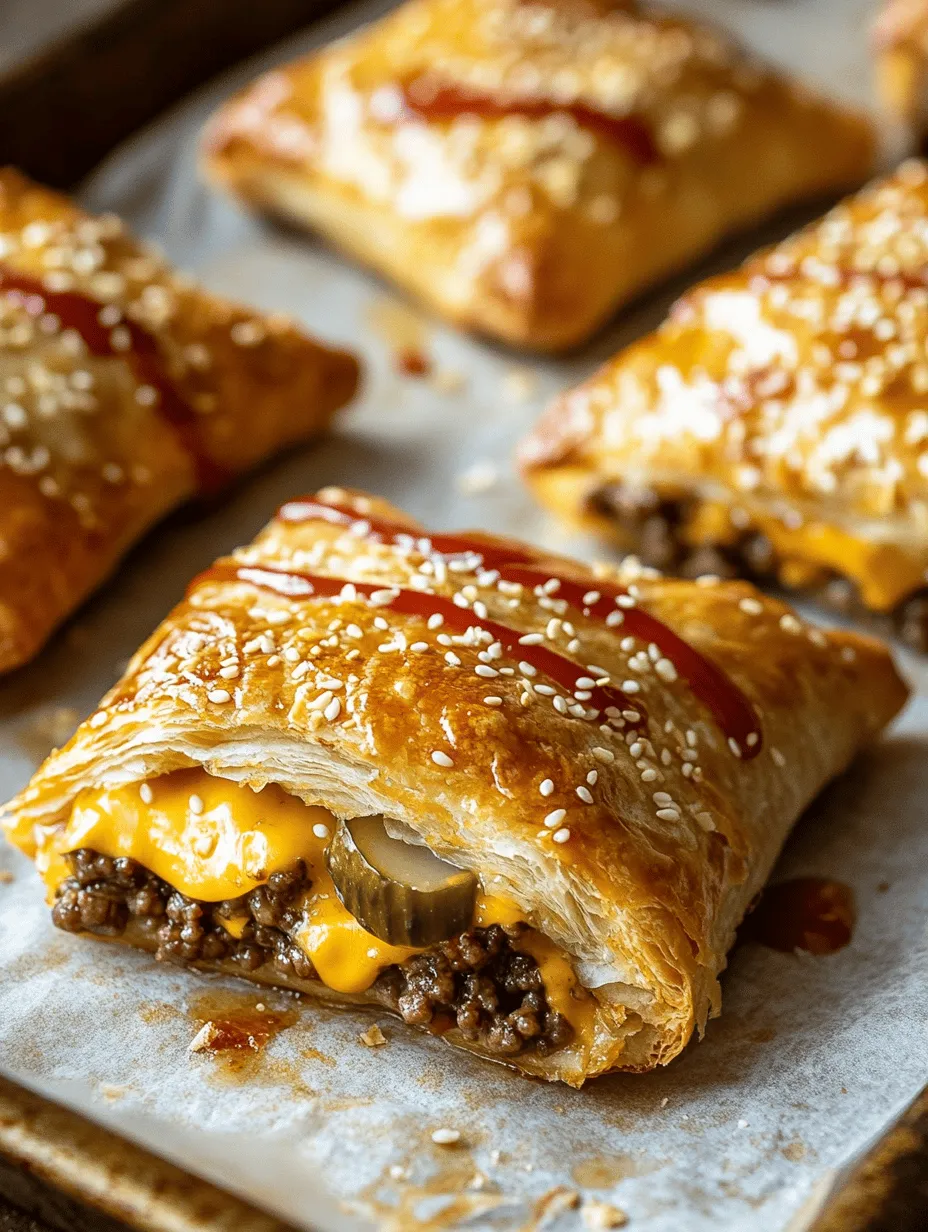
So, what exactly are cheeseburger pockets? Imagine the classic cheeseburger—succulent beef patty, gooey cheese, and all the fixings—encased within a warm, flaky pastry. Cheeseburger pockets combine the traditional elements of a cheeseburger into a hand-held delight that’s both practical and flavorful. The unique presentation makes them an attractive option for both kids and adults, turning a familiar favorite into an exciting new dish.
Cheeseburgers hold a significant place in American culture, often associated with summertime barbecues, backyard cookouts, and family gatherings. They represent comfort food at its finest, evoking memories of shared meals and joyous occasions. In recent years, the trend of handheld meals has surged, as busy lifestyles demand convenient yet satisfying dining options. Cheeseburger pockets perfectly embody this trend, allowing you to enjoy the rich flavors of a cheeseburger without the need for a plate or utensils.
Ingredients Breakdown
As with any great recipe, understanding the individual components is key to achieving the best results. Here, we break down the essential ingredients for cheeseburger pockets, along with some insights into their roles in the dish.
Ground Beef
Ground beef is the star of the show in cheeseburger pockets. When selecting ground beef, it’s important to consider the fat content. For a juicy and flavorful filling, aim for ground beef that is around 80% lean. This balance of fat ensures that the meat remains tender while providing enough moisture to prevent the filling from becoming dry. If you’re looking for alternatives, ground turkey or chicken can also work well, although they may yield a slightly different flavor profile.
Cheddar Cheese
Cheddar cheese is a must-have for cheeseburger pockets, as it melts beautifully and adds a rich, creamy texture to the filling. While sharp cheddar is a popular choice for its robust flavor, you can also consider alternatives such as Monterey Jack for a milder taste or American cheese for that classic cheeseburger experience. The cheese not only enhances the flavor but also serves as a binding agent, helping to hold the filling together.
Onions and Pickles
Onions add a wonderful crunch and a hint of sweetness to the filling. You can use yellow or white onions, finely chopped and sautéed until translucent for a sweeter flavor. Pickles, whether dill or sweet, contribute a tangy brightness that balances out the richness of the beef and cheese. Together, these ingredients create a harmonious blend of flavors and textures that elevate the cheeseburger experience.
Ketchup and Mustard
No cheeseburger is complete without the classic condiments—ketchup and mustard. These condiments not only add flavor but also help to achieve that quintessential cheeseburger taste. You can adjust the amounts to suit your preference, but a good rule of thumb is to incorporate a tablespoon of each into the beef mixture. For those who prefer a little heat, consider adding a dash of hot sauce or a sprinkle of cayenne pepper.
Crescent Rolls
To encase the delicious filling, we turn to crescent rolls. These refrigerated dough options provide a flaky, buttery crust that perfectly complements the savory filling. The convenience of using crescent rolls means you can whip up cheeseburger pockets in no time, making them an ideal choice for busy weeknights or spontaneous gatherings. If you prefer homemade dough, you can certainly make a batch from scratch, but for ease and efficiency, store-bought crescent rolls work brilliantly.
Optional Toppings
For those looking to add an extra touch of flair, consider sprinkling some sesame seeds on top of the crescent rolls before baking. This not only adds a visually appealing element but also enhances the flavor with a nutty crunch. Other optional toppings include freshly chopped herbs, grated cheese, or even a drizzle of barbecue sauce for a smoky twist.
Preparation Steps Explained
Now that we’ve covered the ingredients, let’s dive into the preparation process. Making cheeseburger pockets is straightforward, and with a little attention to detail, you’ll create a delicious dish that will impress your family and friends.
Step 1: Browning the Beef
The first step in preparing your cheeseburger pockets is to brown the ground beef. Heat a large skillet over medium-high heat, and add the ground beef once hot. Use a spatula to break the meat into small pieces, ensuring even cooking. Browning the beef properly is crucial, as it develops a rich flavor that enhances the overall taste of the filling. Cook until the beef is no longer pink, which should take about 6-8 minutes.
Step 2: Draining Excess Fat
After browning the beef, it’s essential to drain any excess fat from the skillet. This step is important for achieving a well-balanced filling that isn’t greasy. You can use a colander or simply tilt the skillet to let the fat escape while holding back the meat with a spatula. Once drained, return the beef to the skillet.
Step 3: Incorporating Other Ingredients
With the beef ready, it’s time to incorporate the remaining ingredients. Add the finely chopped onions and cook for an additional 3-4 minutes until they become translucent. Next, stir in the chopped pickles, ketchup, and mustard. Mix well to combine all the flavors, and allow the mixture to simmer for a couple of minutes. This step helps meld the flavors together, creating a cohesive filling that bursts with cheeseburger goodness.
Step 4: Adding the Cheese
Once the filling is well combined, it’s time to add the cheese. Remove the skillet from heat, and mix in the shredded cheddar cheese until it melts and integrates into the meat mixture. The cheese not only adds flavor but also acts as a glue, helping to hold the filling together when encased in the crescent roll dough.
Step 5: Rolling and Sealing the Crescents
Now comes the fun part—assembling the cheeseburger pockets! Preheat your oven according to the instructions on the crescent roll packaging. On a clean surface, unroll the crescent roll dough and separate it into triangles. Place a generous spoonful of the cheeseburger filling at the wider end of each triangle. Carefully roll the dough over the filling, starting from the wide end and rolling towards the pointed end. Make sure to seal the edges well to prevent any filling from leaking out during baking. For added security, you can pinch the seams with your fingers or use a fork to crimp the edges.
Step 6: Baking the Cheeseburger Pockets
Once all the pockets are filled and sealed, place them on a baking sheet lined with parchment paper or a silicone baking mat. If desired, brush the tops with a beaten egg wash or melted butter to achieve a beautiful golden color. This step is optional but highly recommended for an appetizing finish. Bake according to the crescent roll package instructions, usually around 12-15 minutes, or until the pockets are golden brown and puffed.
By following these steps, you’ll have a batch of delicious cheeseburger pockets ready to enjoy. These savory treats are sure to become a go-to recipe for any occasion, bringing the classic flavors of a cheeseburger to the palm of your hand.
Optimal Baking Temperature and Time for Achieving Golden-Brown Perfection
To achieve the perfect cheeseburger pockets, preheat your oven to 375°F (190°C). This temperature is ideal for ensuring that the dough cooks through evenly while achieving that coveted golden-brown crust. Typically, the baking time will range from 20 to 25 minutes. Keep a close eye on them; you want them to be golden and crispy, but not overcooked or burned.
When placing the cheeseburger pockets in the oven, it’s essential to use the middle rack. This ensures that heat circulates evenly around the pockets, promoting uniform cooking. To check for doneness, look for a beautifully browned exterior. The cheese inside should be melted, and the filling should be hot throughout.
Tips on Using Baking Sheets and Parchment Paper
Using a baking sheet lined with parchment paper is critical for preventing sticking and ensuring even cooking. Parchment paper creates a non-stick surface that allows the cheeseburger pockets to slide off easily once baked, maintaining their shape and presentation.
Additionally, ensure that you space the pockets out sufficiently on the baking sheet. This allows for even airflow around each pocket, helping them to crisp up nicely. If they are too crowded, they may steam instead of bake, resulting in a less desirable texture.
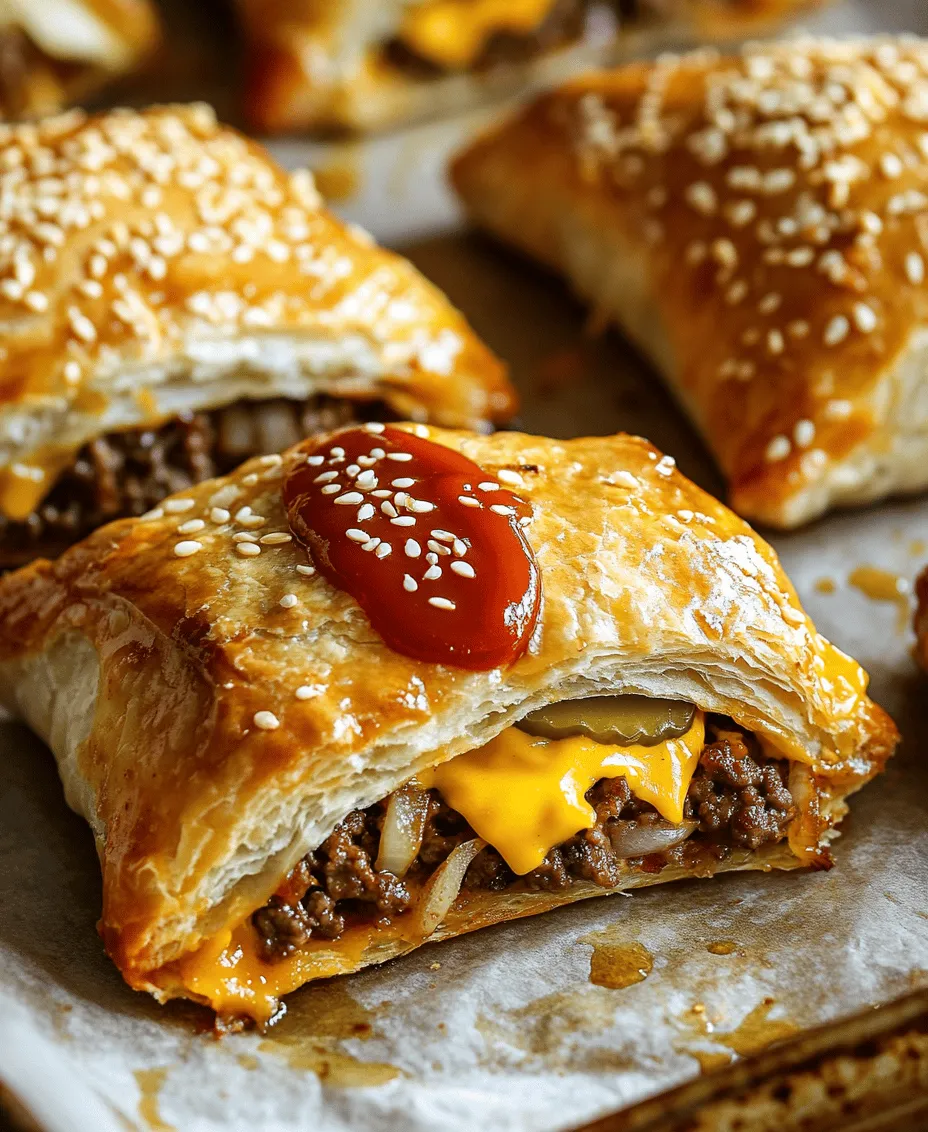
Visual Cues to Look for When Determining Doneness
Visual cues are your best friends when determining if your cheeseburger pockets are done. Look for a deep, golden-brown color across the tops and edges. The filling should also be bubbling slightly at the seams, indicating that the cheese is melted and the meat is cooked thoroughly. If you have an instant-read thermometer, you can check the internal temperature; it should read 165°F (74°C) for safe consumption.
Serving Suggestions
Once your cheeseburger pockets are out of the oven and cooled slightly, it’s time to think about serving. There are countless creative ways to present this dish that will elevate your meal experience.
Pairing with Dipping Sauces
Dipping sauces can add an extra layer of flavor to your cheeseburger pockets. Here are some popular options:
– Ranch Dressing: Creamy and tangy, ranch dressing is a classic choice that complements the savory flavors of the beef and cheese.
– Spicy Mayo: A mixture of mayonnaise with a touch of sriracha or hot sauce can provide a spicy kick that balances the richness of the cheeseburger pockets.
– Ketchup: The classic condiment never goes out of style. Offer a small bowl of ketchup for dipping, or drizzle it over the pockets before serving for a touch of color and flavor.
Suggestions for Side Dishes that Complement the Meal
To round out your meal, consider serving your cheeseburger pockets with a few side dishes. Here are some delicious options:
– Fries: Crispy French fries are a classic pairing. Whether you prefer traditional or sweet potato fries, they provide a satisfying crunch that complements the softness of the pockets.
– Salads: A fresh side salad with mixed greens, cherry tomatoes, and a light vinaigrette can add a refreshing contrast to the rich flavors of the cheeseburger pockets.
– Coleslaw: The crunchy texture and tangy flavor of coleslaw can be a delightful accompaniment, adding brightness to the meal.
Presentation Tips to Enhance Appeal
Presentation can elevate any meal. Consider garnishing your cheeseburger pockets with fresh herbs like parsley or cilantro for a pop of color. You might also place the pockets on a wooden cutting board or a colorful platter, making the meal visually appealing. Slicing the pockets in half to reveal the gooey cheese and savory filling can entice your guests and make for an Instagram-worthy moment.
Nutritional Information
Understanding the nutritional content of your cheeseburger pockets can help you enjoy them in moderation while balancing indulgence with health.
Overview of Nutritional Content
A standard cheeseburger pocket made with lean ground beef, cheese, and dough can contain approximately 300-400 calories per serving. This can vary based on the type of cheese used, the fat content of the meat, and any additional ingredients. Typically, a serving will provide a good source of protein, but it’s essential to be mindful of sodium levels, especially if you’re adding sauces.
Discussion on Balancing Indulgence with Health
You can make these pockets healthier by opting for leaner ground beef or turkey, which reduces the overall fat content. Additionally, using low-fat cheese can cut down on calories without sacrificing flavor. For a heartier version, consider incorporating vegetables such as diced bell peppers, onions, or even spinach into the filling. This not only boosts nutritional value but also adds color and texture.
Considerations for Dietary Restrictions
For those with dietary restrictions, cheeseburger pockets can be adapted easily. For gluten-free options, use gluten-free dough or even crescent roll dough available at most grocery stores. If you’re catering to vegetarians, try using plant-based ground beef or a filling made of sautéed mushrooms and spinach. These variations ensure that everyone can enjoy this tasty meal without compromise.
Variations of Cheeseburger Pockets
The beauty of cheeseburger pockets lies in their versatility. You can explore different flavor profiles and customize the fillings to suit your taste.
Southwest-Inspired Pockets
For a zesty twist, create Southwest-inspired cheeseburger pockets by adding jalapeños and pepper jack cheese to the filling. A touch of chili powder can also enhance the flavor profile, making each bite a spicy delight.
BBQ Cheeseburger Pockets
Another delicious variation is BBQ cheeseburger pockets. Simply mix cooked ground beef with your favorite BBQ sauce before filling the dough. Consider adding a small scoop of coleslaw inside for added crunch and flavor.
Vegetarian Options
For a vegetarian version, use plant-based crumbles in place of meat or fill the pockets with seasoned sautéed mushrooms, spinach, and cheese. This way, you retain the heartiness of the dish while accommodating those who prefer not to consume meat.
International Twists
Consider incorporating flavors from different cuisines to keep things exciting. For example, you can add teriyaki sauce and diced pineapple for a Hawaiian-inspired version or use tzatziki sauce and feta cheese for a Mediterranean touch. The possibilities are endless, and experimenting with different ingredients can lead to delightful new discoveries.
Storing and Reheating Leftovers
If you find yourself with leftovers, proper storage is key to maintaining freshness and flavor.
Best Practices for Storing Leftover Cheeseburger Pockets
Allow any leftover cheeseburger pockets to cool completely before storing them. Wrap them individually in plastic wrap or aluminum foil, or place them in an airtight container. They can be stored in the refrigerator for up to 3 days. For longer storage, consider freezing them. Place wrapped pockets in a freezer-safe bag, ensuring to remove as much air as possible before sealing. They can last for up to 2 months in the freezer.
Methods for Reheating Without Sacrificing Texture and Flavor
To reheat, the oven is your best option for preserving texture. Preheat your oven to 350°F (175°C) and place the pockets on a baking sheet. Heat for about 10-15 minutes, or until warmed through. If you’re short on time, the microwave can be used, but be aware that it may result in a softer texture. To do this, place the pockets on a microwave-safe plate and cover with a damp paper towel, heating in 30-second intervals until warm.
Conclusion
In summary, cheeseburger pockets are a delightful addition to any meal plan, offering a perfect blend of flavors and textures. Their versatility allows you to experiment with various fillings and accompaniments, making them suitable for any occasion. Whether you’re serving them for a casual family dinner or a gathering with friends, these pockets are sure to impress.
Don’t hesitate to experiment with different variations and make the recipe your own. The joy of cooking lies in creativity and the ability to share delicious meals with loved ones. So roll up your sleeves, gather your ingredients, and enjoy the process of making these scrumptious cheeseburger pockets!