If you’re looking for a dessert that combines the irresistible textures of cookie and candy, look no further than Twix Cookie Cups. This delightful treat is the perfect fusion of classic cookie goodness and the indulgent flavors of Twix bars. Imagine sinking your teeth into a warm, soft cookie cup, filled with creamy caramel, smooth chocolate, and crunchy bits of Twix. Each bite is a delicious adventure that will leave you craving more.
The Popularity of Twix Bars
Twix bars, with their delectable combination of cookie, caramel, and chocolate, have long been a favorite among candy lovers. Their unique texture and flavor make them a versatile ingredient, perfect for enhancing a variety of desserts. In Twix Cookie Cups, they take center stage, transforming an ordinary cookie into an extraordinary experience. The contrast between the crunchy cookie base and the gooey caramel creates a delightful interplay of textures, while the chocolate adds a rich sweetness that perfectly complements the cookie’s flavor.
Versatility for Various Occasions
One of the greatest advantages of making Twix Cookie Cups is their versatility. They are suitable for any occasion, whether it’s a birthday party, holiday gathering, or simply a cozy family night at home. Their appealing presentation and delicious taste make them a crowd-pleaser sure to impress your guests. You can even customize them for different seasons or events by adding festive decorations or variations in toppings. These cookie cups are easy to share and perfect for potluck contributions or bake sales.
Understanding the Ingredients: A Closer Look at What Makes Twix Cookie Cups Special
To create the perfect Twix Cookie Cups, it’s essential to understand the role each ingredient plays in this delightful recipe. Here’s a closer look at the key components that make these cookie cups so special:
All-Purpose Flour and Cocoa Powder: The Foundation of Flavor
The base of any great cookie starts with flour. All-purpose flour provides the structure necessary for the cookie cups, ensuring they hold their shape while baking. It creates a soft yet sturdy base that can support the luscious filling. When combined with cocoa powder, the flavor profile deepens dramatically. Cocoa powder adds a rich chocolate flavor that elevates the cookie from ordinary to extraordinary, giving it that decadent taste we all crave.
Sugars: Granulated and Brown for Perfect Sweetness
In the world of baking, sugars play a crucial role beyond just sweetness. In this recipe, both granulated and brown sugars are used to create a balanced flavor and ideal texture. Granulated sugar contributes to the cookie’s crispness, while brown sugar, with its higher moisture content and hints of molasses, brings a soft, chewy texture and a slight depth of flavor. This combination ensures that the cookie cups are not only sweet but also satisfyingly textured.
Baking Soda and Salt: Essential Leavening Agents
Baking soda is an essential component in cookie recipes, acting as a leavening agent that helps the cookies rise in the oven. It reacts with the acidity in brown sugar, creating carbon dioxide bubbles that give the cookies a light and airy feel. Salt, on the other hand, is often overlooked but is crucial in balancing sweetness and enhancing the overall flavor of the cookie. It brings out the best in the other ingredients, ensuring a well-rounded taste.
Butter, Egg, and Vanilla Extract: The Creamy Components
Butter is a key ingredient in achieving that rich and moist texture that makes cookies so irresistible. It not only adds flavor but also contributes to the cookie’s tenderness. When creamed with sugars, it creates air pockets that help the cookies rise and become fluffy. The egg binds the ingredients together, providing structure and moisture. Finally, vanilla extract adds an aromatic quality, enhancing the sweetness and making the cookie cups even more appealing.
Twix Bars: The Star Ingredient
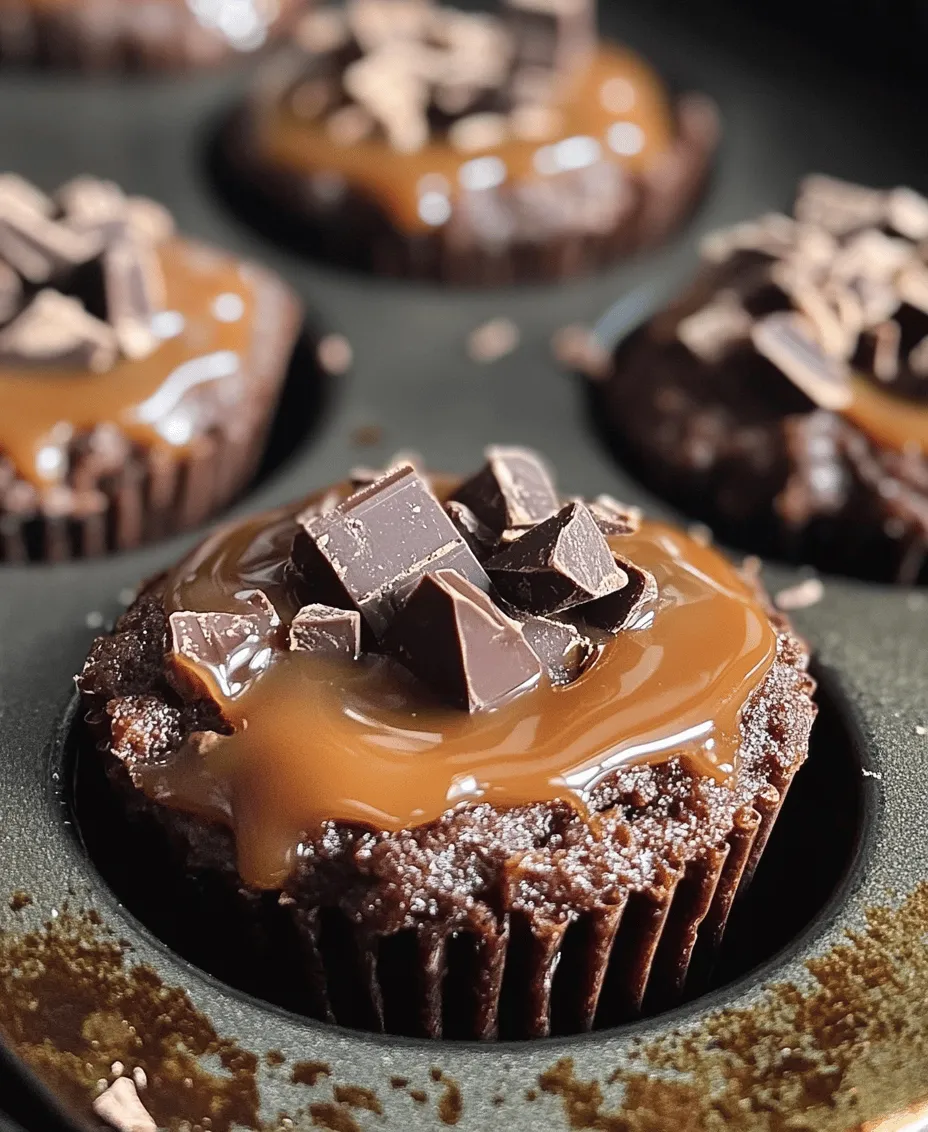
No discussion of Twix Cookie Cups would be complete without mentioning the star ingredient: Twix bars. Chopped into bite-sized pieces, these candy bars add a delightful crunch and bursts of flavor throughout each cookie cup. The combination of chocolate and caramel perfectly complements the rich chocolatey cookie base, creating a harmonious blend of flavors that is nothing short of addictive.
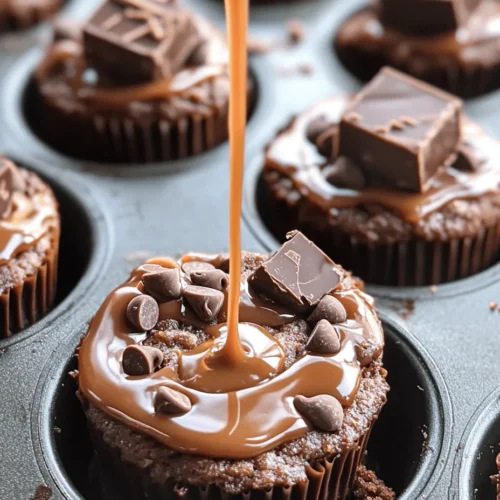
Caramel Sauce and Chocolate Chips: The Finishing Touches
To elevate these cookie cups even further, we finish them off with a drizzle of caramel sauce and a sprinkle of chocolate chips. The caramel adds an extra layer of gooey sweetness that perfectly complements the crunchy bits of Twix inside. Meanwhile, the chocolate chips melt into pools of chocolatey goodness, making each bite even more indulgent. These finishing touches not only enhance the flavor but also add visual appeal, transforming the cookie cups into a stunning dessert that will wow your guests.
Step-by-Step Instructions for Perfect Twix Cookie Cups
Now that we’ve covered the essential ingredients, let’s dive into the step-by-step instructions to create these delectable Twix Cookie Cups.
Preparation: Setting the Stage for Baking
Before you begin mixing your ingredients, it’s essential to prepare your workspace and equipment. Start by preheating your oven to 350°F (175°C). This ensures that your cookie cups bake evenly and achieve the perfect texture. While the oven is heating, prepare your mini muffin pan by greasing it with cooking spray or lining it with mini cupcake liners. This will prevent the cookie cups from sticking and make it easier to remove them once they’re baked.
Mixing the Dry Ingredients: Creating a Harmonious Blend
In a medium-sized mixing bowl, combine the all-purpose flour, cocoa powder, baking soda, and salt. Whisk these dry ingredients together until they are well blended. This step is crucial as it ensures that the cocoa powder, flour, and leavening agent are evenly distributed throughout the mixture. A uniform blend will lead to consistent baking results, preventing any pockets of bitter cocoa or unrisen cookie areas.
By taking the time to mix your dry ingredients thoroughly, you set the foundation for achieving perfectly baked Twix Cookie Cups that are both delicious and visually appealing.
With the preparation underway and the dry ingredients mixed, you’re well on your way to creating these scrumptious treats. In the next part of this recipe article, we’ll explore the next steps, including how to combine the wet ingredients and form the cookie cups that will soon become a favorite in your dessert repertoire.
Creaming the Butter and Sugars: The Art of Achieving Fluffiness
The first crucial step in creating your Twix Cookie Cups is the creaming of butter and sugars. This step may seem simple, but it is vital for achieving the right texture and incorporating air into the dough. Start by using room temperature unsalted butter, as this ensures it blends well with the sugars. In a large mixing bowl, combine the softened butter with granulated sugar and brown sugar.
Using an electric mixer on medium speed, beat the mixture until it becomes light and fluffy, which typically takes about 2-3 minutes. This process not only helps to dissolve the sugars, creating a smooth base, but it also incorporates air, which leads to a lighter, more tender cookie. The color of the mixture should lighten and become creamier as you mix, indicating that enough air has been incorporated. This step is essential for achieving the perfect texture in your cookie cups.
Incorporating Eggs and Vanilla: Binding the Ingredients Together
Once your butter and sugars have reached the desired fluffy consistency, it’s time to add the eggs and vanilla extract. The eggs play a crucial role in binding the ingredients together, while the vanilla adds depth to the flavor profile. Crack in one large egg and add the egg yolk to the mixture, followed by a teaspoon of pure vanilla extract.
Mix these wet ingredients into the creamed mixture on low speed. It’s important to combine them just until they are blended. Over-mixing at this stage can result in a denser cookie, so keep an eye on the mixture to ensure it remains smooth and creamy without incorporating too much air. The resulting mixture should be glossy and well combined, laying the groundwork for the perfect cookie dough.
Combining Wet and Dry Ingredients: The Key to a Perfect Dough
Next, it’s time to combine your wet and dry ingredients. In a separate bowl, whisk together the all-purpose flour, baking soda, and a pinch of salt. The baking soda acts as a leavening agent, helping the cookie cups rise and maintain a soft texture. Gradually add the dry ingredients to the wet mixture, mixing on low speed.
Here’s a key tip: mix until just combined. Overworking the dough can lead to tough cookie cups, so stop mixing as soon as you no longer see traces of flour. The dough should be soft and slightly sticky, perfect for holding its shape when baked. This careful balance is essential for maintaining a tender and delicious cookie.
Folding in Twix Bars: Adding a Crunchy Surprise
With your dough now complete, it’s time to fold in the star ingredient—chopped Twix bars. Start by unwrapping your Twix bars and chopping them into small chunks. The goal is to have a mix of larger pieces for crunch and smaller bits for flavor infusion throughout the dough.
Gently add the chopped Twix to the cookie dough and use a spatula to fold them in. Be careful not to overmix, as you want to maintain the integrity of the chocolate and caramel pieces. This step ensures that each bite of your cookie cup will have that delightful crunchy surprise, melding beautifully with the soft cookie base.
Shaping the Cookie Cups: The Importance of Creating Wells
Now it’s time to shape your cookie dough into cups. Preheat your oven to 350°F (175°C) and line a muffin pan with paper liners or grease it well to prevent sticking. Using a cookie scoop or tablespoon, portion out the dough into each muffin cup, filling them about halfway full.
To create the signature well shape, use your fingers or the back of a measuring spoon to press down gently in the center of each mound of dough. This step is crucial, as it creates a space for the toppings and enhances the overall presentation of your cookie cups. The dough will expand while baking, so don’t worry if it seems small at first; it will puff up beautifully.
Baking: The Transformation of Dough to Deliciousness
With your cookie cups shaped and ready, it’s time to bake. Place the muffin pan in the preheated oven and bake for approximately 10-12 minutes. Keep a close eye on them; you want the edges to be lightly golden while the centers remain soft. The cookies will continue to cook slightly even after being removed from the oven due to residual heat.
To check for doneness, insert a toothpick into one of the cookie cups. If it comes out clean or with just a few moist crumbs, they are ready. If the toothpick has wet dough on it, give them another minute or two before checking again. Once baked to perfection, allow the cookie cups to cool in the pan for about 5 minutes before transferring them to a wire rack to cool completely.
Cooling and Adding Toppings: Final Steps for Enjoyment
After allowing your Twix Cookie Cups to cool for a few minutes in the muffin pan, carefully transfer them to a wire rack. This step is essential for cooling them evenly and preventing them from becoming soggy.
Once they are completely cooled, it’s time for the fun part—adding toppings! Drizzle caramel sauce generously over each cookie cup, allowing it to pool in the center. Then, sprinkle mini chocolate chips on top for an extra touch of sweetness and texture. You can also add a pinch of sea salt to elevate the flavors, providing a delightful contrast to the sweetness of the caramel and chocolate.
Serving Suggestions: How to Enjoy Your Twix Cookie Cups
Presentation Ideas: Making Your Treats Irresistible
When it comes to serving your Twix Cookie Cups, presentation is key. Arrange them on a decorative platter or stand to showcase their delightful appearance. For an added touch, you can dust the tops with powdered sugar or drizzle additional caramel sauce for a visually appealing effect.
If you’re hosting a gathering, consider placing the cookie cups in individual cupcake liners for an elegant touch. For a more rustic look, you can serve them on a wooden board, allowing guests to help themselves. A simple yet effective way to elevate the presentation is to garnish each cookie cup with a small piece of Twix or a sprinkle of chopped nuts for added texture.
Pairing Suggestions: What Goes Well with Twix Cookie Cups
Pairing your Twix Cookie Cups with the right beverages can enhance the overall experience. For a comforting treat, serve them alongside a glass of cold milk or a warm cup of coffee. The richness of chocolate and caramel pairs beautifully with the smoothness of milk, while coffee adds depth to the flavors.
For a more indulgent treat, consider serving them with vanilla ice cream. The warm cookie cups will melt the ice cream slightly, creating a delightful combination of hot and cold. Alternatively, a scoop of salted caramel or chocolate ice cream can complement the flavors of the Twix filling.
Conclusion: Enjoying the Sweetness of Twix Cookie Cups
Making Twix Cookie Cups is not just about the final product; it’s about the joy of the process and the delight of sharing these treats with friends and family. These cookie cups offer a unique twist on traditional cookies, combining the beloved flavors of Twix bars into a delightful cup form that is sure to impress.
Encourage your readers to experiment with the recipe by adding their favorite mix-ins or toppings. Whether it’s swapping out Twix for another chocolate bar, adding nuts, or incorporating a different sauce, there are endless possibilities to personalize this recipe.
In conclusion, Twix Cookie Cups are an experience to be savored, from the moment you mix the ingredients to the last delicious bite. So gather your ingredients, invite some friends over, and enjoy the sweet moments that come with baking and sharing these delightful treats.