
As the warm sun graces us with its presence, summer beckons us to indulge in fresh flavors and light, refreshing desserts. The joys of the season extend beyond sun-soaked days and balmy nights; they invite us to celebrate with delightful sweet treats that encapsulate the essence of summer. Whether it’s a picnic in the park or a backyard barbecue with friends, desserts made with seasonal fruits and vibrant flavors are the perfect way to make any summer gathering memorable.
In this article, we will explore the concept of sweet summer treats, featuring a variety of delectable recipes that capture the spirit of the season. You will discover how to create a Sweet Berry Bake, whip up a batch of Refreshing Lemonade, assemble a No-Bake Strawberry Shortcake, and craft a Tropical Fruit Tart. Each recipe emphasizes the importance of using fresh ingredients, highlighting the beauty of summer cooking that is both enjoyable and satisfying.
Celebrating Summer with Sweet Berry Bake
One of the quintessential summer desserts is the Sweet Berry Bake. This delightful dish is a symphony of flavors and textures that showcases the best of seasonal berries. Imagine the sweetness of ripe strawberries, blueberries, and raspberries melding together in a warm, buttery bake that is both comforting and indulgent. With a golden, crumbly topping that contrasts beautifully with the juicy berries nestled beneath, this dessert is not only delicious but also visually appealing.
Flavor Profile and Texture
The Sweet Berry Bake is a delightful combination of sweet and tart, with the natural sugars from the berries beautifully balanced by the rich, buttery topping. Each bite offers a satisfying crunch followed by a burst of juicy fruit, making it a perfect treat to enjoy on a warm day. The inviting aroma of baked berries wafting through your kitchen will surely entice everyone to gather around the table.
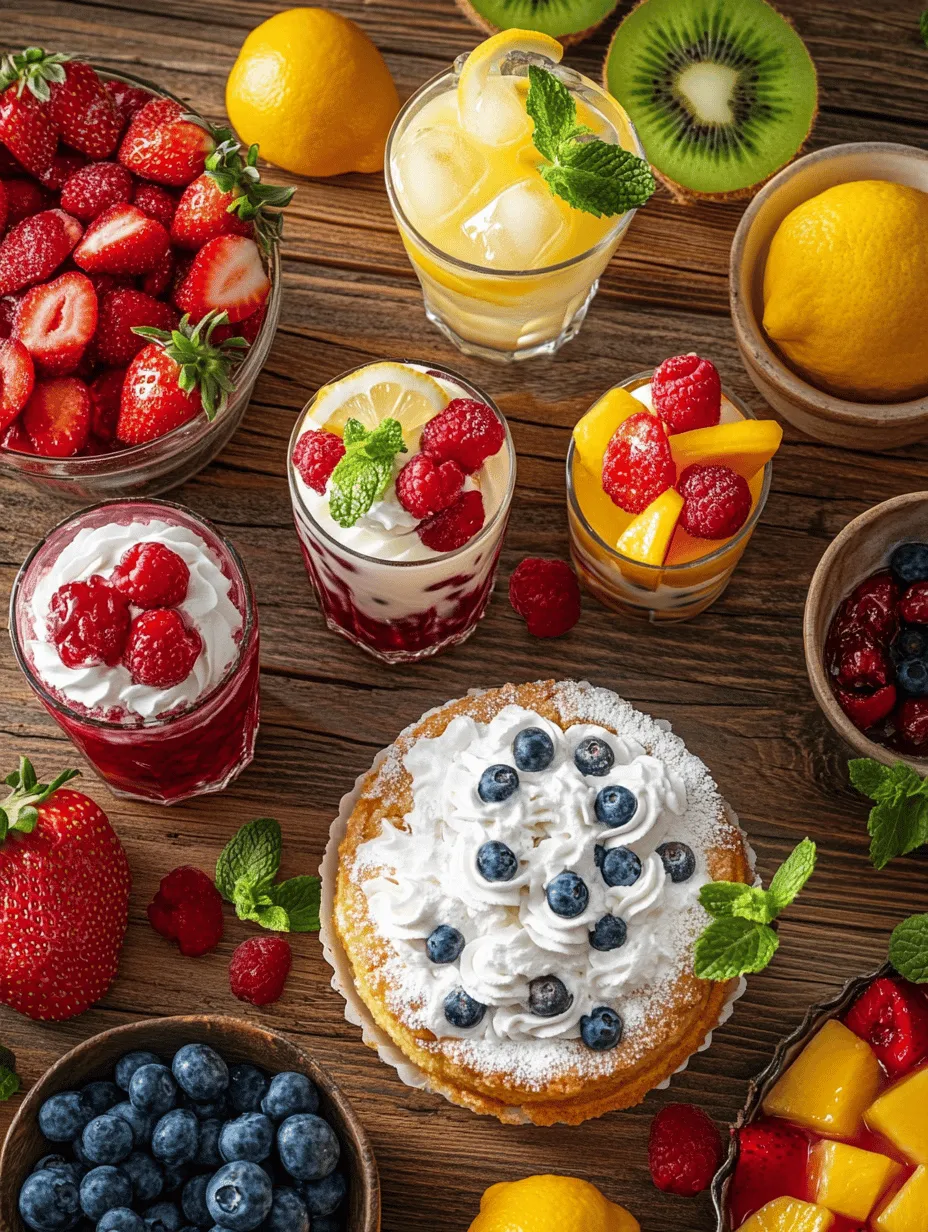
The Visual Appeal of Fresh Summer Berries
What truly sets this dessert apart is the vibrant colors of fresh summer berries. Picture a medley of deep red strawberries, plump blueberries, and bright raspberries, all artfully arranged in a baking dish. The contrasting hues create a stunning visual display that is sure to impress your guests. Not only do these berries look beautiful, but they also provide essential vitamins and antioxidants, making this dessert a guilt-free indulgence.
Ingredient Spotlight
To create the perfect Sweet Berry Bake, it’s important to understand the role of each ingredient.
– All-Purpose Flour: This kitchen staple serves as the backbone of the bake, providing structure and stability. Its versatility allows it to blend seamlessly with other ingredients, making it ideal for both sweet and savory dishes.
– Butter: The unsung hero of this recipe, butter is essential for achieving the rich, tender texture that defines a great bake. It adds a depth of flavor that enhances the overall taste, creating a delightful contrast to the fresh berries.
– Fresh Berries: The star of the show! Using a combination of strawberries, blueberries, and raspberries ensures a well-rounded flavor profile. The freshness of the berries is crucial, as it elevates the dish from ordinary to extraordinary. Look for berries that are firm, plump, and brightly colored for the best results.
Step-by-Step Instructions
Creating the Sweet Berry Bake is a straightforward process that allows even novice bakers to shine. Here’s a detailed look at each step in crafting this summer delight:
1. Preheat Your Oven: Begin by preheating your oven to 350°F (175°C). This step ensures that your bake cooks evenly and achieves that perfect golden crust.
2. Prepare the Baking Dish: Lightly grease a 9×13-inch baking dish with butter or cooking spray. This will prevent the bake from sticking and make for easier serving.
3. Mix the Berries: In a large mixing bowl, combine your selection of fresh berries. Gently toss them with a tablespoon of sugar and a tablespoon of cornstarch. This will help to thicken the berry juices as they bake, creating a luscious filling.
4. Make the Topping: In another bowl, combine the all-purpose flour, sugar, baking powder, and a pinch of salt. Use a pastry cutter or your fingers to incorporate softened butter into the dry mixture until it resembles coarse crumbs.
5. Assemble the Bake: Pour the berry mixture into the prepared baking dish, spreading it evenly across the bottom. Sprinkle the crumbly topping over the berries, ensuring it covers them well.
6. Bake: Place the baking dish in the preheated oven and bake for about 30-35 minutes, or until the topping is golden brown and the berries are bubbling.
7. Cool and Serve: Allow the Sweet Berry Bake to cool slightly before serving. This dish can be enjoyed warm or at room temperature. Consider serving it with a dollop of whipped cream or a scoop of vanilla ice cream for an extra touch of indulgence.
Tips for Achieving the Best Results
– Choose Ripe Berries: The quality of your berries will significantly affect the flavor of the bake. Visit local farmers’ markets or grocery stores to find the freshest options available.
– Adjust Sweetness to Taste: Depending on the ripeness of your berries, you may want to adjust the amount of sugar used in the recipe. Taste the berries before adding sugar to ensure a balanced sweetness.
– Experiment with Flavors: Feel free to add a splash of vanilla extract or a sprinkle of cinnamon to the topping for an extra layer of flavor. You can also try incorporating other fruits, such as peaches or cherries, for a unique twist.
Serving Suggestions
The Sweet Berry Bake is a versatile dessert that can be served in various ways. For a classic touch, top each slice with freshly whipped cream or vanilla ice cream. For a healthier option, consider serving it with a dollop of Greek yogurt and a drizzle of honey. This bake also pairs beautifully with a cup of tea or coffee, making it a delightful addition to any summer gathering or brunch.
Quenching Thirst with Refreshing Lemonade
No summer occasion is complete without a refreshing glass of homemade lemonade. This timeless beverage is synonymous with summer, evoking memories of backyard barbecues and lazy afternoons spent under the sun. The tangy sweetness of freshly squeezed lemons combined with the right balance of sugar and water creates a thirst-quenching drink that is sure to please.
The Timeless Appeal of Homemade Lemonade
Homemade lemonade is more than just a beverage; it’s a nostalgic experience that transports you back to simpler times. Whether you’re hosting a summer party or simply enjoying a quiet evening at home, sipping on a glass of lemonade instantly brightens the mood and refreshes the spirit. The best part is that making lemonade from scratch is incredibly simple and requires just a few key ingredients.
Ingredient Overview
To achieve the perfect lemonade, it’s essential to focus on the quality of your ingredients.
– Freshly Squeezed Lemon Juice: The star ingredient in any lemonade, freshly squeezed lemon juice provides the vibrant flavor and acidity that defines this drink. Bottled lemon juice lacks the brightness and freshness of the real thing, making it worth the extra effort to squeeze your own.
– Balance of Sugar and Water: Achieving the perfect balance between sugar and water is crucial for a well-rounded lemonade. Too much sugar can mask the tartness of the lemons, while too little can leave it overly sour. Start with a basic ratio and adjust to your taste preferences.
Preparation Steps
Making refreshing lemonade is a straightforward process that can be completed in just a few simple steps:
1. Juice the Lemons: Begin by rolling the lemons on a countertop to loosen the juice. Cut them in half and use a citrus juicer or your hands to extract the juice into a measuring cup. For a recipe serving four, you’ll need about one cup of fresh lemon juice.
2. Combine Ingredients: In a pitcher, combine the freshly squeezed lemon juice with four cups of cold water. Add sugar gradually, starting with one cup, and stir until dissolved. Taste the lemonade and adjust the sweetness as needed.
3. Chill: Refrigerate the lemonade for at least 30 minutes to allow the flavors to meld and to serve it cold.
4. Serve Over Ice: When ready to serve, pour the lemonade into glasses filled with ice. Garnish with lemon slices or fresh mint for an extra touch of elegance.
Importance of Chilling and Serving Over Ice
Chilling your lemonade is essential to enhance its refreshing qualities. The cold temperature not only makes for a more enjoyable drink on a hot summer day but also helps to meld the flavors together. Serving it over ice further elevates the experience, ensuring that your lemonade stays cool and revitalizing.
With this guide, you are well on your way to creating a delightful collection of sweet summer treats that celebrate the flavors of the season. Each recipe showcases the joy of cooking with fresh ingredients, and the Sweet Berry Bake and Refreshing Lemonade are just the beginning of your summer culinary adventure. Stay tuned for more delicious recipes that will keep you inspired and satisfied all summer long!

Variations to Consider
When it comes to sweet summer treats, creativity knows no bounds. Here are a few delightful variations to consider for the classic recipes we’ve discussed. For the no-bake strawberry shortcake, you might swap strawberries for other seasonal fruits like peaches or blueberries, allowing you to tailor the dessert to your taste preferences. Alternatively, consider layering in some lemon curd or mascarpone cheese for an extra zing of flavor and creaminess.
For the tropical fruit tart, you can mix and match your fruits based on availability and preference. Consider using mango, kiwi, or passionfruit for an even more vibrant tart. You could also infuse your tart filling with coconut cream to enhance the tropical flavor profile or add a hint of lime zest for brightness. Each variation can create a new experience, keeping your summer treat repertoire exciting.
Suggestions for Flavoring Lemonade with Herbs or Fruits
Enhancing your homemade lemonade can elevate this classic summer beverage to a refreshing masterpiece. Consider infusing your lemonade with herbs such as mint, basil, or rosemary. Simply muddle the herbs in a glass before adding lemonade, allowing their essential oils to permeate the drink.
Fruits can also bring a burst of flavor to your lemonade. Try adding slices of fresh ginger for a spicy kick or muddling fresh berries for a sweet and colorful twist. Cucumber slices can add a refreshing note, while a splash of sparkling water can make it bubbly and festive. Experimenting with these additions can turn your lemonade into a signature summer drink that impresses family and friends alike.
Indulging in No-Bake Strawberry Shortcake
Introduction to the No-Bake Concept
No-bake desserts have become a cornerstone of summer cooking, particularly for those hot afternoons when turning on the oven feels like an unwelcome effort. The beauty of no-bake recipes lies in their simplicity and the ability to create delectable treats without the need for extensive cooking techniques. They offer a light, refreshing alternative that perfectly complements the warm weather, allowing for maximum enjoyment of seasonal ingredients.
Advantages of No-Bake Desserts in Hot Weather
No-bake desserts are perfect for hot weather not only because they keep your kitchen cool but also because they often highlight fresh fruits and lighter textures. They are quick to prepare, making them ideal for impromptu gatherings or when you want a sweet treat without the fuss. These desserts typically require minimal ingredients and can be made ahead of time, freeing you up to enjoy the sunshine.
Highlighting Ingredients
Fresh Strawberries: Strawberries are the star of our no-bake shortcake. Bursting with flavor, they are also packed with vitamins C and K, fiber, and antioxidants, making them a nutritious choice for dessert. Their sweet, juicy nature pairs perfectly with creamy textures, creating a delightful contrast.
The Role of Whipped Cream: Whipped cream is essential in this dessert, providing a light and airy texture that enhances the overall experience. It serves as both a filling and a topping, adding richness without overwhelming the freshness of the strawberries.
Assembly Instructions
Step-by-step Guide to Assembling the Shortcake
1. Prepare the Strawberries: Start by washing and slicing about 2 cups of fresh strawberries. Toss them with a tablespoon of sugar to macerate, allowing them to release their juices and create a delicious syrup.
2. Make the Whipped Cream: In a mixing bowl, combine 1 cup of heavy whipping cream, 2 tablespoons of powdered sugar, and 1 teaspoon of vanilla extract. Beat with a hand mixer or stand mixer until soft peaks form.
3. Layer the Ingredients: In a large serving dish or individual cups, layer the ingredients. Begin with a layer of whipped cream, followed by a generous layer of macerated strawberries. Repeat the layers until you reach the top, finishing with a dollop of whipped cream and a few strawberry slices for garnish.
4. Chill: Let the assembled dessert chill in the refrigerator for at least 30 minutes. This allows the flavors to meld beautifully and ensures a refreshing experience when served.
Tips for Perfect Layering and Presentation
– Use Clear Containers: If you’re serving individual portions, consider using clear glasses or jars. This allows your guests to see the beautiful layers of strawberries and cream, enhancing visual appeal.
– Garnish Creatively: Add mint leaves or a sprinkle of crushed graham crackers on top for an appealing presentation. A light dusting of cocoa powder can also add a sophisticated touch.
– Ensure Even Layers: Use an offset spatula or the back of a spoon to create smooth, even layers of whipped cream and strawberries for a polished look.
Serving Ideas
For serving, consider pairing your no-bake strawberry shortcake with a refreshing glass of lemonade or iced tea to complement the sweetness of the dessert. You can also serve it alongside a scoop of homemade vanilla ice cream for added indulgence.
If you’re hosting a gathering, consider making a large batch and serving it in a trifle dish, allowing guests to help themselves. This not only makes for a beautiful centerpiece but also adds a communal feel to the dessert experience.
Creating a Tropical Escape with Tropical Fruit Tart
Description of the Tropical Fruit Tart
The tropical fruit tart is a vibrant and enticing dessert that brings the taste of summer to your table. With a crisp, buttery crust filled with a creamy filling and topped with an assortment of colorful tropical fruits, this tart is as much a feast for the eyes as it is for the palate. The combination of flavors and textures creates a refreshing escape, making it a perfect choice for summer gatherings.
Visual Appeal and Exotic Flavors
The visual appeal of a tropical fruit tart lies in its colorful fruit topping, which can include slices of kiwi, mango, pineapple, and berries. The bright colors and varied textures make it an eye-catching centerpiece for any dessert table. The tart’s sweet and tart flavors, combined with the creamy filling, create a delightful balance that is sure to impress any guest.
Ingredient Breakdown
Premade Tart Shell: For convenience, using a premade tart shell saves you time and effort, allowing you to focus on the filling and fruit toppings. Look for a high-quality pastry shell to ensure a buttery and flaky crust.
Assorted Tropical Fruits: A mix of tropical fruits not only adds flavor but also provides nutritional benefits. Fruits like mango and kiwi are rich in vitamins A and C, while pineapple offers digestive enzymes that can aid in digestion. The combination of different fruits adds layers of flavor and visual interest to the tart.
Detailed Instructions
Steps for Assembling the Tart and Achieving a Glossy Finish
1. Prepare the Tart Shell: If using a premade tart shell, follow the package instructions for any necessary baking or cooling. Allow it to cool completely before filling.
2. Make the Cream Filling: In a mixing bowl, combine 1 cup of cream cheese, 1/2 cup of powdered sugar, and 1 teaspoon of vanilla extract. Mix until smooth and creamy. Fold in 1 cup of whipped cream to create a light and fluffy filling.
3. Fill the Tart Shell: Spoon the cream filling into the cooled tart shell, spreading it evenly with a spatula.
4. Arrange the Fruits: Slice your tropical fruits and artfully arrange them on top of the cream filling. Start with larger slices like mango and pineapple, and fill in the gaps with smaller fruits like berries and kiwi.
5. Glaze for Shine: To achieve a glossy finish, prepare a simple fruit glaze by heating 1/4 cup of apricot jam with a splash of water until melted. Brush this glaze over the arranged fruit for a beautiful sheen.
6. Chill Before Serving: Refrigerate the tart for at least 1 hour before serving to allow the flavors to meld and the filling to set.
Importance of Chilling for Flavor Integration
Allowing the tart to chill not only helps set the filling but also allows the flavors to integrate. This resting period enhances the overall taste and ensures that each bite is as delicious as possible.
Presentation Tips
When serving the tropical fruit tart, consider placing it on a decorative platter to showcase its beauty. You can garnish with fresh mint leaves or a light dusting of powdered sugar for added flair. For an extra touch, serve slices with a dollop of whipped cream or a scoop of coconut sorbet to enhance the tropical experience.
Conclusion
Sweet summer treats not only celebrate the vibrant flavors of the season but also create cherished memories with family and friends. The joy of making a no-bake strawberry shortcake or a tropical fruit tart lies in the fresh, seasonal ingredients that highlight the essence of summer cooking.
Embrace the simplicity and joy of these recipes, and take the time to gather with loved ones around the table, sharing laughter, stories, and delicious treats. Whether you’re enjoying a lazy afternoon or hosting a lively gathering, these sweet summer treats are sure to bring happiness and warmth to every occasion. So, indulge in the simple pleasures of summer through cooking, and savor each delightful bite together.
