Introduction
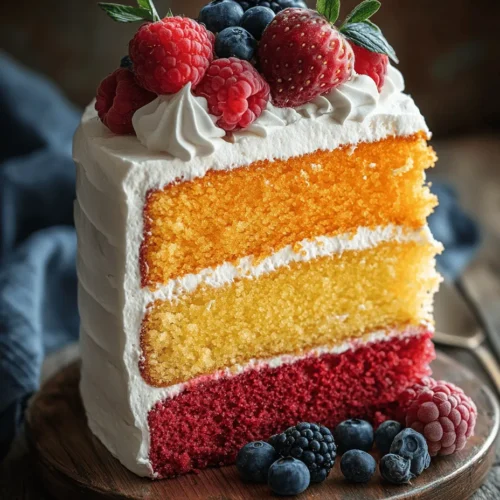
The Sweet Sunset Cake is a delightful dessert that captures the vivid colors of a sunset in a delicious slice. With its gorgeous gradient of hues ranging from soft yellows to vibrant oranges and pinks, this cake is not only a feast for the taste buds but also a visual masterpiece that adds charm to any occasion. Whether you are celebrating a birthday, an anniversary, or simply hosting a gathering with friends and family, this cake will undoubtedly steal the spotlight and leave a lasting impression.
The inspiration behind the Sweet Sunset Cake stems from the breathtaking beauty of sunsets that we often witness at the end of the day. Just as the sky transforms with brilliant colors, this cake layers different shades to create a stunning visual effect. It’s a perfect reminder that life is filled with beautiful moments, making it an ideal centerpiece for celebrations that honor those cherished times.
Visually appealing desserts play a significant role in gatherings, as they not only satisfy our cravings but also serve as conversation starters. The Sweet Sunset Cake embodies this sentiment perfectly; it invites guests to indulge in its layers while sparking joy and eliciting smiles. Its vibrant colors and flavors make it a versatile choice that resonates with both adults and children, ensuring that everyone at the table feels included in the celebration.
Understanding the Ingredients
Creating the perfect Sweet Sunset Cake requires a thoughtful selection of ingredients, each playing a vital role in the overall flavor, texture, and visual appeal of the dessert. Here’s a closer look at the essential components that come together to make this cake a true delight.
Flour
Flour is the foundation of any cake, providing the necessary structure and texture. In the Sweet Sunset Cake, all-purpose flour is typically used to achieve a light and fluffy crumb. The gluten proteins in the flour develop during mixing, giving the cake its stability and allowing it to rise beautifully as it bakes.
Sugar
Sugar serves a dual purpose in baking; it sweetens the cake and helps retain moisture. In the Sweet Sunset Cake, granulated sugar is essential for achieving a balanced sweetness that complements the other flavors. Additionally, sugar contributes to the cake’s tenderness and creates a delightful crust on the surface, giving it an appealing texture.
Butter
Butter plays a critical role in adding richness and flavor to the Sweet Sunset Cake. The creamy texture of butter helps to create a moist cake with a velvety crumb. When creamed with sugar, it introduces air into the mixture, which contributes to the cake’s leavening and ensures a light and airy final product.
Milk
Milk is another key ingredient that enhances the tenderness of the cake. It hydrates the dry ingredients and helps to create a smooth batter. The fat content in milk also adds creaminess, further enriching the flavor and texture of the cake. Whole milk is often preferred for its richness, but you can substitute with any milk of your choice, including dairy-free alternatives.
Eggs
Eggs are essential in cake baking for their binding and leavening properties. They help to hold the ingredients together, ensuring that the cake maintains its shape. The proteins in eggs also provide structure, while the yolks contribute moisture and richness. For the Sweet Sunset Cake, it is important to incorporate the eggs at room temperature, as this allows for better emulsification and a smoother batter.
Baking Powder
Baking powder is the leavening agent responsible for the cake’s rise. When combined with the liquid ingredients, it produces carbon dioxide gas, which creates air pockets within the batter. This reaction is what allows the Sweet Sunset Cake to rise and achieve its fluffy texture. It’s important to use fresh baking powder to ensure optimal results.
Vanilla Extract
Vanilla extract is the secret ingredient that elevates the flavor profile of the Sweet Sunset Cake. Its aromatic quality enhances the overall taste, making each bite more enjoyable. The warm and comforting essence of vanilla pairs beautifully with the other ingredients, creating a harmonious blend of flavors.
Salt
While salt may seem like a minor ingredient, it plays a crucial role in balancing the sweetness of the cake. A pinch of salt enhances the flavors of the other ingredients and prevents the cake from tasting overly sweet. It’s a vital addition that brings depth and complexity to the overall flavor profile of the Sweet Sunset Cake.
Food Coloring
To achieve the stunning sunset effect, food coloring is essential in creating the vibrant layers of the cake. Gel food coloring is often preferred for its concentrated pigments and ability to produce vivid colors without altering the batter’s consistency. By incorporating different shades of yellow, orange, and pink, you can replicate the beautiful gradient of a sunset, making the cake visually captivating.
Step-by-Step Guide to Making Sweet Sunset Cake
Now that we’ve explored the essential ingredients, let’s dive into the step-by-step process of creating the Sweet Sunset Cake. This guide will help you navigate through the preparation and baking stages, ensuring that you achieve the perfect cake.
Prepping the Oven and Pans
Before you begin mixing your ingredients, it’s essential to prepare your baking environment. Preheat your oven to 350°F (175°C) to ensure that it reaches the proper temperature before you place your cake inside. Preheating is a crucial step, as it allows the cake to rise evenly and creates a well-structured crumb.
Next, prepare your cake pans. Grease two 9-inch round cake pans with butter or cooking spray to prevent the cake from sticking. You can also line the bottoms with parchment paper for added protection. Properly greased pans are vital for easy removal, ensuring that your beautifully baked layers maintain their shape.
Creaming Butter and Sugar
Once your pans are ready, it’s time to cream the butter and sugar together. In a large mixing bowl, combine softened unsalted butter and granulated sugar. Using an electric mixer on medium speed, beat the mixture until it becomes light and fluffy. This process typically takes about 3-5 minutes.
Creaming the butter and sugar properly is crucial, as it incorporates air into the mixture, which contributes to the cake’s light texture. The mixture should appear pale in color and have a smooth consistency, indicating that it is ready for the next step.
Incorporating Eggs and Vanilla
With the butter and sugar mixture ready, it’s time to add the eggs and vanilla extract. Crack in the eggs one at a time, mixing well after each addition to ensure they are fully incorporated. This gradual addition helps to maintain the emulsion and creates a uniform batter.
Once the eggs are combined, add the vanilla extract and mix until evenly distributed. The aroma of vanilla will enhance the flavor profile of the Sweet Sunset Cake, making it even more inviting.
Preparing Dry Ingredients
While the wet ingredients are being mixed, it’s important to prepare the dry ingredients. In a separate bowl, whisk together the all-purpose flour, baking powder, and salt. This step is essential for ensuring that the leavening agent is evenly distributed throughout the flour, preventing any uneven rising during baking.
Whisking the dry ingredients also serves to aerate the flour, which can help create a lighter texture in the final cake. Once combined, set the dry mixture aside as you return to the wet ingredients.
By following these initial steps, you are laying a strong foundation for your Sweet Sunset Cake. The careful preparation and attention to detail will ensure that your cake turns out perfectly, ready to impress your guests with its beauty and flavor. In the next part of this article, we will continue with the process of combining the wet and dry ingredients, adding the food coloring for the sunset effect, and baking the cake to perfection. Stay tuned as we explore more steps to bring this stunning cake to life!
Combining Wet and Dry Ingredients
To achieve the perfect Sweet Sunset Cake, the key is in how you combine the wet and dry ingredients. Start by ensuring that your dry ingredients, which typically include flour, baking powder, and a pinch of salt, are well mixed in a separate bowl. This process helps to evenly distribute the baking powder, which is essential for creating a light and fluffy cake.
In another bowl, combine your wet ingredients, including eggs, sugar, vanilla extract, and oil. It’s important to whisk these ingredients well until they are fully blended and slightly frothy. This aeration will help in creating a light texture in your cake.
Techniques for Alternating Ingredients for Optimal Mixing
When combining your wet and dry ingredients, use the following technique to ensure a smooth batter. Begin by adding a third of the dry mixture to the wet ingredients, gently folding them together using a spatula. Be careful not to overmix; you want to combine the ingredients just until they are incorporated. This method helps to prevent the gluten in the flour from developing too much, which can lead to a dense cake.
Next, add half of the milk (or any liquid you are using), followed by another third of the dry ingredients. Repeat this process, alternating between dry and wet, and ending with the dry ingredients. This method helps maintain the right consistency and keeps the batter from becoming too thick or lumpy.
Dividing and Coloring the Batter
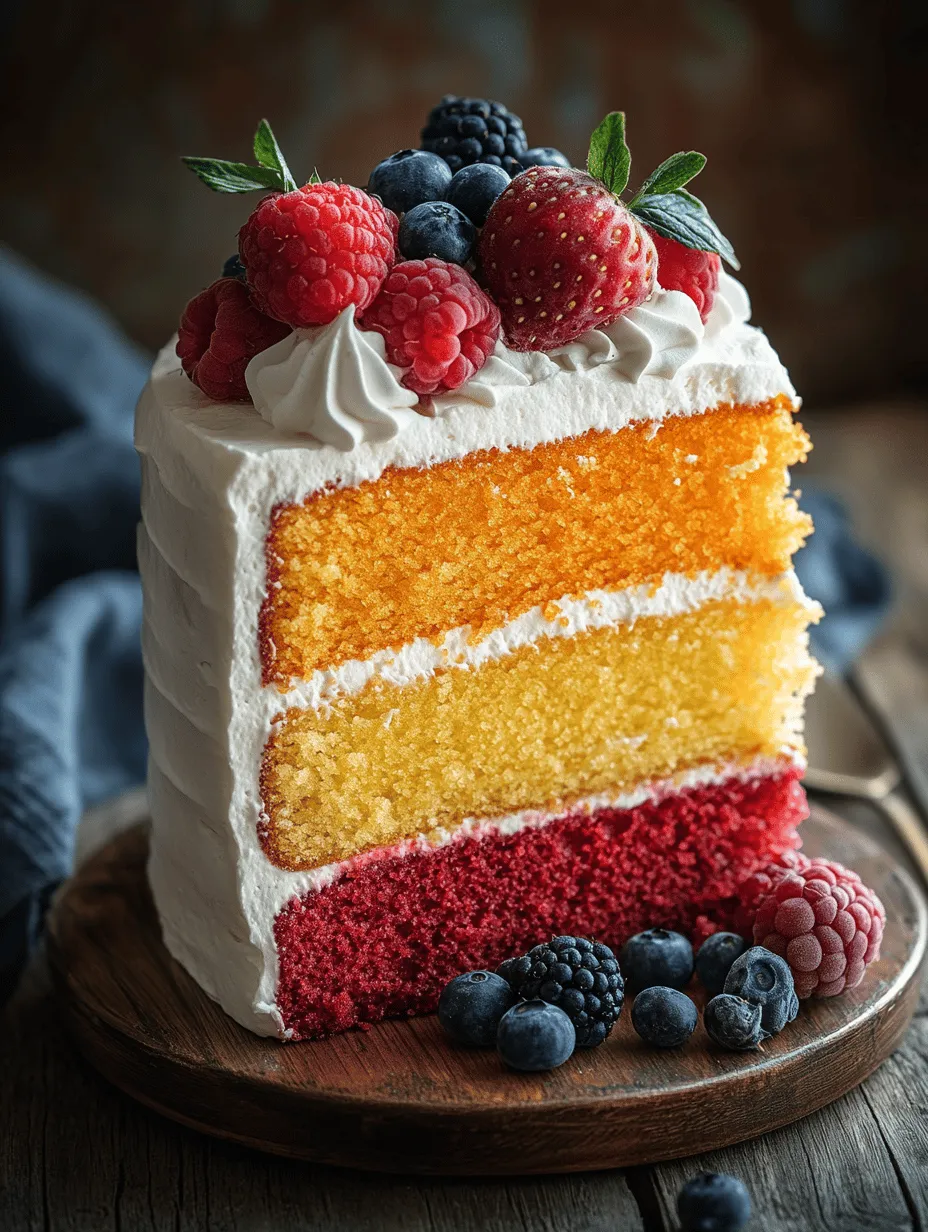
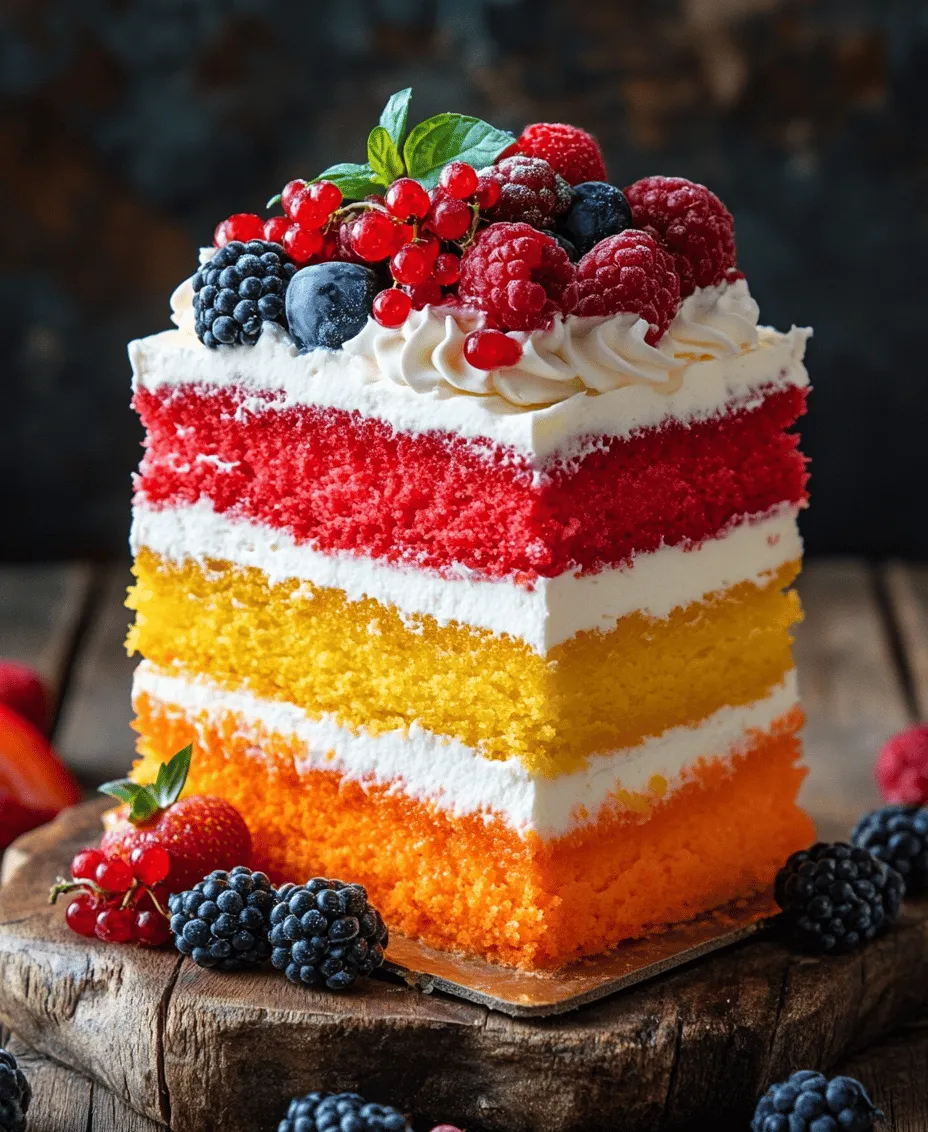
To create the stunning sunset effect, divide your prepared batter into three equal portions. Each portion will be colored differently to represent the beautiful hues of a sunset. For the first layer, use a vibrant yellow food coloring, the second layer can be tinted an orange shade, and the final layer should be a rich red or pink.
Tips for Achieving Vibrant Colors and Avoiding Mixing
When coloring your batter, it’s essential to add the food coloring gradually. Start with a few drops, mix, and then assess if you need a deeper hue. This method allows you to control the color more effectively. Once you achieve your desired shades, be cautious when combining the colors; you want them to remain distinct for a beautiful layered effect. Avoid over-mixing the colored batters to keep the colors from blending into one another.
Layering the Batter
Layering the batter is where the magic happens. Start by greasing and flouring your cake pans to ensure that your cake releases easily after baking. Pour the yellow batter into the center of the first prepared pan and gently spread it to the edges, allowing it to settle naturally. Then, using a spoon, pour the orange batter into the center of the yellow layer. Repeat this layering process with the red batter on top.
Techniques for Creating a Visually Stunning Layered Effect
To create an even more visually stunning effect, you can use a toothpick or skewer to swirl the colors slightly without fully mixing them. This gives the illusion of a sunset gradient. Be careful not to over-swirl, as you want to maintain distinct layers.
Baking the Sweet Sunset Cake
Now that your batter is beautifully layered, it’s time to bake. Preheat your oven to 350°F (175°C). Ensure your oven is at the correct temperature, as baking is a science, and temperature plays a crucial role in the outcome.
Optimal Baking Conditions
Place your cake pans in the center of the oven. This positioning allows for even heat distribution. Bake for 25-30 minutes, but keep an eye on them as ovens can vary in temperature.
Importance of Temperature and Timing
Baking at the correct temperature is vital for achieving a cake that rises properly and cooks evenly. Too high a temperature can cause the cake to dome and crack, while too low can result in a dense, undercooked center.
Signs of Doneness
You can tell your cakes are done when the edges start to pull away from the sides of the pan, and a toothpick inserted into the center comes out clean or with a few moist crumbs attached.
How to Check if the Cake is Fully Baked (Toothpick Test)
To perform the toothpick test, insert a toothpick into the center of the cake. If it comes out clean or with a few crumbs, your cake is ready. If the toothpick has wet batter on it, it needs more time in the oven.
Cooling and Frosting the Cake
Once your cakes are baked to perfection, the next step is cooling. Proper cooling techniques are essential to prevent sogginess.
Proper Cooling Techniques to Prevent Sogginess
Allow the cakes to cool in the pans for about 10 minutes before carefully transferring them to a wire rack. Cooling them in the pans for too long can create steam, making the cakes soggy.
Whipped Cream Frosting
For the frosting, a light and fluffy whipped cream complements the Sweet Sunset Cake beautifully. Here’s a simple recipe for homemade whipped cream:
– 1 cup heavy cream
– 2 tablespoons powdered sugar
– 1 teaspoon vanilla extract
Simple Recipe for Homemade Whipped Cream
In a chilled bowl, combine the heavy cream, powdered sugar, and vanilla extract. Using a hand mixer or a stand mixer, whip the cream on medium speed until soft peaks form. Be careful not to overwhip, as it can turn into butter.
Tips for Achieving the Perfect Consistency
To ensure your whipped cream holds its shape, consider adding a tablespoon of cornstarch or instant pudding mix to the mixture while whipping. This will provide stability and keep your frosting from wilting.
Decorating the Cake
Now it’s time for the fun part—decorating your cake! Use the whipped cream frosting generously to cover the top and sides of your cake. For a more visually appealing finish, consider using a spatula to create swirls or peaks in the frosting.
Ideas for Using Fresh Fruits to Enhance the Sunset Theme
To enhance the sunset theme, consider decorating with fresh fruits that reflect the colors of a sunset. Slices of peaches, strawberries, or even orange segments can be arranged around the top of the cake. Additionally, edible flowers or a sprinkle of edible glitter can add an extra touch of elegance.
Serving Suggestions and Pairings
The Sweet Sunset Cake is perfect for various occasions. Whether it’s a birthday party, a wedding celebration, or a simple family gathering, this cake is sure to impress.
Best Occasions to Serve the Sweet Sunset Cake
This cake’s vibrant colors and delightful flavor make it an excellent choice for summer picnics, beach parties, or brunches. Its cheerful appearance adds a festive touch to any table.
Beverage Pairings that Complement the Cake
When it comes to beverage pairings, consider serving the Sweet Sunset Cake with refreshing iced teas, creamy coffees, or fruity juices. A chilled glass of lemonade or homemade iced hibiscus tea can enhance the cake’s flavors beautifully.
Conclusion
The Sweet Sunset Cake is not just a dessert; it’s a visual masterpiece that brings joy to any gathering. With its vibrant colors and delectable flavors, this cake captures the essence of a beautiful sunset, inviting everyone to indulge in a slice of happiness.
Whether you’re celebrating a special occasion or simply treating yourself, this cake is a delightful creation that you can proudly share with loved ones. So, don your apron, gather your ingredients, and embark on this baking adventure. The joy of creating and sharing such delightful desserts is unparalleled, and the Sweet Sunset Cake is sure to become a cherished favorite in your baking repertoire. Enjoy the process and the rewarding moment when you present your beautifully crafted cake to friends and family!