
When it comes to celebrating summer holidays, few desserts capture the essence of festive gatherings quite like No-Bake Cheesecake Flag Bars. This delightful dessert not only delights the palate but also serves as a stunning centerpiece to your table. The origins of this recipe stem from the classic American cheesecake, which has been a beloved dessert for generations. However, these flag bars take it a step further by incorporating a visually striking presentation that mimics the American flag, making them a perfect choice for Independence Day, Memorial Day, or any patriotic celebration.
The Appeal of No-Bake Desserts
As the temperatures rise and the days grow longer, the appeal of no-bake desserts becomes even more pronounced. These recipes offer a convenient way to enjoy a sweet treat without the need for an oven, allowing you to keep your kitchen cool during those hot summer months. No-bake desserts are not only easy to assemble but also allow for creativity in presentation. The No-Bake Cheesecake Flag Bars bring together the rich, creamy texture of cheesecake with the vibrant colors of fresh fruit, making them an inviting dessert that’s sure to impress.
A Visual and Festive Delight
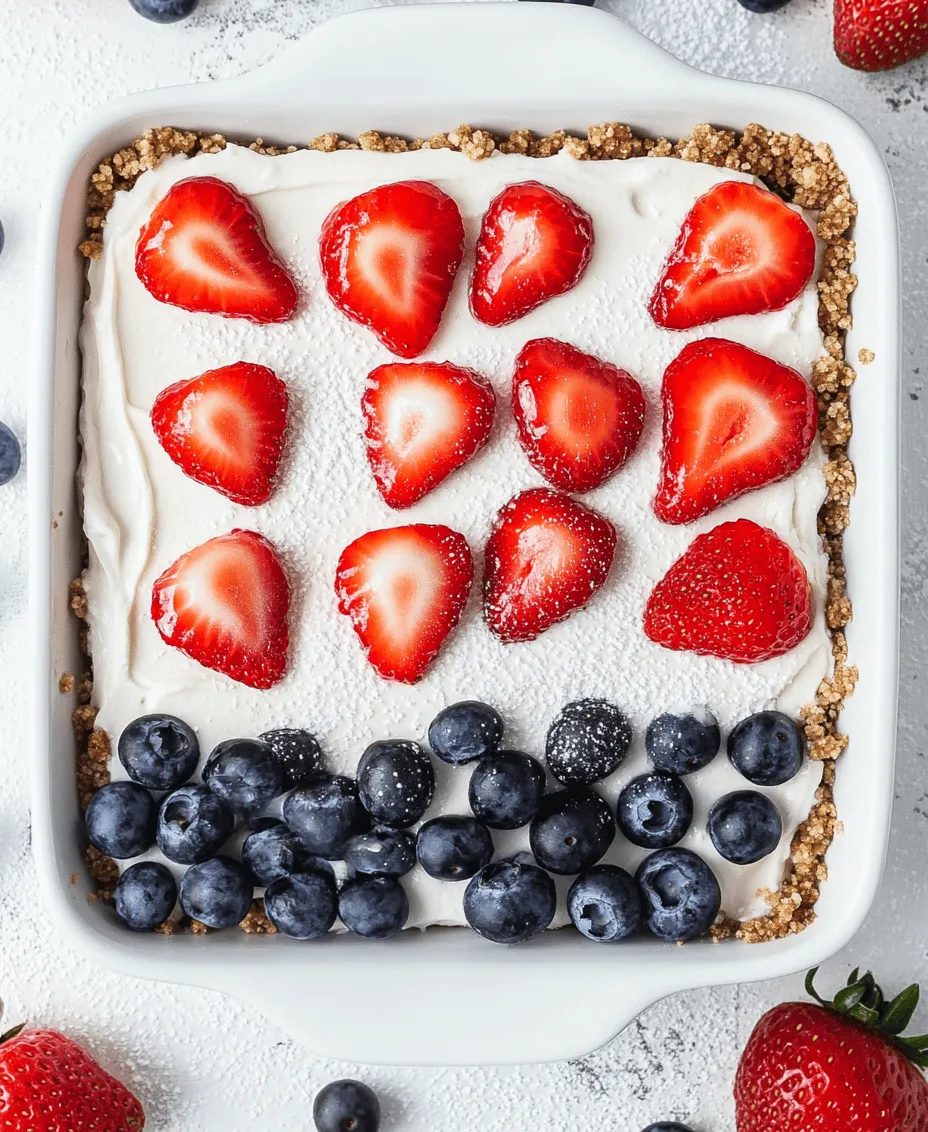
The No-Bake Cheesecake Flag Bars are not just delicious; they are visually stunning. The vibrant red strawberries and deep blue blueberries create a striking contrast against the creamy white cheesecake filling, perfectly representing the colors of the American flag. This dessert is perfect for sharing at family gatherings, barbecues, or potlucks, as it adds a festive touch to any occasion. The appeal is not just in its aesthetics; the combination of flavors and textures—from the crunchy graham cracker crust to the smooth cheesecake filling—offers a delightful experience for all who indulge.
Understanding the Ingredients
To create the perfect No-Bake Cheesecake Flag Bars, it’s essential to understand the role each ingredient plays in the final product. This recipe relies on a handful of key components, each contributing to the overall flavor, texture, and visual appeal of the dessert.
Graham Cracker Crumbs
The foundation of the No-Bake Cheesecake Flag Bars is the graham cracker crust. Graham cracker crumbs provide a sweet and slightly nutty flavor that serves as the perfect base for the creamy filling. The texture of the crumbs adds a satisfying crunch that contrasts beautifully with the smoothness of the cheesecake. When mixed with unsalted butter and sugar, the crumbs bind together to form a sturdy yet tender crust that holds the bars together.
Unsalted Butter
Unsalted butter is crucial in this recipe, enhancing both the flavor and texture of the crust. By using unsalted butter, you have better control over the overall saltiness of the dessert, allowing the sweetness to shine through. The melted butter acts as a binding agent, helping the graham cracker crumbs stick together while also imparting a rich, buttery flavor that elevates the entire dessert.
Granulated Sugar
Granulated sugar plays a significant role in both the crust and the cheesecake filling. In the crust, it adds sweetness that balances the slight saltiness of the butter and enhances the overall taste of the graham crackers. In the cheesecake filling, granulated sugar helps to balance the tanginess of the cream cheese, ensuring a harmonious flavor profile. The right amount of sugar is essential for achieving that perfect level of sweetness without overpowering the other flavors.
Cream Cheese
As the star ingredient in this recipe, cream cheese is what gives the cheesecake its signature richness and creaminess. It provides a smooth texture that melts in your mouth, making each bite a luxurious experience. To achieve the best results, it’s important to use softened cream cheese. This allows for easy mixing, ensuring that the filling is velvety smooth without any lumps. The cream cheese also lends a slight tang, which adds depth to the overall flavor of the cheesecake.
Powdered Sugar
In addition to granulated sugar, powdered sugar is used in the cheesecake filling. The fine texture of powdered sugar allows it to blend seamlessly into the cream cheese, contributing to a silky smooth consistency. It also adds sweetness while helping to stabilize the filling, making it less prone to separation. The combination of granulated sugar and powdered sugar creates a balanced sweetness that enhances the flavor without being overwhelming.
Vanilla Extract
Vanilla extract is a simple yet powerful ingredient that adds depth and complexity to the cheesecake filling. A splash of pure vanilla extract enhances the overall flavor profile, complementing the cream cheese and sugar. The aromatic nature of vanilla elevates the dessert, making it even more appealing.
Heavy Cream
Heavy cream is essential for achieving the right texture and stability in the cheesecake filling. When whipped, heavy cream adds lightness and volume, creating a fluffy texture that contrasts nicely with the denser crust. It also helps to stabilize the filling, ensuring that the cheesecake holds its shape once chilled. The richness of heavy cream contributes to the overall indulgence of the dessert, making each bite a decadent treat.
Fresh Strawberries and Blueberries
No dessert is complete without the finishing touches, and for the No-Bake Cheesecake Flag Bars, fresh strawberries and blueberries are the stars of the show. These fruits not only provide vibrant colors that mimic the American flag, but they also add nutritional benefits. Strawberries are rich in vitamin C, antioxidants, and fiber, while blueberries are known for their health-promoting properties, including high levels of antioxidants. The natural sweetness and tartness of the fruits balance the richness of the cheesecake filling, making for a refreshing end to your meal.
Step-by-Step Instructions for Preparation
Now that we have a good understanding of the ingredients, let’s dive into the step-by-step process for preparing these No-Bake Cheesecake Flag Bars. This straightforward method ensures that even novice bakers can achieve delicious results.
Preparing the Crust
1. Gather Your Ingredients: Start by measuring out 2 cups of graham cracker crumbs, 1/2 cup of granulated sugar, and 1/2 cup of unsalted butter. Have these ready to go for an efficient prep.
2. Melt the Butter: In a small saucepan over low heat or in a microwave, melt the unsalted butter until it is completely liquefied. Allow it to cool slightly before mixing it with the dry ingredients.
3. Mix the Dry Ingredients: In a large mixing bowl, combine the graham cracker crumbs and granulated sugar. Stir until well combined to ensure that the sugar is evenly distributed throughout the crumbs.
4. Combine the Mixtures: Pour the melted butter into the bowl with the graham cracker mixture. Using a spatula or wooden spoon, mix until all the crumbs are evenly coated with butter. The mixture should resemble wet sand and hold together when pressed.
5. Press the Crust into the Pan: Transfer the crumb mixture into a 9×13-inch baking dish. Press it firmly into the bottom of the dish using the back of a measuring cup or your fingers. Ensure that the crust is evenly distributed and compacted to create a solid base for your cheesecake filling.
6. Chill the Crust: Place the crust in the refrigerator while you prepare the cheesecake filling. Chilling the crust will help it set and maintain its shape when you add the filling.
Making the Cheesecake Filling
1. Soften the Cream Cheese: Before starting on the filling, make sure your cream cheese is at room temperature. This step is crucial for achieving a smooth and creamy texture. If you’re short on time, you can cut the cream cheese into smaller pieces to help it soften more quickly.
2. Mix the Cream Cheese: In a large mixing bowl, beat the softened cream cheese using an electric mixer on medium speed until it is light and fluffy. This process usually takes about 2-3 minutes. Ensure there are no lumps for the best texture.
3. Add the Sweeteners: Gradually add the granulated sugar and powdered sugar to the cream cheese, mixing well after each addition. Continue to beat until the mixture is smooth and fully combined.
4. Incorporate the Vanilla: Add the vanilla extract to the cream cheese mixture, mixing until fully incorporated. The vanilla should blend seamlessly, adding a lovely aroma and flavor to your filling.
5. Whip the Heavy Cream: In a separate bowl, whip the heavy cream until stiff peaks form. This will give the cheesecake filling its light and airy texture. Be careful not to over-whip, as this can lead to a grainy texture.
6. Fold in the Whipped Cream: Gently fold the whipped cream into the cream cheese mixture, taking care not to deflate the air you’ve just incorporated. Use a spatula to combine the two mixtures until they are fully blended and smooth.
7. Spread the Filling: Remove the graham cracker crust from the refrigerator and pour the cheesecake filling over the chilled crust. Use a spatula to spread it evenly, ensuring that the filling reaches all corners of the dish.
With the crust and filling prepared, your No-Bake Cheesecake Flag Bars are well on their way to becoming a reality. The next steps will involve decorating with fresh fruit to create the flag design and chilling the dessert until it sets perfectly. Stay tuned for the final touches that will make this dessert not only delicious but also a feast for the eyes.
Folding in the whipped cream is a crucial step in creating the airy texture that characterizes no-bake cheesecakes. To achieve this, gently add the whipped cream to the cream cheese mixture in small batches. Using a rubber spatula, fold the whipped cream into the mixture by scooping from the bottom and turning the mixture over itself. This technique incorporates air without deflating the whipped cream, ensuring that your cheesecake remains light and fluffy. Be patient and continue folding until there are no streaks of whipped cream visible and the mixture is uniform in color.
Techniques for Maintaining Lightness and Airiness
Maintaining the lightness and airiness of your cheesecake is essential for achieving that luxurious texture. Here are some effective techniques:
1. Use Room Temperature Ingredients: Make sure your cream cheese is at room temperature before mixing. This ensures a smoother blend and helps avoid lumps that can weigh down the mixture.
2. Don’t Overmix: When combining the whipped cream with the cream cheese mixture, be careful not to overmix. Overmixing can cause the whipped cream to lose its volume and lead to a denser cheesecake.
3. Chill Your Mixing Bowl: For optimal results, chill your mixing bowl and beaters before whipping the cream. Cold equipment helps the cream whip faster and increases volume.
Assembling the Bars
Now that you have your creamy filling ready, it’s time to assemble the cheesecake bars. Start by spreading a layer of the cheesecake filling evenly over the graham cracker crust in your prepared baking dish. Use an offset spatula or the back of a spoon to smooth the surface.
Tips for Spreading the Filling Evenly
To ensure an even layer of filling:
– Start in the Center: Spoon the filling into the center of the crust and gently push it towards the edges.
– Use a Spatula: An offset spatula is ideal for spreading, as it allows you to glide smoothly over the surface without disturbing the crust.
– Check for Air Bubbles: After spreading, gently tap the baking dish on the counter to release any air bubbles trapped in the filling.
Creating the Flag Pattern
For a festive and visually striking presentation, creating a flag pattern with fresh fruit is a delightful touch. Use blueberries and strawberries to mimic the stars and stripes of the American flag:
1. Blueberry Stars: In the top left corner of the cheesecake, arrange a cluster of blueberries to represent the stars. You can use about 1 cup of blueberries for this section.
2. Strawberry Stripes: Slice fresh strawberries into thin pieces. Arrange them in horizontal rows across the cheesecake to create the stripes. Alternate with rows of blueberries to enhance the flag effect.
3. Precision is Key: Take your time with this step to ensure that the fruit arrangement is neat and visually appealing.
Suggestions for Arranging Fruit for Maximum Visual Effect
For the best presentation:
– Color Contrast: Choose ripe, vibrant fruits to create a striking contrast against the creamy cheesecake. The red strawberries and blue blueberries pop beautifully against the white filling.
– Uniformity: Aim for uniform cuts of fruit for a polished look. This consistency helps the flag pattern appear more professional and intentional.
– Garnish with Fresh Mint: A few sprigs of fresh mint can add a touch of green, enhancing the overall color scheme and freshness.
Setting the Cheesecake
Once the flag pattern is complete, it’s time to let your cheesecake set. Gently cover the baking dish with plastic wrap or aluminum foil, ensuring it does not touch the surface of the cheesecake to avoid marks. Place the cheesecake in the refrigerator for at least 4-6 hours or overnight for the best results. This chilling time allows the cheesecake to firm up and makes it easier to cut into bars.
Importance of Refrigeration Time for Optimal Texture
Refrigeration is crucial for achieving the perfect texture in no-bake cheesecakes. The cooling process allows the filling to firm up, resulting in a sliceable dessert that holds its shape. Skipping this step can lead to a runny or overly soft cheesecake that won’t hold together when served.
Nutritional Information
When it comes to desserts, understanding the nutritional information can help you make informed decisions. Here’s a breakdown of the calories and macronutrient content per serving of these No-Bake Cheesecake Flag Bars (based on a standard recipe serving 12):
– Calories: Approximately 250 per bar
– Fat: 15g
– Carbohydrates: 25g
– Protein: 4g
– Sugar: 15g
Discussion on the Health Benefits of Using Fresh Fruit
One of the standout features of this recipe is the use of fresh fruit, which not only enhances flavor but also delivers nutritional benefits:
– Vitamins and Antioxidants: Berries are rich in vitamins such as vitamin C and antioxidants that support overall health.
– Fiber: Fresh fruit adds fiber to your dessert, which aids in digestion and contributes to a feeling of fullness.
– Natural Sweetness: Using fruit allows you to reduce added sugars without compromising on sweetness, making the dessert a bit healthier.
Options for Reducing Sugar or Using Alternative Ingredients
For those looking for a lighter option, consider the following substitutions:
– Sugar Alternatives: Use natural sweeteners like stevia, monk fruit, or agave nectar to lower the sugar content.
– Lower-Fat Cream Cheese: Opt for a lower-fat cream cheese or Greek yogurt to reduce calories while maintaining creaminess.
– Whole Wheat Crust: Substitute traditional graham crackers with whole wheat or nut-based crusts for added fiber and nutrients.
Serving Suggestions and Presentation Ideas
Once your No-Bake Cheesecake Flag Bars have set, it’s time to serve them up in style. Here are some creative ways to present this delightful dessert:
1. Plating: Cut the cheesecake into bars and arrange them on a decorative platter. Consider using a white plate to allow the vibrant colors of the fruit to stand out.
2. Garnishing: Drizzle a homemade berry sauce or chocolate sauce over the cheesecake bars for an elegant touch. A sprinkle of crushed nuts can also add texture.
3. Pairing with Beverages: These cheesecake bars pair wonderfully with a variety of drinks. Consider serving them with:
– Iced Tea: A refreshing glass of unsweetened iced tea or a fruity herbal tea complements the rich flavors.
– Sparkling Water: Flavored sparkling water adds a light, bubbly contrast without overwhelming sweetness.
– Coffee: A rich cup of coffee or espresso can balance the sweetness of the dessert and enhance the overall experience.
Occasions for No-Bake Cheesecake Flag Bars
These No-Bake Cheesecake Flag Bars are perfect for a variety of occasions, making them a versatile addition to your dessert repertoire. Here are some ideas for when to serve them:
– Fourth of July Celebrations: Their patriotic flag design makes them an ideal treat for Independence Day festivities.
– Summer Parties and Picnics: Perfect for outdoor gatherings, these bars are easy to transport and serve, making them a hit at summer events.
– Birthday Parties: Customize the fruit arrangement to match the birthday theme, and you have a crowd-pleasing dessert.
Discussing the Recipe’s Versatility
While the flag design is particularly festive, the base cheesecake recipe can be easily adapted for other occasions. Consider these variations:
– Seasonal Fruits: Utilize seasonal fruits to change the flavor profile. For example, peaches and blueberries in summer or pumpkin and pecans in the fall.
– Flavor Infusions: Experiment with different flavors by adding extracts like vanilla, almond, or coconut to the cheesecake filling.
– Chocolate Swirls: For chocolate lovers, incorporate melted chocolate into the filling for a rich chocolate cheesecake experience.
Conclusion
The No-Bake Cheesecake Flag Bars are not only a delicious dessert but also a visually stunning centerpiece for any summer gathering. Their light, creamy texture, combined with the fresh fruit topping, creates a delightful treat that is sure to impress your guests.
By following the steps outlined in this recipe and embracing the creative process, you can make these bars a staple in your summer dessert menu. Enjoy the process of making and sharing this festive treat, and don’t hesitate to experiment with flavors and presentations to make it your own. Whether for a holiday celebration or a simple family gathering, these cheesecake bars are destined to be a favorite.