Introduction
If you’re on the hunt for a dessert that is as indulgent as it is easy to make, look no further than the No-Bake Banoffee Cheesecake. This delightful treat brings together the irresistible flavors of ripe bananas, creamy dulce de leche, and velvety cream cheese—all harmoniously combined without the need for an oven. Whether it’s a summer gathering, a holiday feast, or simply a sweet craving, this cheesecake is bound to impress your guests and satisfy your sweet tooth.
The beauty of the No-Bake Banoffee Cheesecake lies not just in its taste, but also in its simplicity. With minimal preparation and a quick assembly, you can create a dessert that looks and tastes like it has come straight from a gourmet kitchen. In this article, we will guide you through the step-by-step process of crafting this luxurious cheesecake, exploring its ingredients, preparation methods, and serving tips that will elevate your dessert game.
Understanding the Banoffee Cheesecake
Overview of Banoffee Flavor Profile
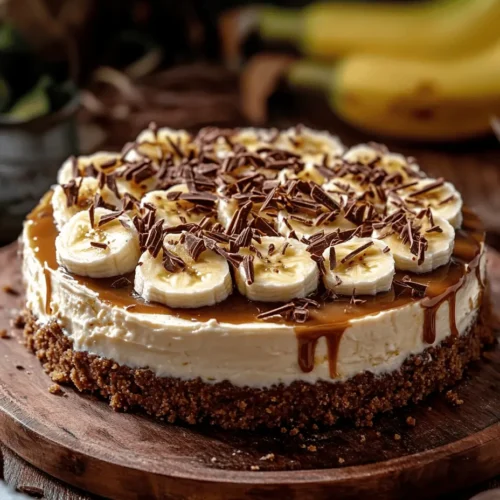
At the heart of the No-Bake Banoffee Cheesecake lies the iconic flavor profile of Banoffee, which is a delightful blend of banana and toffee. The combination of sweet, ripe bananas with the rich, caramel-like taste of dulce de leche creates a dessert that is both comforting and decadent. The cream cheese adds a smooth and creamy texture, which balances the sweetness of the other ingredients, making each bite a perfect harmony of flavors. Topped with chocolate shavings, this cheesecake is not just a treat for the palate but also a feast for the eyes.
Historical Background of Banoffee Pie and Its Evolution into Cheesecake
Banoffee pie, the precursor to our cheesecake, made its debut in the 1970s in the UK. This delightful dessert was created by combining the flavors of banana and toffee, resulting in a luscious pie that quickly gained popularity. Over the years, variations of the Banoffee pie have emerged, with the cheesecake version becoming a beloved favorite among dessert enthusiasts. The no-bake adaptation is particularly appealing, as it eliminates the need for baking while still delivering that classic Banoffee flavor. The transition from pie to cheesecake allows for a creamier texture and a more sophisticated presentation, making it a perfect choice for dinner parties and special occasions.
Why Choose a No-Bake Version?
The no-bake version of the Banoffee cheesecake is not just convenient; it also offers several advantages. Firstly, it is an ideal dessert for warm weather, as you won’t have to heat up your kitchen with the oven. Secondly, the no-bake method allows the flavors to meld beautifully without the risk of overbaking, resulting in a creamy and luscious filling. Additionally, this recipe is beginner-friendly and requires minimal culinary skills, making it accessible for anyone looking to impress with a stunning dessert.
Ingredients Breakdown
Creating the perfect No-Bake Banoffee Cheesecake starts with understanding the key ingredients that contribute to its deliciousness. Each component plays a crucial role in achieving the right texture and flavor balance, ensuring a dessert that is nothing short of exceptional.
Digestive Biscuits: The Perfect Base for Cheesecake
The foundation of any great cheesecake is its crust, and for the No-Bake Banoffee Cheesecake, digestive biscuits are the ideal choice. Their slightly sweet and buttery flavor complements the creamy filling beautifully, while their firm texture holds up well when pressed into the base. If you want to switch things up, graham crackers or even chocolate cookies can also work well, adding a unique twist to the traditional flavor profile.
Unsalted Butter: Importance of Using Unsalted for Flavor Control
Unsalted butter is essential in this recipe as it provides richness without adding unwanted saltiness. This allows for greater control over the overall flavor of the cheesecake. When melted and combined with the crushed digestive biscuits, the unsalted butter helps bind the crust together, creating a sturdy base that can support the weight of the creamy filling.
Cream Cheese: The Creamy Core of the Cheesecake
Cream cheese is the star of the cheesecake filling, providing a rich and creamy texture that is both smooth and decadent. For the best results, use full-fat cream cheese, as it will yield a luxurious mouthfeel and prevent the cheesecake from becoming too soft. Make sure to let the cream cheese come to room temperature before mixing to ensure a lump-free filling.
Icing Sugar: Sweetening the Filling for Balance
Icing sugar, or powdered sugar, is used to sweeten the cheesecake filling without adding grittiness. Its fine texture allows it to blend seamlessly with the cream cheese, creating a smooth and creamy mixture. Adjust the amount of icing sugar according to your taste preference; remember that the sweetness will be balanced by the bananas and dulce de leche.
Vanilla Extract: Enhancing Flavor Complexity
A splash of vanilla extract adds depth to the flavor profile of the cheesecake. It enhances the sweetness and complements the caramel notes from the dulce de leche. Always opt for pure vanilla extract for the best flavor, as artificial vanilla can sometimes leave an unpleasant aftertaste.
Double Cream: Creating a Rich and Fluffy Texture
Double cream, also known as heavy cream, is crucial for achieving the rich and fluffy texture that characterizes a great cheesecake. Whipping the double cream before folding it into the cream cheese mixture adds air, resulting in a light and airy filling. This combination of cream cheese and double cream creates a delightful contrast, contributing to both the flavor and mouthfeel of the cheesecake.
Ripe Bananas: The Star Fruit of the Dish
Ripe bananas are the highlight of this dessert, providing natural sweetness and a wonderful flavor. For the best results, choose bananas that are just ripe, with a few brown spots. This ensures they are sweet enough to enhance the filling without being overly mushy. Slicing the bananas and layering them on top of the filling not only adds flavor but also creates a beautiful presentation.
Dulce de Leche: Adding Caramel Notes and Sweetness
Dulce de leche is a key ingredient that brings an irresistible caramel flavor to the cheesecake. This sweet, gooey treat can be made at home by slowly simmering sweetened condensed milk or can be purchased pre-made for convenience. Its luscious consistency makes it easy to swirl into the cheesecake filling, adding both flavor and an attractive marbled effect.
Chocolate Shavings: The Finishing Touch for Added Elegance
To elevate your No-Bake Banoffee Cheesecake, a sprinkle of chocolate shavings on top adds a touch of elegance and visual appeal. Dark chocolate shavings contrast beautifully with the creamy filling and sweet bananas, while also providing a hint of bitterness that balances the overall sweetness of the dessert. Feel free to use a vegetable peeler to create delicate shavings from a chocolate bar, or purchase pre-made chocolate curls for added convenience.
Step-By-Step Preparation
Now that we have a thorough understanding of the ingredients that will bring our No-Bake Banoffee Cheesecake to life, it’s time to dive into the preparation process. Following these steps will ensure that your cheesecake is a resounding success.
Preparing the Base
The first step in creating your No-Bake Banoffee Cheesecake is to prepare the biscuit base. The crust is essential for providing structure to the cheesecake and adds a delightful crunch that contrasts with the creamy filling.
Crushing the Digestive Biscuits: Techniques for a Fine Crumb
Begin by crushing the digestive biscuits into fine crumbs. There are several methods to achieve this: you can place the biscuits in a zip-lock bag and use a rolling pin to crush them, or you can use a food processor for a quicker option. Aim for a texture similar to sand, ensuring there are no large chunks remaining. This will help the crust hold together when combined with the melted butter.
Mixing with Melted Butter: Achieving the Right Consistency
Once you have your biscuit crumbs, transfer them to a mixing bowl and pour in the melted unsalted butter. Using a spatula or your hands, mix the crumbs and butter until they are evenly combined and resemble wet sand. The melted butter acts as a binding agent, ensuring that your crust holds its shape. If the mixture appears too dry, you can add a little more melted butter, but be cautious not to make it too greasy.
Pressing into the Springform Tin: Tips for an Even Base
Next, it’s time to press the crumb mixture into a springform tin. Grease the bottom and sides of the tin lightly to prevent sticking, then pour the crumb mixture into the tin. Using the back of a measuring cup or your fingers, press the mixture firmly and evenly across the bottom and up the sides of the tin. Ensure that there are no gaps and that the crust is compact; this will help it hold together when it sets. Once you have a solid base, place the tin in the refrigerator to chill while you prepare the filling.
By following these initial steps, you set the foundation for a delectable No-Bake Banoffee Cheesecake that captures the essence of this beloved dessert. In the next part of this article, we will explore the preparation of the creamy filling, layering techniques, and tips for serving this delightful treat. Stay tuned for the continuation of this mouthwatering recipe that will surely become a favorite in your dessert repertoire.
Crafting the Filling
Creating a creamy and rich filling is the heart of the No-Bake Banoffee Cheesecake. This filling combines the decadent taste of bananas, sweet caramel, and smooth cream cheese, bringing together a delightful medley of flavors that will leave your guests wanting more.
Beating the Cream Cheese: Ensuring a Smooth Mixture
Start by taking 16 ounces (450 grams) of cream cheese out of the refrigerator and letting it sit at room temperature for about 30 minutes. This step is crucial as it softens the cream cheese, making it easier to beat. Using a hand mixer or a stand mixer fitted with a paddle attachment, beat the cream cheese on medium speed until it becomes smooth and creamy. This process should take about 2 to 3 minutes. Avoid rushing this step; a well-beaten cream cheese mixture is the key to a lump-free filling.
Combining Icing Sugar and Vanilla Extract: Balancing Sweetness and Flavor
Once the cream cheese is smooth, gradually add 1 cup (120 grams) of icing sugar and 1 teaspoon of pure vanilla extract. Beat the mixture on low speed to prevent icing sugar from flying everywhere, then increase to medium speed until the mixture is well combined and creamy. The icing sugar provides sweetness, while the vanilla adds depth of flavor, balancing the richness of the cream cheese.
Whipping the Cream
The next step involves whipping the cream, which will give the cheesecake its light and airy texture.
Importance of Soft Peaks: Achieving the Right Texture
In a separate bowl, pour 1 cup (240 ml) of heavy whipping cream. Using a clean mixer or whisk, whip the cream on medium-high speed until soft peaks form. This usually takes about 3 to 5 minutes. Soft peaks mean that when you lift the whisk out of the cream, it will hold a slight shape but will bend over at the tips. Be cautious not to over-whip, as this can lead to a grainy texture.
Folding Technique: Incorporating Air Without Deflating
Now, it’s time to combine the whipped cream with the cream cheese mixture. Gently fold the whipped cream into the cream cheese mixture using a spatula. Start by adding about one-third of the whipped cream to lighten the cream cheese mixture, then fold in the remaining whipped cream in two parts. The folding technique is crucial as it retains the airiness of the whipped cream, ensuring a light filling.
Layering the Cheesecake
With the filling ready, it’s time to layer your cheesecake, which involves creating that beautiful banoffee effect.
Spreading the Cream Mixture: Tips for Even Layering
Pour the creamy mixture into the prepared biscuit base. Using a spatula, spread it evenly across the surface, ensuring the filling reaches the edges of the crust. This step is important for ensuring that each slice of cheesecake has a balanced distribution of flavors.
Adding Banana Slices and Dulce de Leche: Techniques for Balanced Flavor
Now comes the fun part! Slice two medium ripe bananas and layer them evenly over the cream mixture. Following this, drizzle a generous amount of dulce de leche (about 1/2 cup or 120 grams) over the banana slices. The dulce de leche adds an irresistible caramel flavor that complements the bananas perfectly. You can use a spoon to dollop the dulce de leche or a piping bag for more precise application.
Final Layer of Cream Mixture: Ensuring a Smooth Finish
After layering the bananas and dulce de leche, pour the remaining cream mixture over the top. Smooth it out with your spatula to ensure a clean and elegant finish. This final layer will encase the bananas and dulce de leche, creating a harmonious blend of flavors.
Chilling the Cheesecake
Chilling is a vital step in the no-bake cheesecake process, as it allows the filling to set properly.
Optimal Chilling Time: Ensuring Proper Set
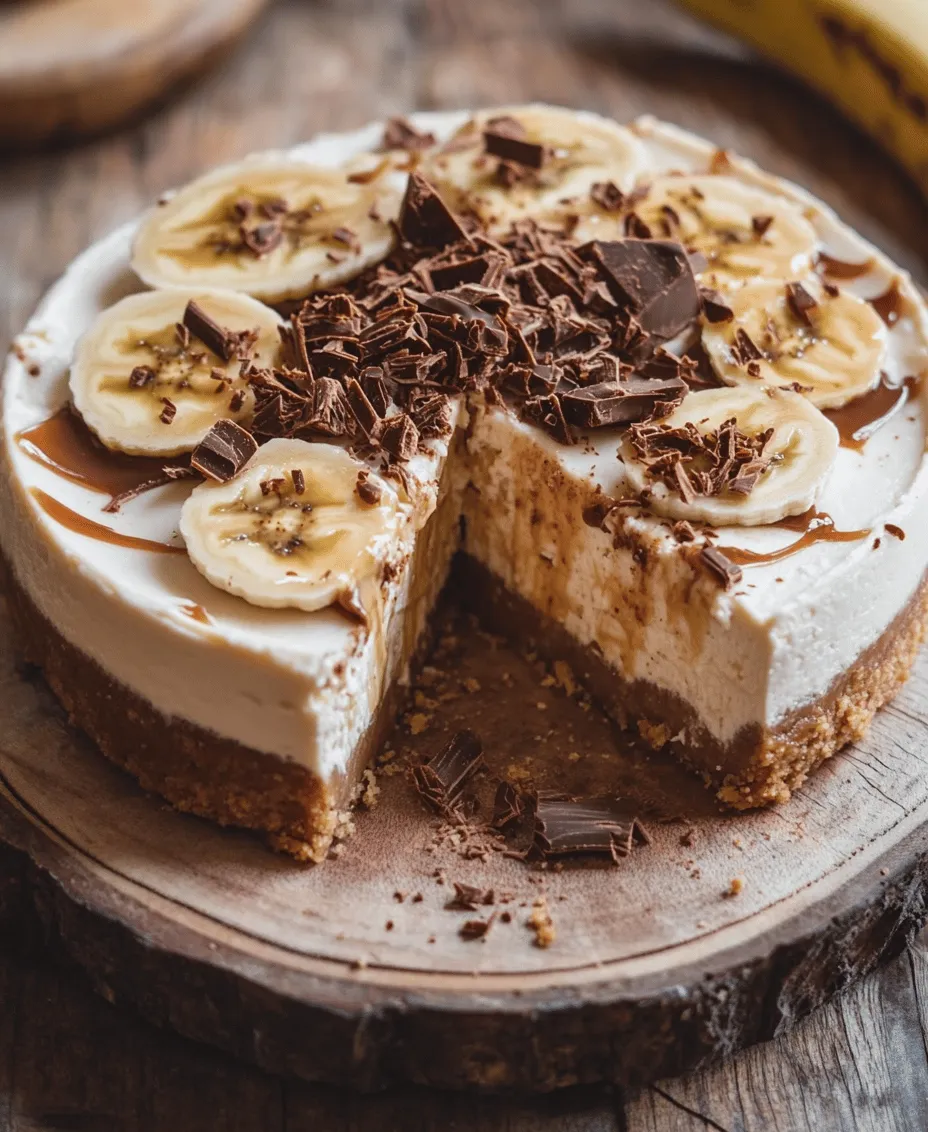
Cover the cheesecake with cling film or aluminum foil and refrigerate it for at least 4 hours, preferably overnight. The longer the cheesecake chills, the better it will set, allowing for cleaner slices when serving.
How to Check if the Cheesecake is Ready
After the chilling period, check if the cheesecake is ready by gently shaking it; the filling should be firm yet slightly jiggly in the center. If it wobbles too much, give it more time in the refrigerator.
Serving and Presentation
Now that your cheesecake is perfectly set, it’s time to present it beautifully.
Removing the Cheesecake from the Tin: Techniques for a Clean Release
To remove the cheesecake from the springform pan, run a butter knife around the edge to loosen it before releasing the clasp. If you have lined the bottom with parchment paper, this will make lifting the cheesecake out much easier. Carefully slide the cheesecake onto a serving platter.
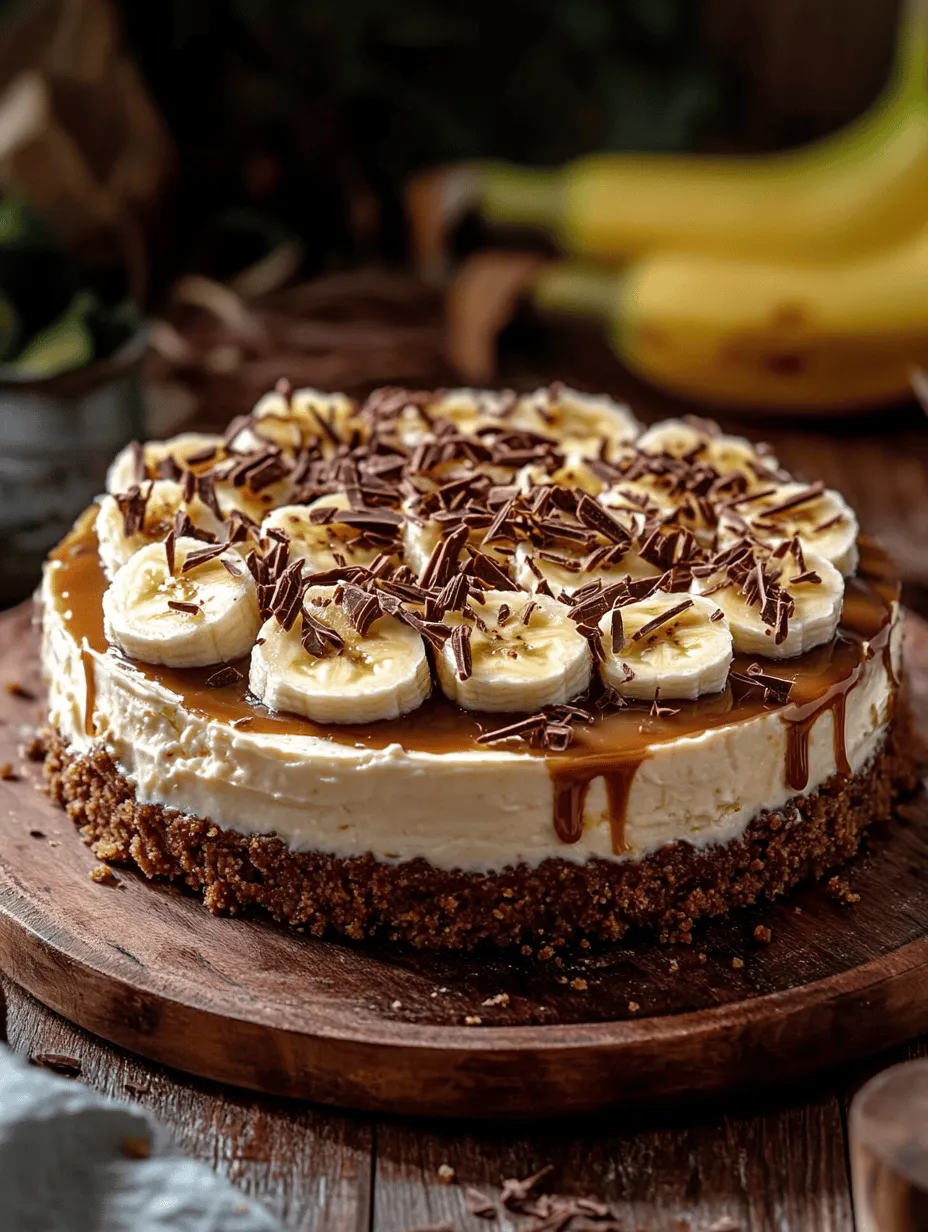
Garnishing with Banana Slices and Chocolate Shavings: Tips for an Attractive Presentation
For an appealing presentation, decorate the top of the cheesecake with fresh banana slices and chocolate shavings. You can make chocolate shavings by using a vegetable peeler on a chocolate bar or using store-bought chocolate curls. A light dusting of cocoa powder or a drizzle of extra dulce de leche can also elevate the visual appeal.
Ideal Serving Suggestions: Pairing with Coffee or Dessert Wine
Serve your No-Bake Banoffee Cheesecake chilled. It pairs wonderfully with a cup of coffee or a glass of dessert wine, such as a sweet Moscato or a rich port. The combination of flavors will enhance the overall dessert experience.
Nutritional Information
Understanding the nutritional content of your dessert is essential, especially if you are mindful of dietary choices.
Breakdown of Calories and Nutritional Content per Serving
Each slice of No-Bake Banoffee Cheesecake (assuming 12 servings) contains approximately 320 calories. The nutritional breakdown is as follows:
– Total Fat: 22g
– Saturated Fat: 12g
– Cholesterol: 70mg
– Sodium: 150mg
– Total Carbohydrates: 28g
– Dietary Fiber: 1g
– Sugars: 15g
– Protein: 4g
Health Considerations for Indulgent Desserts
While this cheesecake is a delightful treat, it is important to enjoy it in moderation due to its high sugar and fat content. Balancing indulgent desserts with healthy meals can help maintain a well-rounded diet.
Potential Substitutions for Dietary Restrictions
For those with dietary restrictions, consider these substitutions:
– Gluten-Free: Use gluten-free biscuits for the crust.
– Dairy-Free: Substitute cream cheese with a dairy-free alternative like cashew cream and use coconut cream instead of heavy cream.
– Lower Sugar: Reduce the icing sugar or use a sugar substitute to lower the sweetness.
Conclusion
The No-Bake Banoffee Cheesecake is a versatile dessert that combines simplicity with exquisite flavor. This rich and creamy cheesecake not only satisfies sweet cravings but also provides a delightful experience for both the maker and the eater. Whether for a special occasion or a casual treat, this cheesecake is sure to impress with its creamy texture and rich taste. Embrace the joy of creating this no-bake masterpiece and enjoy the delightful flavors of banoffee in every bite. With its easy preparation and stunning presentation, you’ll find it to be a favorite in your dessert repertoire.