Introduction
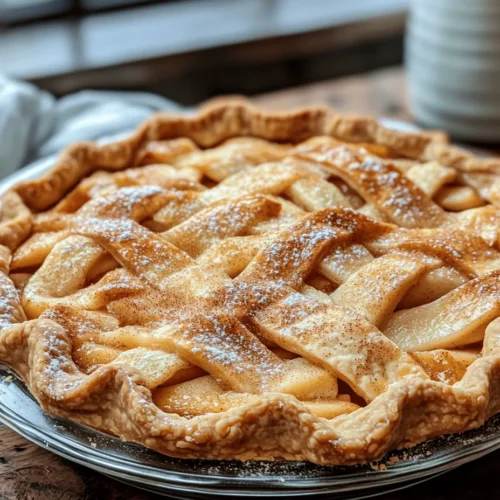
Apple pie is more than just a dessert; it’s a cherished tradition that evokes warm memories of family gatherings, holidays, and home-cooked comfort. Often described as the quintessential American dessert, apple pie has a rich history that dates back to the early settlers of this great nation. With its golden, flaky crust enveloping a sweet and spiced apple filling, this classic treat holds a special place in the hearts and kitchens of many.
Creating a homemade apple pie can be an immensely rewarding experience. While store-bought pies may be convenient, nothing compares to the aroma of fresh apples, cinnamon, and vanilla wafting through your home as the pie bakes. The joy of making this dessert lies not only in the delicious end product but also in the process of preparing it with fresh ingredients. Using high-quality, in-season apples and other components will elevate your pie to new heights, ensuring that each bite is bursting with flavor.
Whether it’s for Thanksgiving dinner, a summer barbecue, or a simple Sunday family meal, making a classic double crust apple pie is an invitation to create lasting memories. In this article, we will guide you through the necessary ingredients and step-by-step instructions to achieve the perfect pie crust and filling, allowing you to impress your family and friends with your culinary skills.
Understanding the Ingredients
To embark on your apple pie journey, it is essential to understand the key ingredients that contribute to its delightful taste and texture. A successful apple pie starts with a well-made crust, followed by a flavorful filling.
Essential Components for the Pie Crust
The foundation of any great apple pie lies in its crust. Here are the essential components:
– All-Purpose Flour: This versatile flour is crucial for achieving the right texture in your pie crust. It provides the necessary structure while still allowing for a tender, flaky finish. The balance of protein in all-purpose flour helps create a crust that holds up well, yet melts in your mouth.
– Unsalted Butter: The type of fat used in your crust significantly impacts its flavor and texture. Unsalted butter is preferred because it allows you to control the salt levels in your recipe. The rich, creamy flavor of butter adds depth to the crust, while its fat content helps create a flaky texture when incorporated correctly.
– Salt and Sugar: These two ingredients play vital roles in balancing the flavors of the dough. Salt enhances the overall taste, while sugar adds a touch of sweetness. Together, they help elevate the flavor profile of the crust, making it a delightful companion to the sweet apple filling.
Breakdown of Filling Ingredients
The filling is what truly makes your apple pie shine. Here’s what you’ll need:
– Apples: Choosing the right type of apples is crucial for a successful pie. Varieties such as Granny Smith, Honeycrisp, or Braeburn are ideal due to their tartness and firmness. These apples hold their shape during baking and provide a lovely contrast to the sweetness of the added sugar.
– Spices: Cinnamon is the star spice in apple pie, contributing warmth and depth to the flavor. Nutmeg and allspice can also be added for an extra layer of complexity. These spices enhance the natural sweetness of the apples while adding a comforting aroma.
– Lemon Juice: A splash of lemon juice is essential for adding freshness and acidity to the filling. It helps to brighten the flavors and prevents the apples from browning too quickly. The acidity of lemon juice complements the sweetness of the apples, striking the perfect balance.
– Flour: A small amount of flour is necessary to thicken the filling as it bakes. It absorbs the juices released from the apples, preventing the pie from becoming too runny and ensuring a slice that holds its form when served.
Having a solid grasp of these ingredients allows you to enjoy the pie-making process and create a delicious classic double crust apple pie that your family will love.
Step-by-Step Instructions for the Perfect Pie Crust
Now that you have an understanding of the ingredients, it’s time to delve into the process of making the perfect pie crust. Follow these detailed steps to ensure a flaky and flavorful base for your apple pie.
Mixing the Dry Ingredients
Start by gathering your all-purpose flour, sugar, and salt. In a large bowl, combine:
– 2 ½ cups all-purpose flour
– 1 tablespoon granulated sugar
– ½ teaspoon salt
Whisk these dry ingredients together until evenly distributed. This step is crucial as it ensures that the sugar and salt are incorporated throughout the flour, providing a balanced flavor in your crust.
Importance of Proper Measurements and Techniques
Accurate measurements are vital in baking. Using a kitchen scale to weigh your flour can help achieve consistent results. If you prefer to use measuring cups, spoon the flour into the cup and level it off with a straight edge, avoiding any packing of the flour, which can lead to a dry crust.
Incorporating Chilled Butter
One of the keys to a flaky pie crust is using cold butter. Cut 1 cup (2 sticks) of unsalted butter into small cubes and place it in the refrigerator to chill while you prepare your dry ingredients. Once you’re ready, add the chilled butter to the flour mixture.
Using a pastry cutter or your fingertips, work the butter into the flour until the mixture resembles coarse crumbs. The goal is to create small pea-sized clumps of butter, ensuring that some larger pieces remain intact. This will create pockets of fat that will melt during baking, resulting in a flaky texture.
How to Achieve a Crumbly Texture
Be mindful not to overwork the dough at this stage. Overmixing can lead to a tough pie crust rather than a tender one. It’s important to stop mixing once you achieve that crumbly texture, as the warmth of your hands can soften the butter too much.
The Significance of Ice Water in Pie Dough
To bring your dough together, you’ll need to add ice water. Start by mixing 6-8 tablespoons of ice water into the mixture one tablespoon at a time. Gently mix with a fork until the dough starts to come together. If the dough appears too dry, add a bit more water, but be cautious not to make it too wet.
Shaping and Chilling the Dough
Once the dough has formed, divide it into two equal portions and shape each portion into a disk. Wrap each disk tightly in plastic wrap and refrigerate for at least 1 hour. Chilling the dough is essential for a flaky crust, as it allows the butter to firm up again and relaxes the gluten, making the dough easier to roll out later.
Why Chilling is Crucial for a Flaky Crust
The chilling step is non-negotiable; it helps prevent shrinking during baking and promotes the desired flaky texture. Skipping this step can lead to a crust that falls apart or becomes too tough, so be patient and allow the dough to rest.
Preparing the Apple Filling
While your dough is chilling, it’s the perfect time to prepare the apple filling. Selecting the right apples and knowing how to prepare them is essential for achieving the best flavor and texture in your pie.
Selecting and Preparing the Apples
Choose a mixture of tart and sweet apples for a well-rounded filling. As mentioned, Granny Smiths bring tartness, while Honeycrisps add natural sweetness. Aim for about 6-8 cups of sliced apples, which is roughly 6-8 medium-sized apples depending on their size.
Tips on Peeling, Coring, and Slicing
To prepare your apples, start by peeling them using a vegetable peeler. Cut them in half and use an apple corer or a knife to remove the core. Then, slice the apples into even wedges, about ¼-inch thick. Uniform slices ensure that the apples cook evenly, resulting in a perfectly textured filling.
Achieving the Perfect Sweetness
In a large bowl, toss the sliced apples with:
– ¾ cup granulated sugar (adjust to taste)
– 1 tablespoon lemon juice
– 1 teaspoon ground cinnamon
– ¼ teaspoon nutmeg (optional)
– 2 tablespoons all-purpose flour
The sugar will draw out the natural juices of the apples, creating a syrupy filling as it bakes. The lemon juice brightens the flavors, while the spices add warmth and depth. The flour will help thicken the mixture, preventing a soggy bottom crust.
Now that you have your pie crust prepared and your apple filling ready, you are well on your way to creating a classic double crust apple pie that is sure to impress. Stay tuned as we continue with the final steps of assembling and baking this beloved dessert!
Adjusting Sugar Based on Apple Tartness
The sweetness of your classic double crust apple pie is largely determined by the type of apples you choose. Varieties like Granny Smith are notably tart and may require more sugar to balance their acidity, while sweeter apples, such as Fuji or Honeycrisp, may need less. As a general guideline, for every cup of tart apples, consider adding about 1 to 2 tablespoons of sugar to achieve the desired sweetness. Taste your filling mixture as you go, adjusting the sugar until it aligns with your preference for sweetness versus tartness.
Mixing the Filling Ingredients
In a large mixing bowl, combine your sliced apples with sugar, cinnamon, nutmeg, and a splash of lemon juice. The lemon juice not only enhances flavor but also helps prevent the apples from browning. Toss the apple slices gently but thoroughly so that each slice is evenly coated with the sugar and spice mixture. This step is crucial as it ensures that every bite of your pie is bursting with flavor. Allow the mixture to sit for about 15 minutes; this resting period lets the apples release some of their juices, helping to create a delicious syrup that will mingle with the other ingredients during baking.
Importance of Evenly Coating Apple Slices
An evenly coated mixture of apple slices is essential for the overall taste and texture of your pie. When the apples are uniformly coated, they cook evenly, ensuring that no slice is overly sweet or bland. This even coating also helps to create a thick, flavorful syrup during baking, which contributes to the pie’s overall richness and prevents it from becoming too dry or watery. Take your time with this step; it’s worth the effort for a perfectly balanced filling.
—
Assembling the Pie
Rolling Out the Dough
Once your filling is prepared, it’s time to roll out the dough. Start by flouring your work surface and your rolling pin to prevent sticking. Take one of your chilled dough discs and place it in the center of your floured surface. Gently press down to flatten it slightly before rolling it out. Aim for a thickness of about 1/8 inch. Make sure to rotate the dough a quarter turn every few rolls to maintain a circular shape and keep it even.
Techniques for Even Thickness and Avoiding Cracks
To achieve an even thickness while rolling out your dough, use a ruler or a pie dough thickness guide. If you notice any cracks forming in the edges of your dough, simply pinch them back together with your fingers. If the dough becomes too warm and starts to stick, don’t hesitate to place it back in the refrigerator for a few minutes to chill. This will make it easier to handle and shape.
Layering the Filling
Once your bottom crust is in the pie dish, you can layer the apple filling. Start by placing about half of your apple mixture in the center of the crust. Avoid pouring the juices in just yet; you want to create a mound of apples that fills the crust but doesn’t overflow. Gently arrange the apples, then add the remaining slices on top, creating a well-structured heap.
How to Fill Without Overstuffing
It’s crucial not to overstuff the pie, as this can lead to a messy overflow during baking. To avoid this, leave about 1/2 inch of space from the crust’s edge. The apples will shrink slightly as they bake, allowing for some settling without creating a disaster. If you find yourself with a bit of extra filling, consider using it in a small baking dish for a mini apple crisp.
Creating a Double Crust
To create the top crust, roll out your second disc of dough in the same manner as the bottom crust. Carefully lay it over the filled pie. If you prefer a decorative finish, you can cut slits into the top crust or use cookie cutters to create shapes that allow steam to escape.
Methods for Sealing the Pie and Ensuring Steam Escapes
To seal the pie, trim any excess dough hanging over the edges, leaving about 1/2 inch. Fold the edges of the top crust under the bottom crust to create a thick border and crimp the edges with your fingers or a fork for a decorative touch. This not only ensures a good seal but also adds visual appeal. Additionally, remember to cut a few slits in the top crust to allow steam to escape during baking, preventing a soggy pie.
—
Baking the Pie to Perfection
Importance of Preheating the Oven
Preheating your oven is a critical step in pie baking. It ensures that the crust begins to cook immediately when placed inside, creating a flaky texture without becoming soggy. Set your oven to 425°F (220°C) to start, allowing it to reach the desired temperature before you place your pie inside.
Baking at Two Different Temperatures
To achieve the perfect apple pie, begin baking at a high temperature of 425°F for the first 15-20 minutes. This initial blast of heat helps to set the crust and achieve a golden brown color. After this time, reduce the temperature to 350°F (175°C) and continue baking for another 30-40 minutes. This lower temperature allows the filling to cook through without burning the crust.
The Science Behind High Heat for Crust and Lower Heat for Filling
The reason for this two-temperature approach lies in the chemistry of baking. The high heat creates steam in the crust, helping it rise while keeping it flaky. Meanwhile, lowering the temperature allows the sugars in the apple filling to caramelize slowly, enhancing the flavor without causing the crust to brown too quickly.
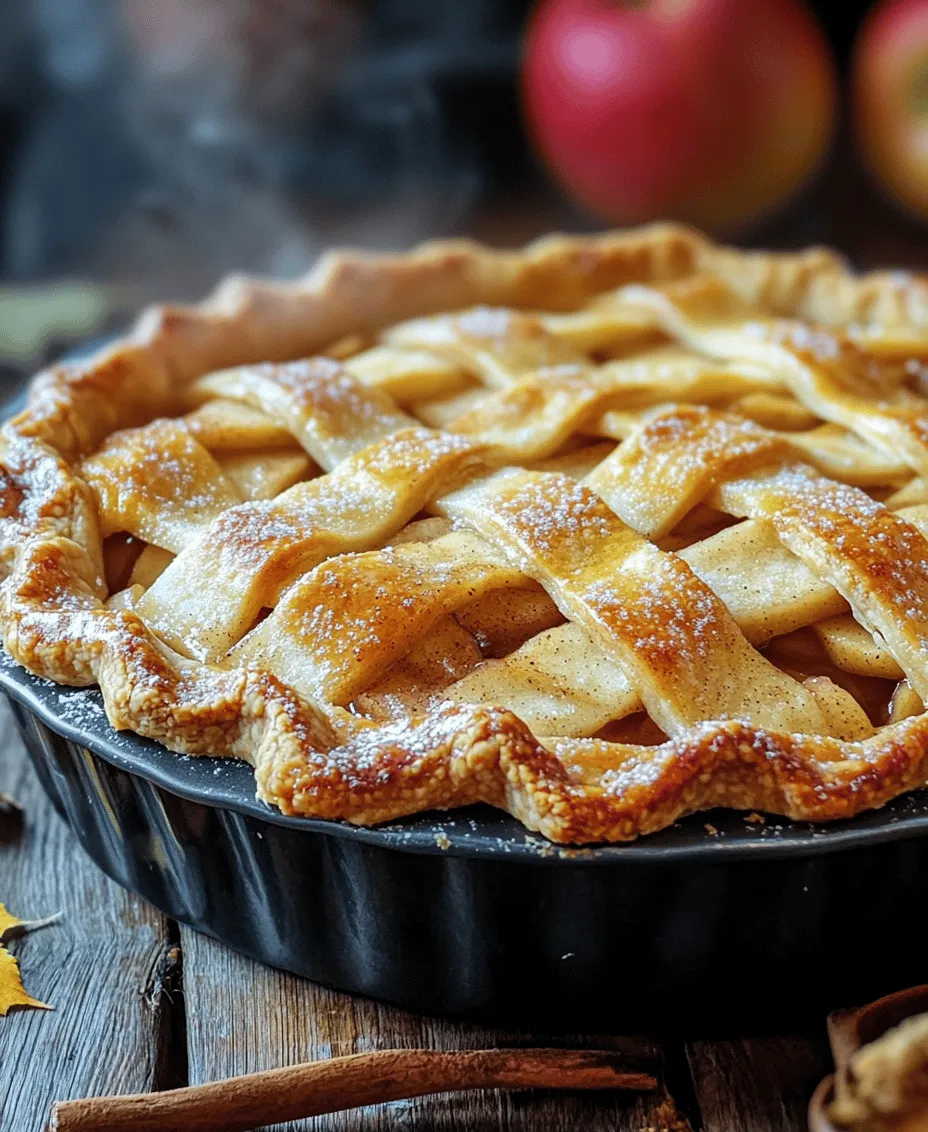
Signs of Doneness to Look For
Your pie is done when the crust is golden brown and the filling is bubbling through the slits in the top crust. If you see juices bubbling over and the apples appear tender, your pie is ready to come out of the oven. Allow it to cool slightly; this will also help the filling set up a bit more.
—
Cooling and Serving the Pie
Why Cooling is Essential
Cooling your apple pie is an essential step that should not be skipped. As it cools, the filling continues to thicken, making it easier to slice without oozing out. Allow the pie to cool for at least 2 hours at room temperature before slicing.
Suggestions for Serving Options
When it comes to serving your classic double crust apple pie, the options are plentiful. Serve it warm with a scoop of vanilla ice cream for a comforting dessert, or enjoy it at room temperature with a dollop of freshly whipped cream. For a more sophisticated touch, consider drizzling caramel sauce over each slice or sprinkling it with a dusting of powdered sugar.
Pairing with Ice Cream or Whipped Cream
The contrast of warm pie with cold ice cream is a classic combination. Vanilla is the traditional choice, but feel free to experiment with flavors like cinnamon or caramel. Whipped cream adds a light and airy touch, balancing the pie’s richness perfectly.
Presentation Tips for a Beautiful Finish
For a stunning presentation, slice the pie into wedges and arrange them on a decorative plate. You can garnish each slice with a sprig of fresh mint or a sprinkle of cinnamon for added flair. If you’re feeling creative, use a stencil to dust powdered sugar over the slices for an elegant look.
—
Nutritional Information
Breakdown of Calories and Nutrients per Serving
While enjoying a slice of homemade apple pie, it’s good to have an idea of its nutritional content. A typical serving of classic double crust apple pie (about 1/8 of a 9-inch pie) contains approximately 320 calories. This includes around 15 grams of fat, 45 grams of carbohydrates, and 2 grams of protein. The levels of sugar can vary based on your adjustments, but a serving generally contains about 20 grams of sugar.
Discussion on Portion Control and Enjoyment in Moderation
Pie is a delightful treat, but it’s important to enjoy it in moderation. Pairing your slice with a healthy meal or a light salad can help balance your dietary intake. Consider sharing a slice with a friend or family member, allowing you both to indulge without overdoing it.
—
Conclusion
The process of making a classic double crust apple pie is not only a culinary journey but also a labor of love. From selecting the right apples to mastering the art of crust creation, every step contributes to the satisfaction of producing a homemade classic. The rich aroma that fills your kitchen as it bakes, and the joy of sharing it with loved ones, creates lasting memories that go beyond the flavors.
Whether you adhere to traditional serving methods or put your own twist on it, the experience of enjoying a slice of warm apple pie is truly timeless. So gather your friends and family, slice into that beautiful pie, and share the warmth of homemade goodness. Your classic double crust apple pie is sure to be a crowd-pleaser, and every bite will remind you of the joy in creating something special from scratch.