Introduction
Crème brûlée is a beloved classic dessert that embodies elegance and indulgence. This creamy, custard-based treat is renowned for its rich texture and the satisfying crack of caramelized sugar on top. Originating from France, crème brûlée has cemented its status as a favorite among dessert lovers worldwide. It’s often associated with special occasions, making it a perfect choice for romantic dinners or celebrations.
At the heart of a truly authentic crème brûlée lies the vanilla bean. Unlike vanilla extract, which sometimes offers a more muted flavor, the vanilla bean provides a depth of taste that elevates this dessert to gourmet status. The tiny black seeds from the bean not only infuse the custard with an intoxicating aroma but also add visual appeal, making each spoonful a delight.
The romantic appeal of making and sharing vanilla bean crème brûlée with loved ones cannot be overstated. The process of preparing this dessert together creates a special moment, filled with laughter and the excitement of anticipation. When you break the caramelized sugar with a spoon and savor the creamy custard beneath, you’re not just enjoying a dessert; you’re creating a delightful memory.
What’s more, this recipe is surprisingly simple, requiring just a handful of ingredients and minimal kitchen skills. Its elegance and flavor make it an impressive addition to any dinner table, perfect for anniversaries, Valentine’s Day, or even an intimate weeknight treat. Now, let’s dive into the ingredients that make this dessert so special.
Understanding the Ingredients
Creating a perfect vanilla bean crème brûlée begins with understanding its key ingredients. Each component plays a vital role in achieving the dessert’s signature flavor and texture.
Heavy Cream
Heavy cream is the backbone of crème brûlée, contributing to its rich and velvety texture. The high-fat content of heavy cream allows for a luxuriously smooth custard that melts in your mouth. When heated, the cream becomes the perfect base for infusing flavors, particularly the aromatic goodness of vanilla beans.
Vanilla Bean
The vanilla bean is the star of this dessert. When comparing it to vanilla extract, the difference in flavor is striking. Vanilla extract can be a great alternative for convenience, but it often lacks the complexity and depth that real vanilla beans provide. The act of splitting the bean open and scraping out its seeds releases a potent flavor that permeates the cream, resulting in a crème brûlée that is both fragrant and flavorful.
Egg Yolks
Egg yolks are crucial for creating the custard’s rich consistency. They provide the necessary emulsification that binds the fat from the cream with the liquid, resulting in a smooth, creamy texture. The yolks also contribute to the dessert’s color, giving it that beautiful golden hue.
Granulated Sugar
Granulated sugar serves a dual purpose in crème brûlée. First, it sweetens the custard itself, balancing the richness of the cream and yolks. Second, it is the key ingredient for the caramelized topping. When sugar is heated, it melts and turns into a beautiful caramel that provides a satisfying crunch when broken.
Salt
While salt might seem like an unexpected addition to a dessert, it plays a vital role in enhancing the flavors. A pinch of salt can elevate the sweetness and richness of the custard, making every bite more complex and satisfying.
Optional Garnish
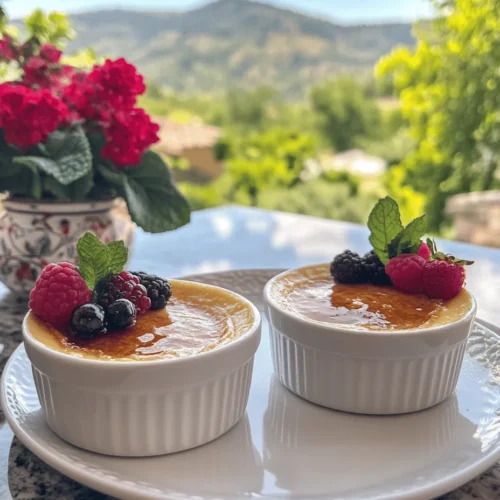
For a visually appealing finish, consider garnishing your crème brûlée with fresh berries and mint leaves. Not only do they add a pop of color, but they also offer a refreshing contrast to the rich custard, making each serving even more delightful.
Step-by-Step Preparation
Before diving into the cooking process, it’s essential to prep your kitchen and gather the necessary tools and equipment. Here’s what you’ll need for making vanilla bean crème brûlée:
Tools and Equipment
– Ramekins: These small dishes are perfect for creating individual servings of crème brûlée. They’re typically made from ceramic or glass and come in various sizes, but standard 6-ounce ramekins are ideal for this recipe.
– Baking Dish: A larger baking dish will be needed to create a water bath for the ramekins during baking. This helps regulate the temperature and ensures that the custards cook evenly.
– Whisk: A good whisk is essential for blending the egg yolks and sugar, creating a light and fluffy mixture.
– Saucepan: You’ll need a saucepan to heat the heavy cream and infuse it with the vanilla flavor.
– Fine Mesh Strainer: This is crucial for straining the custard mixture, ensuring a silky smooth texture.
– Kitchen Torch or Broiler: To achieve that signature caramelized top, you’ll need either a kitchen torch or an oven broiler.
Prepping the Kitchen
Once you have your tools ready, it’s time to prepare your kitchen for a successful crème brûlée experience. Begin by preheating your oven to 325°F (160°C). This temperature is crucial for slow-cooking the custards to perfection without curdling.
Infusing the Cream
In a medium saucepan, pour in the heavy cream and place it over medium heat. Split the vanilla bean in half lengthwise and scrape out the seeds, adding both the seeds and the pod to the cream. Heat the mixture gently until it’s just about to simmer, stirring occasionally to prevent it from sticking to the bottom. Once heated, remove the saucepan from the heat and let it steep for about 15 minutes. This step allows the flavors to meld beautifully.
Whisking Egg Yolks
While the cream is infusing, it’s time to whisk the egg yolks. In a mixing bowl, combine the egg yolks and granulated sugar. Whisk them together until the mixture becomes pale and slightly thickened. This process is essential as it incorporates air into the yolks, which will contribute to the lightness of the custard.
Combining Mixtures
Once the cream has steeped, remove the vanilla pod and slowly pour the warm cream into the egg yolk mixture while continuously whisking. This gradual incorporation is crucial to prevent the eggs from cooking too quickly and curdling. It’s important to combine the mixtures gently to maintain a smooth texture.
Straining the Mixture
To ensure your custard is silky smooth, strain the mixture through a fine mesh strainer into a clean bowl or measuring jug. This step catches any bits of cooked egg and the vanilla pod, resulting in a flawless custard.
Preparing the Ramekins
Next, place your ramekins in the baking dish. Once they’re arranged, carefully pour the custard mixture into each ramekin, filling them about three-quarters full. This allows room for the sugar topping that will be caramelized later.
The Baking Process
The key to achieving that perfectly creamy texture lies in the water bath technique. After filling the ramekins, it’s time to create the water bath.
Understanding the Water Bath Technique
To create a water bath, carefully pour hot water into the baking dish around the ramekins, ensuring that the water reaches halfway up the sides of the ramekins. This method helps regulate the temperature during baking, allowing the custard to cook evenly and gently. It’s essential for preventing the custard from overheating and curdling.
Now that your ramekins are set up in the water bath, it’s time to place the baking dish in the preheated oven. Bake for 30-40 minutes, or until the custards are just set but still slightly jiggly in the center. Once done, remove the baking dish from the oven and allow the ramekins to cool at room temperature. After they have cooled, refrigerate them for at least two hours, or overnight if you want to prepare them in advance.
With these steps, you’re on your way to creating a stunning vanilla bean crème brûlée that will impress anyone you share it with. The combination of rich flavors, smooth textures, and the excitement of cracking through the caramelized topping makes this dessert a true labor of love — and the perfect treat for sweethearts.
The Art of Crafting Vanilla Bean Crème Brûlée
The process of making vanilla bean crème brûlée is as delightful as the dessert itself. With its smooth, velvety custard and a perfectly crunchy caramelized sugar top, mastering this classic French treat is a worthwhile endeavor. In this section, we will delve into the final steps of preparing crème brûlée, ensuring that you achieve the ideal texture, flavor, and presentation to impress your sweethearts.
How It Influences the Texture of the Crème Brûlée
The texture of your crème brûlée hinges on the custard’s preparation. The primary ingredients—heavy cream, egg yolks, and sugar—must be mixed thoughtfully to achieve a creamy, silky consistency. The key is to temper the egg yolks with warm cream gently; this prevents the yolks from cooking too quickly and curdling. When combined correctly, the result is a custard that is both rich and smooth, providing the perfect contrast to the crisp sugar topping.
Tips for Filling the Baking Dish Safely
When it comes to filling your baking dish, precision is essential. Here are a few tips to ensure your custard is perfectly distributed without making a mess:
1. Use a Pitcher: Pouring the custard from a spouted pitcher can help control the flow and prevent spills.
2. Fill to the Right Level: Aim for a consistent depth, typically around three-quarters full, to ensure even baking across all dishes.
3. Use a Baking Sheet: Place your ramekins on a baking sheet before filling them. This will make it easier to transport them to the oven without sloshing the custard.
Baking Times and Signs of Doneness
Baking crème brûlée requires careful attention to time and temperature. Generally, the custard should bake at 325°F (163°C) for about 30 to 40 minutes. However, baking times can vary based on your oven and the size of your ramekins.
Signs of Doneness:
– The edges should be set while the center remains slightly jiggly.
– When you gently shake the ramekin, the custard should have a quivering motion but not appear liquid.
Explanation of How to Check for the Ideal Consistency
To check the ideal consistency, insert a knife into the center of the custard. If it comes out clean or with just a few moist bits clinging to it, the crème brûlée is done. If you find it overly runny, give it a few more minutes in the oven, checking frequently to avoid overcooking.
Cooling and Chilling
After baking, the cooling and chilling process plays a critical role in the final outcome of your crème brûlée.
Importance of Cooling the Custard Before Refrigeration
Once your custard is removed from the oven, it’s vital to allow it to cool at room temperature for about 30 minutes. This step prevents condensation from forming in the fridge, which can ruin the texture. Cooling also allows the flavors to settle and develop further.
Recommended Chilling Time for Best Results
For optimal results, refrigerate your crème brûlée for at least 4 hours, but preferably overnight. This extended chilling time helps solidify the custard, enhancing its creamy texture and allowing the flavors to meld beautifully.
How Chilling Impacts the Flavor and Texture
Chilling not only solidifies the custard but also intensifies the vanilla flavor, making each bite a luscious experience. The longer it chills, the more the flavors develop, creating a dessert that is deeply satisfying.
The Final Touch: Caramelizing the Sugar
The finishing touch of crème brûlée is the caramelized sugar topping, which adds a delightful crunch and a complex sweetness.
Techniques for Caramelization
There are two popular methods for caramelizing the sugar on top of your chilled custard: using a kitchen torch or the broiler in your oven.
1. Kitchen Torch: This is the preferred method for many pastry chefs because it allows precise control over the caramelization process. Hold the torch about 2 inches from the sugar and move it in small circles until it melts and turns golden brown.
2. Broiler Method: If you don’t have a torch, you can place the ramekins under the broiler for about 2-5 minutes. Keep a close eye on them, as the sugar can burn quickly.
Safety Tips for Handling Heat Sources
– If using a torch, ensure you are in a well-ventilated area and keep flammable items away.
– When using the broiler, use oven mitts to handle the hot baking sheet and ramekins.
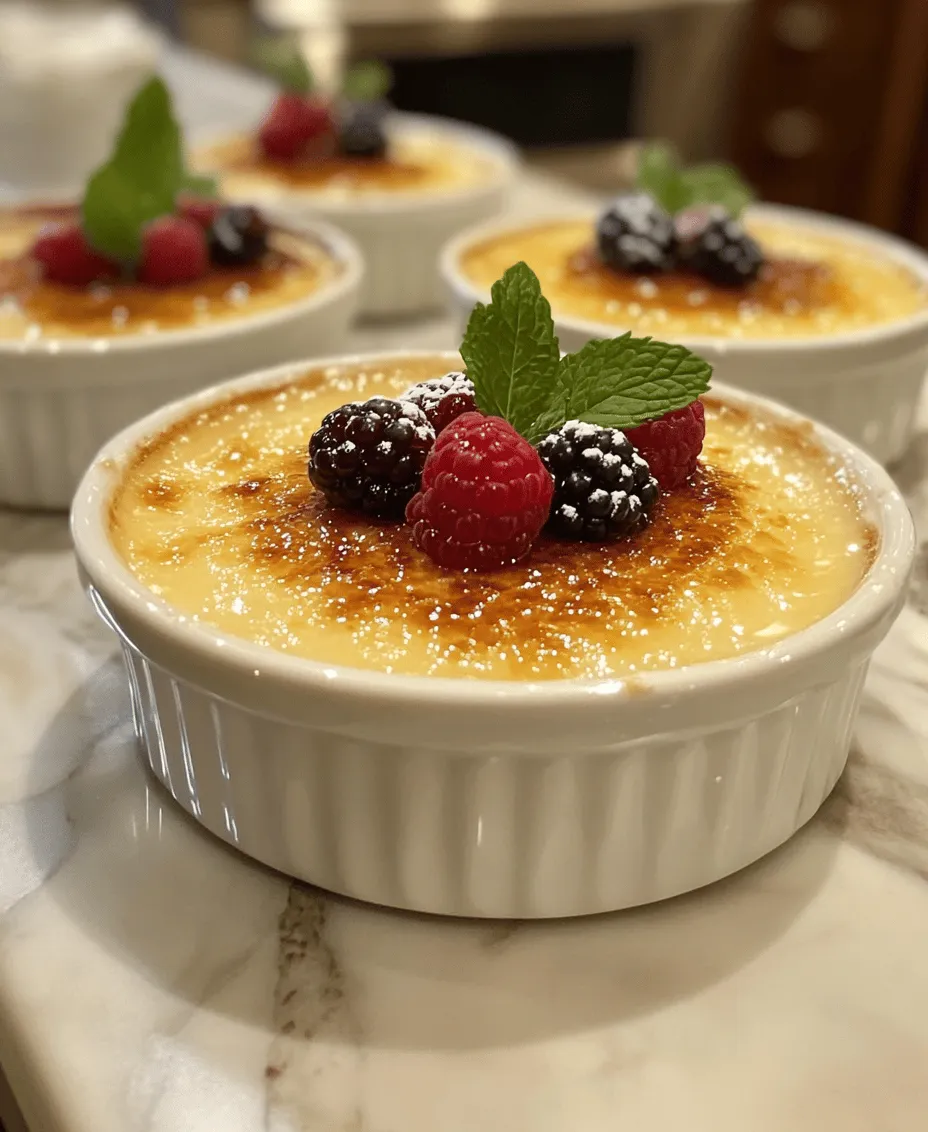
Achieving the Perfect Golden Crust
The ideal sugar crust should be a deep amber color, thin enough to crack when tapped with a spoon yet thick enough to withstand the initial heat. Practice the technique to find the perfect balance that suits your taste.
Serving Suggestions
Presentation is key when serving crème brûlée, especially for special occasions.
Presentation Ideas for a Romantic Setting
– Elegant Ramekins: Serve the custard in beautiful ramekins that complement your table setting.
– Serving Plates: Place the ramekins on decorative plates with a drizzle of chocolate or berry sauce for added flair.
Arranging Fresh Berries and Mint Leaves
Fresh berries—such as raspberries, strawberries, or blueberries—add a pop of color and freshness. A few mint leaves can also enhance the visual appeal and provide a refreshing contrast to the rich custard.
Pairing Suggestions for Beverages
To elevate the dessert experience, consider pairing your crème brûlée with dessert wines, such as Sauternes or a rich port. Alternatively, a strong cup of coffee or espresso can complement the sweet richness of the custard beautifully.
Creative Ways to Enjoy Leftovers
If you find yourself with any leftover crème brûlée, consider using it in other desserts. Swirl it into a milkshake, layer it in a trifle with cake and fruit, or use it as a filling for pastries.
Nutritional Insights
While crème brûlée is an indulgent treat, it is important to understand its nutritional aspects.
Overview of Nutritional Aspects of Crème Brûlée
A typical serving of crème brûlée (about 1/2 cup) contains approximately 320-400 calories, depending on the recipe variations.
Breakdown of Calories, Fats, and Sugars Per Serving
– Calories: 320-400
– Total Fat: 22-25g
– Saturated Fat: 14-16g
– Sugars: 20-25g
Balancing Indulgence with Healthier Choices
For those looking to indulge without overdoing it, consider serving smaller portions or experimenting with lighter alternatives, such as using half-and-half instead of heavy cream or incorporating natural sweeteners.
Conclusion
Vanilla bean crème brûlée is a timeless dessert that brings a touch of elegance to any occasion. Its creamy custard and crunchy sugar topping create a delightful contrast that is hard to resist. Whether you’re celebrating a special date night, hosting a dinner party, or simply treating yourself, this dessert is sure to impress.
Don’t hesitate to experiment with flavors; consider adding chocolate or citrus zests for a unique twist. The joy of creating homemade desserts lies not only in the final product but also in the love and care put into each step. So gather your ingredients, don your apron, and prepare to share this delightful treat with your loved ones—your homemade vanilla bean crème brûlée awaits!