
Introduction
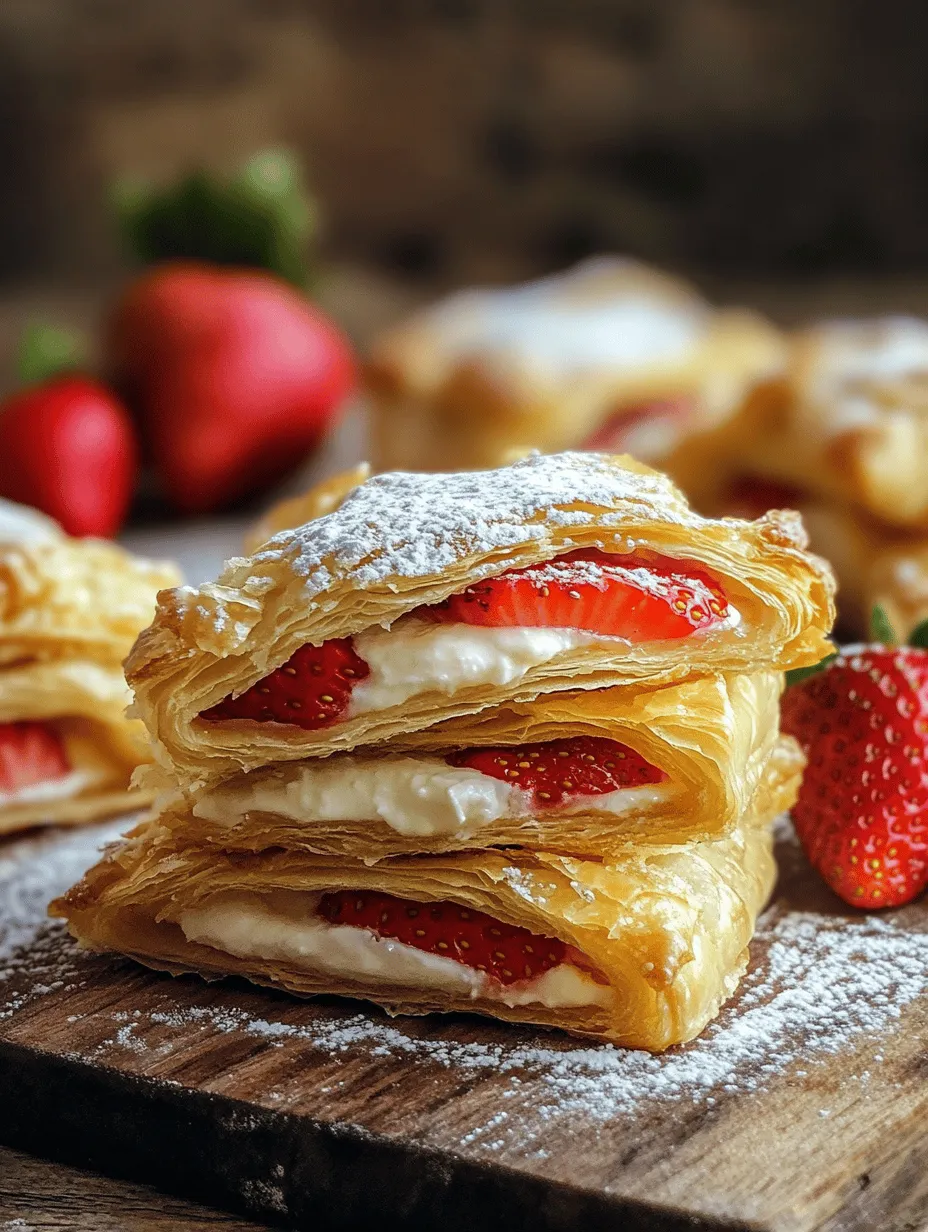
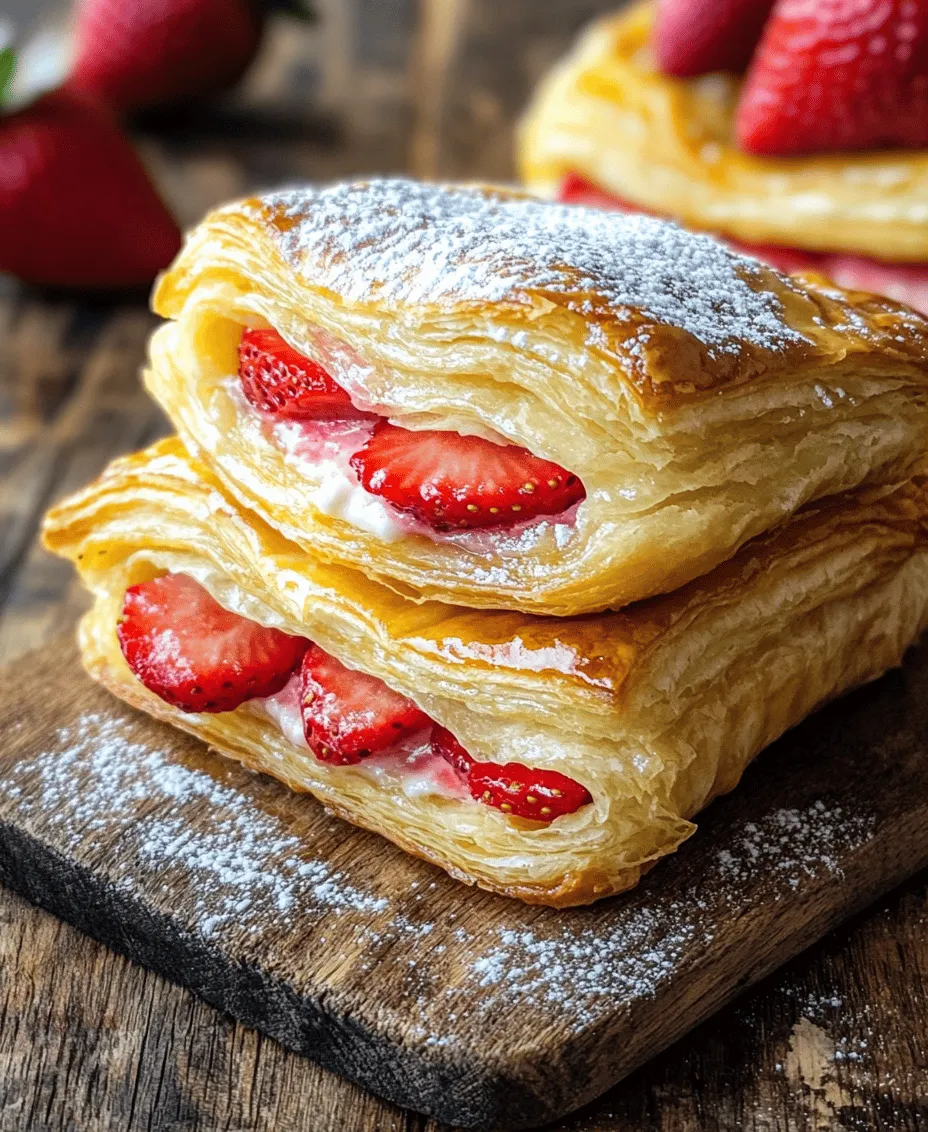
Welcome to the delightful world of the Strawberry Danish Delight, a culinary creation that effortlessly combines the richness of creamy fillings with the refreshing sweetness of fresh strawberries. This tempting pastry is not only an indulgent treat but also a versatile option that can be enjoyed as a decadent breakfast or a light dessert. With its flaky layers and luscious filling, the Strawberry Danish is guaranteed to impress at any gathering, be it a leisurely brunch or a sophisticated dinner party.
The appeal of the Strawberry Danish Delight lies in its harmonious blend of flavors and textures. The crisp, buttery pastry serves as the perfect canvas for the creamy cheese filling, while the fresh strawberries provide a burst of fruity goodness. Each bite is a delightful contrast of crispy and creamy, sweet and tart, making it a favorite among pastry lovers. Whether you’re a seasoned baker or a novice in the kitchen, mastering this recipe will allow you to bring a touch of bakery-style elegance right to your home.
Understanding Danish Pastry
Before diving into the intricacies of the Strawberry Danish, it’s essential to understand what makes Danish pastry unique. Originating from Denmark, this pastry has become a beloved staple in bakeries around the world. Traditional Danish pastry is characterized by its flaky, layered texture, which is achieved through a process known as lamination. This involves folding and rolling a dough that contains butter into layers, creating a light and airy pastry.
Contrastingly, puff pastry, often used in modern recipes for its convenience, is made using a similar lamination technique but differs in its ingredient ratios and preparation methods. Puff pastry is typically lighter and flakier than traditional Danish dough due to the higher butter content, which results in more pronounced layers when baked. While both pastries are delicious, the choice between them often comes down to personal preference and the desired texture.
The significance of layering in pastry-making cannot be overstated. Each layer of dough and butter creates air pockets that expand during baking, leading to the signature flakiness that we associate with Danish pastries. This meticulous process is what transforms basic ingredients into a stunning, multi-layered treat that looks as good as it tastes.
Ingredients Breakdown
To create the perfect Strawberry Danish Delight, it’s essential to use high-quality ingredients. Let’s break down each component of this delectable recipe to understand their roles and how they contribute to the overall flavor and texture.
– Cream Cheese: The star of the filling, cream cheese adds a rich and tangy flavor that perfectly complements the sweetness of the strawberries. Its smooth texture makes it easy to spread and blend with other ingredients, ensuring a creamy, luscious filling that melts in your mouth.
– Powdered Sugar: This finely milled sugar is crucial for sweetening the cream cheese filling. Unlike granulated sugar, powdered sugar dissolves quickly, creating a smooth and creamy texture without any graininess. It helps balance the flavors, ensuring the filling is sweet but not overly so.
– Vanilla Extract: A few drops of pure vanilla extract elevate the flavor profile of the cream cheese filling. It adds a warm, aromatic note that enhances the overall taste, making the Danish even more irresistible. Always opt for pure vanilla extract over imitation for the best flavor.
– Puff Pastry: For convenience and exceptional flakiness, store-bought puff pastry is a fantastic choice. It allows for quick assembly and ensures that you’ll achieve the light, airy texture that is the hallmark of a great Danish. If you feel adventurous, you can also make your own puff pastry from scratch, but using high-quality store-bought pastry saves time without sacrificing taste.
– Fresh Strawberries: The highlight of this recipe, fresh strawberries, provide a burst of flavor and color. Using seasonal, ripe strawberries ensures the best taste. Their natural sweetness and slight tartness create a delightful contrast with the creamy filling. Feel free to experiment with other berries like raspberries or blueberries for a different twist.
– Cornstarch: This ingredient acts as a thickening agent for the strawberry filling, allowing it to hold its shape without becoming runny. It helps create a cohesive filling that stays perfectly in the pastry while baking.
– Lemon Juice: A splash of lemon juice is essential for balancing the sweetness of the strawberries. Its acidity brightens the flavor, enhancing the overall taste of the filling and adding a refreshing zing.
– Egg Wash and Milk: For a beautiful golden color and shiny finish, an egg wash made from beaten eggs and milk is brushed over the assembled Danish before baking. This not only enhances the visual appeal but also adds a slight richness to the pastry’s exterior.
– Optional Powdered Sugar: For an extra touch of sweetness and a professional finish, a light dusting of powdered sugar can be sprinkled on top of the baked Strawberry Danish. This step is purely optional but adds to the presentation, making your Danish look even more inviting.
Step-by-Step Preparation Guide
Now that we’ve covered the essential components of the recipe, it’s time to embark on the step-by-step preparation of the Strawberry Danish Delight. This guide will walk you through each phase, ensuring that you achieve the perfect pastry every time.
Step 1: Preparing the Cream Cheese Filling
1. Soften the Cream Cheese: Begin by allowing your cream cheese to soften at room temperature for about 30 minutes. This makes it easier to blend into a smooth filling.
2. Mix Ingredients: In a medium mixing bowl, combine the softened cream cheese, powdered sugar, and vanilla extract. Using a handheld mixer or a spatula, blend until the mixture is creamy and smooth. Taste and adjust the sweetness if necessary.
Step 2: Preparing the Strawberry Filling
1. Prepare the Strawberries: Rinse the fresh strawberries under cold water. Remove the stems and slice them into small pieces. This ensures even distribution within the filling.
2. Combine with Cornstarch: In a separate bowl, toss the sliced strawberries with cornstarch and lemon juice, ensuring that they are well-coated. This mixture will help thicken the filling while providing a bright flavor.
Step 3: Assembling the Danish
1. Roll Out the Puff Pastry: Preheat your oven to 400°F (200°C). On a lightly floured surface, roll out the puff pastry to a rectangle, about 1/8 inch thick. If using store-bought pastry, ensure it is thawed according to package instructions.
2. Cut the Pastry: Cut the rolled pastry into squares (approximately 4×4 inches). You can adjust the size based on your preference for larger or smaller Danish pastries.
3. Create the Borders: For each square, carefully score a smaller square in the center, about 1 inch from the edges, being careful not to cut all the way through. This will create a border for the filling.
4. Fill the Pastry: Place a generous spoonful of the cream cheese mixture in the center of each square, followed by a spoonful of the strawberry mixture on top. Be mindful not to overfill, as the pastry needs to close properly.
Step 4: Finishing Touches
1. Fold the Corners: Gently fold each corner of the pastry square towards the center, overlapping slightly to create a beautiful shape. The center should remain open to showcase the colorful filling.
2. Apply Egg Wash: In a small bowl, whisk together the egg and milk to create an egg wash. Using a pastry brush, lightly brush the egg wash over the exposed pastry edges and around the filling. This will give your Danish a lovely golden color when baked.
3. Bake the Danish: Place the assembled pastries on a baking sheet lined with parchment paper. Bake in the preheated oven for about 15-20 minutes, or until the pastry is golden brown and puffed.
The preparation of the Strawberry Danish Delight is not only straightforward but also an enjoyable experience that allows you to showcase your baking skills. Each step builds anticipation for the delicious treat that awaits, and with careful attention to detail, you’ll be well on your way to mastering this irresistible recipe. The combination of creamy cheese, fresh strawberries, and flaky pastry promises a delightful outcome that will have everyone craving more.
Stay tuned for the next part where we’ll dive deeper into baking tips, variations, and answers to common questions about this delightful pastry!
Prepping the Oven and Workspace
Before diving into the delicious creation of your Strawberry Danish Delight, it’s crucial to prepare your oven and workspace effectively. Ensuring the right temperature and cleanliness can significantly enhance your baking experience and the final product.
Importance of Temperature and Cleanliness
Start by preheating your oven to 400°F (200°C). This temperature is ideal for baking pastries, as it allows them to puff up beautifully while achieving a golden, crispy exterior. While your oven warms up, take a moment to tidy your workspace. A clean kitchen not only makes the process more enjoyable but also reduces the risk of cross-contamination, especially when working with fresh ingredients like strawberries.
Mixing the Cream Cheese Filling
The cream cheese filling is the heart of your Strawberry Danish Delight, bringing a rich, creamy texture that contrasts perfectly with the fruit. To achieve the right consistency, follow these steps:
Achieving the Right Texture
1. Ingredients: Ensure you have softened cream cheese (about 8 ounces), powdered sugar (1/2 cup), vanilla extract (1 teaspoon), and a pinch of salt.
2. Mixing: In a large bowl, combine the softened cream cheese, powdered sugar, and vanilla extract. Use an electric mixer on medium speed until the mixture is smooth and creamy. Scrape down the sides of the bowl as needed to ensure all ingredients are well combined.
3. Texture Check: The filling should be thick yet spreadable. If it’s too thick, add a teaspoon of milk to loosen it slightly. Be cautious not to overmix, as this can lead to a runny filling.
Working with Puff Pastry
Puff pastry is what gives your Danish its delightful flakiness. Working with it correctly is essential for achieving that perfect pastry texture.
Tips for Rolling and Cutting
1. Thawing: If using frozen puff pastry, ensure it’s completely thawed before working with it. This usually takes about 30 minutes at room temperature.
2. Flouring the Surface: Lightly dust your work surface with flour to prevent sticking. Roll out the pastry gently with a rolling pin until it’s about 1/8 inch thick.
3. Cutting the Pastry: Use a sharp knife or pizza cutter to slice the rolled-out pastry into rectangles or squares, approximately 4×4 inches. This size is perfect for holding the filling and creating that classic Danish shape.
4. Handling: Remember to handle the pastry gently; excessive handling can result in a loss of flakiness. If it becomes too soft, pop it back in the fridge for a few minutes to firm up.
Preparing the Strawberry Filling
Fresh strawberries are the star of this dish. Properly mixing and coating them is key to an irresistibly sweet and juicy filling.
How to Properly Mix and Coat the Fruit
1. Fresh Strawberries: Start with about 1 cup of fresh strawberries, hulled and sliced. Try to use ripe, sweet strawberries for the best flavor.
2. Coating the Strawberries: In a bowl, gently toss the sliced strawberries with 1-2 tablespoons of granulated sugar. The sugar will draw out the juices and create a syrup that enhances the fruit’s natural sweetness.
3. Letting it Rest: Allow the strawberries to sit for about 10 minutes to macerate. This process not only intensifies the flavor but also ensures that the strawberries are juicy without making the pastry soggy.
Assembling the Danish
Now that you have your cream cheese filling and strawberry mixture ready, it’s time to assemble your Danish. This step is all about technique.
Techniques for Sealing and Shaping the Pastry
1. Filling the Pastry: Take a square of puff pastry and place about 1 tablespoon of the cream cheese filling in the center. Top this with a spoonful of the macerated strawberries.
2. Sealing: To seal the Danish, fold the corners of the pastry over the filling towards the center. Pinch the corners together to ensure the filling is well enclosed.
3. Shaping: You can also twist the edges of the pastry for a decorative touch. Alternatively, leave it open-faced for a rustic look.
Applying the Egg Wash
The final touch before baking is the egg wash. This simple step enhances the visual appeal and texture of your Danish.
Importance for Visual Appeal and Texture
1. Preparing the Egg Wash: In a small bowl, whisk together one egg with a tablespoon of milk or water. This will create a rich wash that gives the pastry a golden finish.
2. Brushing: Use a pastry brush to apply the egg wash over the surface of each Danish, being careful not to let any drip onto the baking sheet. This glossy coating will create an enticing sheen as the pastries bake.
Baking Your Strawberry Danish
With everything assembled, it’s time to bake your delicious creation.
Setting the Right Temperature
Setting your oven to 400°F (200°C) is essential for achieving the perfect puff. The high heat causes the layers of the pastry to expand rapidly, creating that signature fluffy texture.
Expected Baking Time
Bake your Danish for approximately 15-20 minutes. Keep an eye on them; they should turn a deep golden brown. The pastry should be puffed and flaky, while the filling will bubble slightly through the openings.
How to Tell When Pastries Are Done
To check for doneness, look for a uniform golden color and a puffy texture. If you gently press the top, it should spring back. If the pastry looks pale or soggy, it may need a few more minutes in the oven.
Cooling Tips
Once baked, remove the pastries from the oven and let them cool on a wire rack for at least 10 minutes before serving. This cooling period helps the filling set slightly, making them easier to handle and eat.
Serving Suggestions
Your Strawberry Danish Delight is not only a joy to make but also a delight to serve. Here are some ideas to enhance your presentation and enjoyment.
Ideas for Presentation
1. Plating Techniques: Place your Danish on a decorative plate or a cake stand for a beautiful display. Dust with powdered sugar or drizzle with a simple glaze made from powdered sugar and milk for an elegant touch.
2. Garnishes: Fresh mint leaves or additional slices of strawberries can add a pop of color and freshness to your plate.
Pairing Recommendations
To complement your Strawberry Danish, consider pairing it with:
– Beverages: A light herbal tea, freshly brewed coffee, or even a glass of sparkling lemonade can enhance the flavors of the pastry.
– Dessert Wines: For a more indulgent experience, a sweet dessert wine like Moscato pairs beautifully with the fruity notes of the Danish.
Variations to Try
While this recipe shines with strawberries, feel free to experiment with other fruits or flavor combinations:
– Berry Medley: Use a mix of blueberries, raspberries, and blackberries for a colorful twist.
– Peach or Apricot: These fruits also work well when coated with sugar and can add a different dimension to your Danish.
– Chocolate Drizzle: For a decadent touch, drizzle melted chocolate over the cooled Danish.
Nutritional Information
Understanding the nutritional aspects of your Strawberry Danish is crucial, especially if you’re mindful of dietary restrictions.
Overview of the Nutritional Aspects
A single serving of Strawberry Danish contains approximately:
– Calories: 300
– Total Fat: 15g
– Saturated Fat: 9g
– Carbohydrates: 36g
– Sugars: 10g
– Protein: 4g
Considerations for Dietary Restrictions
If you’re looking for gluten-free options, consider using gluten-free puff pastry available at many grocery stores. You can also substitute cream cheese with a dairy-free alternative for a vegan version, ensuring to adjust the sweetness according to taste.
Conclusion
The Strawberry Danish Delight is not just a treat; it’s a celebration of flavors and textures that can easily become a staple in your baking repertoire. With its simple steps and rich, satisfying taste, this Danish is perfect for special occasions or casual gatherings alike.
Encouragement to try making this Danish can lead to joyous moments in the kitchen, creating delicious memories with family and friends. The joy of baking is not just in the final product but in the process itself, so roll up your sleeves, gather your ingredients, and enjoy the delightful experience of making your own homemade pastries.