
Introduction
Valentine’s Day is more than just a date on the calendar; it’s a heartfelt celebration of love, affection, and connection. Each year, individuals and couples alike take the opportunity to express their feelings in unique and thoughtful ways. One of the most delightful methods to convey love is through baking. Whether you’re creating sweet treats for a partner, friends, or family, baked goods have a magical ability to bring people together, making them an ideal way to celebrate this romantic occasion.
Baking not only allows for creative expression but also provides a chance to share warmth and joy with others. From cookies to cupcakes, the possibilities are endless, catering to a variety of tastes and preferences. In this article, we will explore ten festive Valentine’s baking ideas that are sure to impress and delight anyone who receives them. Each recipe is designed to evoke the spirit of love and celebration, ensuring that every bite is filled with sweet sentiments.
Heart-Shaped Sugar Cookies
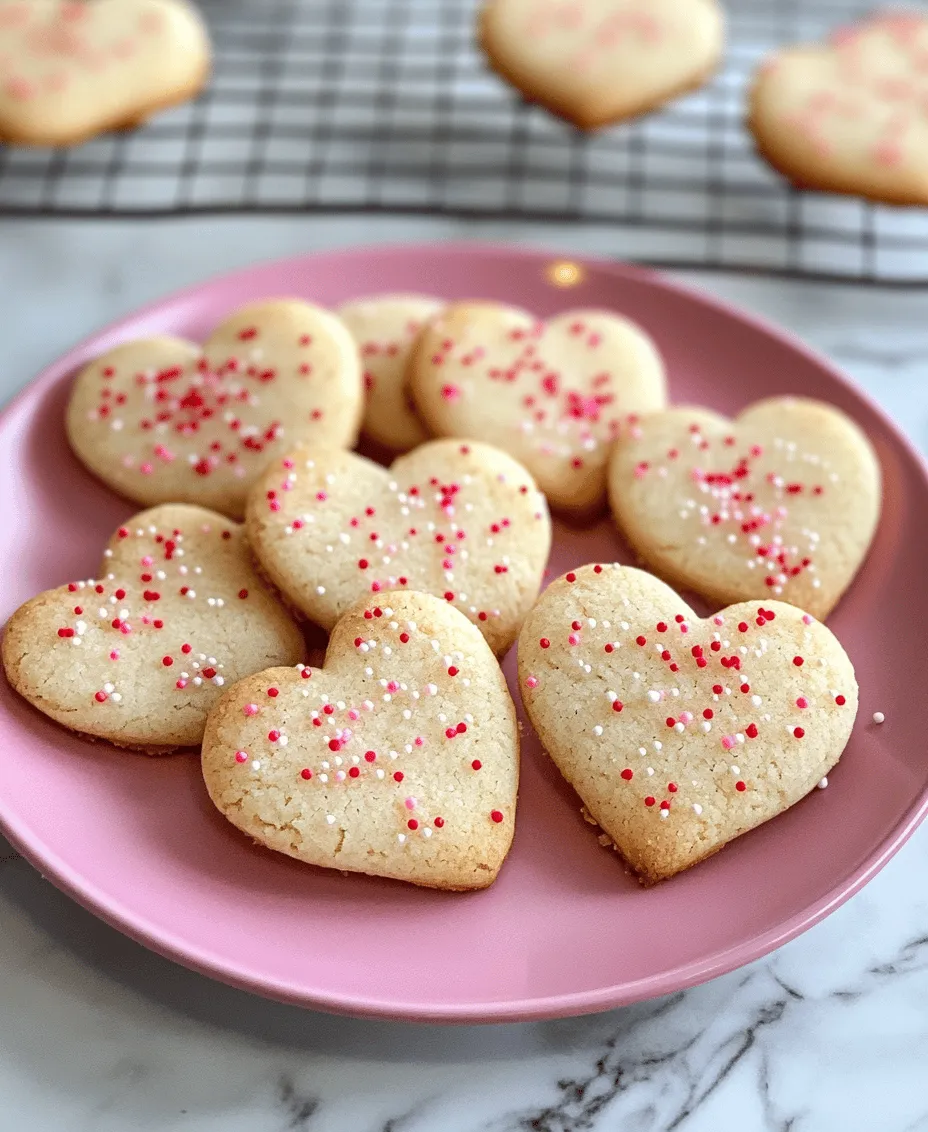
Among the many treats that symbolize love, heart-shaped sugar cookies stand out as a classic Valentine’s Day favorite. These delightful cookies are not only easy to make, but they also offer endless opportunities for personalization. Whether you choose to keep them simple or decorate them extravagantly, heart-shaped sugar cookies convey thoughtful messages that are sure to warm hearts.
Ingredients
To create these charming cookies, you will need the following ingredients:
– 2 3/4 cups all-purpose flour
– 1 teaspoon baking soda
– 1/2 teaspoon baking powder
– 1 cup unsalted butter, softened
– 1 1/2 cups white sugar
– 1 egg
– 1 teaspoon vanilla extract
– 1/2 teaspoon almond extract (optional)
– 3-5 cups powdered sugar (for decorating)
– Food coloring (optional)
– Sprinkles (optional)
These ingredients are easily accessible and can be found in most kitchens or local grocery stores. The simplicity of the recipe makes it perfect for bakers of all skill levels.
Step-by-Step Instructions for Preparation and Baking
1. Preheat the Oven: Start by preheating your oven to 375°F (190°C). This step is crucial to ensure that your cookies bake evenly and achieve that perfect golden-brown color.
2. Mix Dry Ingredients: In a medium bowl, whisk together the all-purpose flour, baking soda, and baking powder. This mixture will serve as the foundation of your cookie dough, providing structure and consistency.
3. Cream Butter and Sugar: In a large bowl, cream together the softened butter and white sugar until smooth and fluffy. This process typically takes about 3-5 minutes. The goal is to incorporate air into the mixture, which will help create light and tender cookies.
4. Add Egg and Extracts: Beat in the egg, vanilla extract, and almond extract (if using) until fully combined. The extracts will add depth to the flavor of your cookies, making them even more delightful.
5. Combine Wet and Dry Ingredients: Gradually blend the dry mixture into the wet mixture, stirring until fully incorporated. Be careful not to overmix, as this can result in tough cookies. You want the dough to be soft and pliable.
6. Chill the Dough: For best results, wrap the dough in plastic wrap and refrigerate for at least 30 minutes. Chilling the dough helps prevent the cookies from spreading too much while baking, allowing them to maintain their heart shape.
7. Roll Out the Dough: Once chilled, remove the dough from the refrigerator and place it on a lightly floured surface. Using a rolling pin, roll the dough to about 1/4 inch thick.
8. Cut the Cookies: Use a heart-shaped cookie cutter to cut out shapes from the rolled dough. Place the cookies on an ungreased baking sheet, leaving some space between each cookie to allow for expansion during baking.
9. Bake: Bake in the preheated oven for 8-10 minutes, or until the edges are lightly golden. Keep an eye on them, as baking times can vary based on the size of your cookies.
10. Cool: Once baked, remove the cookies from the oven and let them cool on the baking sheet for a few minutes before transferring them to a wire rack to cool completely.
Decorating and Personalizing Cookies
Now that your heart-shaped sugar cookies are baked and cooled, it’s time to get creative with decorating. This is where you can truly express your love and personalize each cookie.
– Icing: Create a simple icing by mixing powdered sugar with a little milk and vanilla extract until you achieve your desired consistency. For a thicker icing, use less milk. For a thinner icing that can be drizzled, add more milk.
– Food Coloring: Divide the icing into separate bowls and add food coloring to create a variety of shades. Traditional red and pink are perfect for Valentine’s Day, but feel free to experiment with other colors as well!
– Piping: Use a piping bag or a plastic sandwich bag with a small corner cut off to pipe the icing onto your cookies. You can create intricate designs, write sweet messages, or simply outline the edges.
– Sprinkles: For added texture and color, sprinkle edible glitter, heart-shaped sprinkles, or colored sugar on top of the icing before it sets. This step not only enhances the visual appeal but also adds a delightful crunch.
These heart-shaped sugar cookies are not only a treat for the taste buds but also a feast for the eyes. They make perfect gifts for loved ones, classroom treats for children, or simply a fun baking activity to enjoy with friends and family. With their sweet flavor and charming appearance, they embody the essence of Valentine’s Day—a celebration of love, kindness, and connection.
Stay tuned as we explore more festive baking ideas that will surely make your Valentine’s Day celebration even more special.
Love in Every Layer: 10 Festive Valentine’s Baking Ideas
Berry Toppings: Elevate Flavor and Presentation
When it comes to desserts, the right toppings can transform a simple treat into an extraordinary delight. Berry toppings, such as fresh strawberries, raspberries, and blueberries, not only bring vibrant colors to your Valentine’s Day creations but also add a burst of flavor that perfectly balances sweetness. Their tartness can cut through richer desserts, providing a refreshing contrast that elevates the overall experience. Whether you’re decorating heart-shaped cookies or enhancing a cake, berries are an essential element to consider.
Raspberry Almond Bars
Raspberry Almond Bars are a delightful blend of sweet and tart flavors, perfect for Valentine’s Day celebrations. The combination of buttery crust, tangy raspberry filling, and a hint of almond creates an irresistible treat that is easy to make and even easier to love.
Ingredients
– For the crust:
– 1 cup all-purpose flour
– 1/4 cup powdered sugar
– 1/2 cup unsalted butter, softened
– 1/4 teaspoon salt
– 1/4 teaspoon almond extract
– For the filling:
– 1 cup fresh raspberries (or frozen, thawed)
– 1/2 cup granulated sugar
– 1 tablespoon cornstarch
– 1 tablespoon lemon juice
– 1/4 teaspoon almond extract
– For the topping:
– 1/4 cup sliced almonds
– Powdered sugar for dusting
Instructions
1. Preheat the Oven: Begin by preheating your oven to 350°F (175°C). Grease an 8-inch square baking pan or line it with parchment paper for easy removal.
2. Make the Crust: In a mixing bowl, combine the flour, powdered sugar, salt, and almond extract. Cut in the softened butter until the mixture resembles coarse crumbs. Press the mixture firmly into the bottom of the prepared pan.
3. Bake the Crust: Bake the crust in the preheated oven for about 15 minutes, or until lightly golden. Remove from the oven and let it cool slightly.
4. Prepare the Filling: In another bowl, combine the raspberries, granulated sugar, cornstarch, lemon juice, and almond extract. Gently mix to coat the raspberries without mashing them.
5. Layer the Filling: Pour the raspberry mixture over the cooled crust, spreading it evenly. Sprinkle the sliced almonds on top.
6. Bake Again: Return the pan to the oven and bake for an additional 25-30 minutes, or until the filling is bubbly and the topping is golden brown.
7. Cool and Serve: Allow the bars to cool completely in the pan before slicing into squares. Dust with powdered sugar for a beautiful finish.
Serving Suggestions
Raspberry Almond Bars pair beautifully with a cup of tea or coffee, making them a perfect afternoon treat. For a more festive presentation, serve them on a decorative platter with fresh berries and mint leaves for garnish.
Sweetheart Brownies
Nothing says indulgence quite like a rich, fudgy brownie, especially when they are shaped into hearts for Valentine’s Day. Sweetheart Brownies are a decadent dessert that will surely impress your loved ones.
Ingredients
– 1/2 cup unsalted butter
– 1 cup granulated sugar
– 2 large eggs
– 1 teaspoon vanilla extract
– 1/3 cup unsweetened cocoa powder
– 1/2 cup all-purpose flour
– 1/4 teaspoon salt
– 1/4 teaspoon baking powder
– Optional mix-ins: chocolate chips, nuts, or sprinkles
Instructions
1. Preheat the Oven: Preheat your oven to 350°F (175°C). Grease an 8-inch square baking pan or line it with parchment paper.
2. Melt the Butter: In a medium saucepan, melt the butter over low heat. Once melted, remove it from the heat and stir in the sugar, eggs, and vanilla extract until well combined.
3. Mix Dry Ingredients: In a separate bowl, whisk together the cocoa powder, flour, salt, and baking powder. Gradually add the dry ingredients to the wet mixture, mixing just until combined.
4. Add Optional Mix-ins: If you’re using chocolate chips or nuts, fold them into the batter.
5. Bake: Pour the batter into the prepared baking pan and spread it evenly. Bake for 20-25 minutes, or until a toothpick inserted into the center comes out with a few moist crumbs.
6. Cool and Cut: Allow the brownies to cool in the pan. Once cooled, use a heart-shaped cookie cutter to cut out heart shapes.
Customization Ideas
Feel free to customize your Sweetheart Brownies by adding different mix-ins, such as crushed peppermint candies for a minty twist or caramel swirls for an extra indulgent layer. You can also top them with a drizzle of melted chocolate or a sprinkle of sea salt for a sophisticated touch.
Conversation Heart Cake Pops
Cake pops are a fun and interactive dessert option that adds a touch of playfulness to your Valentine’s Day celebrations. Conversation Heart Cake Pops are not only adorable but also delicious, making them a hit with guests of all ages.
Ingredients
– 1 box of cake mix (any flavor)
– Ingredients required for cake mix preparation (typically eggs, oil, and water)
– 1 can of frosting (any flavor)
– 12 ounces of white chocolate or candy melts
– Sprinkles for decoration
– Lollipop sticks
– Food coloring (optional)
Instructions
1. Bake the Cake: Prepare the cake mix according to package instructions and bake it in a 9×13-inch pan. Allow the cake to cool completely.
2. Crumble the Cake: Once cooled, crumble the cake into a large mixing bowl. Add about 1/2 cup of frosting and mix until the cake crumbs can hold together when shaped.
3. Shape the Pops: Using your hands, scoop out about 1 tablespoon of the cake mixture and roll it into a ball. Place the balls on a baking sheet lined with parchment paper. Once all balls are formed, freeze them for about 30 minutes to firm up.
4. Melt the Chocolate: While the cake pops are chilling, melt the white chocolate or candy melts in a microwave-safe bowl, stirring every 30 seconds until smooth.
5. Dip the Sticks: Dip the end of each lollipop stick into the melted chocolate and then insert it into the cake ball. This helps secure the stick in place.
6. Coat the Cake Pops: Dip each cake pop into the melted chocolate, allowing any excess to drip off. You can add food coloring to the chocolate before dipping to create colorful pops.
7. Decorate: Before the chocolate sets, sprinkle with festive decorations. Allow the pops to dry upright in a foam block or a cup.
Creative Decoration Ideas
Personalize each cake pop with messages using edible markers or by melting colored chocolate and piping words. You can also create themed designs by using different colors and shapes of sprinkles to match the Valentine’s Day spirit.
Valentine’s Day Pudding Parfaits
Pudding parfaits are a simple yet elegant dessert option that showcases stunning layers of flavor and texture. They are a delightful way to indulge in creamy goodness while presenting a visually appealing treat.
Ingredients
– 2 cups of prepared chocolate pudding
– 2 cups of prepared vanilla pudding
– 1 cup of whipped cream (homemade or store-bought)
– Fresh berries (strawberries, raspberries, blueberries)
– Crushed cookies or graham crackers for layering
Instructions
1. Prepare the Puddings: If you’re using instant pudding, prepare both chocolate and vanilla puddings according to package instructions. Allow them to set in the refrigerator.
2. Layer the Ingredients: In clear cups or dessert glasses, start by adding a layer of chocolate pudding, followed by a layer of crushed cookies or graham crackers, then a layer of whipped cream, and finally a layer of vanilla pudding.
3. Repeat Layers: Continue layering until you reach the top of the glass, finishing with a layer of whipped cream and a few fresh berries on top for garnish.
4. Chill and Serve: Refrigerate the parfaits for at least 30 minutes before serving to allow the flavors to meld together.
Customization Options
These parfaits can be customized with different flavors of pudding, such as butterscotch or strawberry. You can also add layers of caramel sauce or flavored syrups for additional sweetness.
Sweetheart Pancakes
Start your Valentine’s Day with a delightful breakfast by making Sweetheart Pancakes. These fluffy pancakes shaped like hearts are sure to bring a smile to your loved one’s face.
Ingredients
– 1 cup all-purpose flour
– 2 tablespoons granulated sugar
– 1 tablespoon baking powder
– 1/4 teaspoon salt
– 1 cup buttermilk
– 1 large egg
– 2 tablespoons melted butter
– Cooking spray or additional butter for the pan
Instructions
1. Prepare the Batter: In a large bowl, whisk together the flour, sugar, baking powder, and salt. In another bowl, combine the buttermilk, egg, and melted butter, then mix well. Pour the wet ingredients into the dry ingredients and stir until just combined; the batter will be slightly lumpy.
2. Preheat the Pan: Heat a non-stick skillet or griddle over medium heat and lightly grease with cooking spray or butter.
3. Shape the Pancakes: For heart-shaped pancakes, you can use a heart-shaped cookie cutter placed directly on the skillet. Pour batter into the cutter and cook until bubbles form on the surface, about 2-3 minutes. Carefully remove the cutter and flip the pancake to cook the other side for another 1-2 minutes.
4. Serve Warm: Stack the heart-shaped pancakes on a plate, and serve warm with your choice of toppings.
Serving Suggestions
Top your Sweetheart Pancakes with maple syrup, fresh berries, whipped cream, or chocolate sauce. You can also sprinkle powdered sugar for an extra touch of sweetness.
Conclusion
Baking is a beautiful way to express love and creativity, especially during special occasions like Valentine’s Day. These festive treats, from Raspberry Almond Bars to Sweetheart Pancakes, not only tantalize the taste buds but also create moments of joy when shared with loved ones. Each recipe encourages you to explore your culinary skills and personalize your creations, making every bite memorable.
As you embark on your baking journey this Valentine’s Day, remember that the most precious ingredient is love. So gather your family and friends, get creative in the kitchen, and let the spirit of Valentine’s Day shine through in everything you bake. Happy baking!