
Introduction
As the summer sun blazes down and the days stretch long, there’s no better way to cool off than with a selection of delectable homemade sweet treats. With the mercury rising, our cravings shift towards refreshing flavors that can help us beat the heat while tantalizing our taste buds. In this article, we’ll explore three delightful recipes that are not only simple to whip up but also bursting with flavors that scream summer. From luscious creamy frozen desserts to vibrant fruity pops and indulgent sundaes, these recipes are sure to satisfy your sweet tooth and add a touch of joy to your warm-weather gatherings.
In the realm of summer desserts, frozen treats reign supreme. Think about how many times you’ve reached for a popsicle or an ice cream cone during those sweltering afternoons. The appeal of chilled desserts lies in their ability to provide instant relief from the heat while delivering a burst of flavor. However, with the rise of homemade treats, there’s a growing appreciation for crafting your own sweet delights. Not only do these homemade versions often taste better, but they also allow for a level of customization that store-bought options can’t match.
In this article, we will focus on the versatility and creativity that comes with making your own summer sweets, ensuring that everyone can find something to enjoy. Whether you’re looking for a classic ice cream to share at a backyard barbecue or a fruity pop to savor by the pool, we’ve got you covered. Let’s dive into the world of summer desserts with our featured recipes.
Understanding the Basics of Summer Desserts
The Significance of Frozen Desserts During Summer
Frozen desserts have a special place in our hearts, especially during the summer months. As temperatures soar, our bodies naturally crave something cool and refreshing. Ice creams, popsicles, and sundaes not only provide that cooling effect but also evoke nostalgia for carefree summer days spent playing outside. The sensory experience of enjoying a sweet, cold treat can enhance our summer memories, making frozen desserts a staple for seasonal enjoyment.
Benefits of Homemade Treats Versus Store-Bought Options
While there’s nothing wrong with grabbing a scoop of your favorite ice cream from the store, making desserts at home offers a plethora of benefits. First and foremost, you have complete control over the ingredients. This means you can choose high-quality, fresh ingredients and avoid preservatives and artificial flavors that are often found in commercial products. Additionally, homemade treats can be tailored to meet dietary preferences, whether that means reducing sugar, opting for dairy-free alternatives, or incorporating fresh fruits.
Another significant advantage of creating your own sweet treats is the opportunity for creativity. You can experiment with flavors, textures, and presentations that suit your palate. Want to add a swirl of caramel to your ice cream? Go for it! Feel like incorporating your favorite fruits into a popsicle? The choice is all yours. This level of customization not only enhances the enjoyment of the desserts but also allows you to impress family and friends with unique flavor combinations.
Versatility and Creativity in Crafting Summer Sweets
The beauty of summer desserts lies in their versatility. You can mix and match flavors, textures, and presentations to create something truly unique. For example, you can use seasonal fruits to highlight their freshness or combine various flavors to create a layered dessert that offers a little bit of everything. The possibilities are virtually endless, and the only limit is your imagination.
The following recipes showcase this versatility. We’ll explore a creamy strawberry chocolate ice cream that marries rich flavors with fresh fruit, fruity fun pops that celebrate the essence of summer, and a minty chocolate dream sundae that combines refreshing coolness with indulgent sweetness. Each recipe is designed to be easy to follow, ensuring that even novice home cooks can create delightful desserts that will impress.
Chill Out with Sweet Treats Recipe Overview
Introducing the Three Featured Recipes
1. Creamy Strawberry Chocolate Ice Cream: This ice cream brings together the lusciousness of heavy cream with the sweetness of strawberries and the richness of chocolate. It’s a perfect way to cool off during those hot summer days while enjoying the taste of fresh fruit.
2. Fruity Fun Pops: These popsicles are a vibrant and refreshing treat made from pureed fruits. They are not only delicious but also provide a healthy alternative to sugary snacks, making them a great choice for both kids and adults.
3. Minty Chocolate Dream Sundae: This indulgent sundae combines the refreshing flavor of mint with chocolate, topped with a swirl of whipped cream. It’s an elegant dessert that’s perfect for summer gatherings or simply as a treat for yourself.
Creamy Strawberry Chocolate Ice Cream
Ingredients Breakdown
– Heavy Cream: The backbone of any good ice cream, heavy cream contributes a rich and creamy texture that’s essential for a delightful mouthfeel. The high-fat content is what allows the ice cream to be smooth and luxurious, melting in your mouth with each bite.
– Sweetened Condensed Milk: This ingredient serves a dual purpose: it adds sweetness and creaminess. Sweetened condensed milk is a staple in many ice cream recipes because it helps create a smooth consistency without the need for an ice cream maker. It also brings a rich flavor that complements the strawberries beautifully.
– Vanilla Extract: A touch of vanilla extract enhances the overall flavor profile of the ice cream. It adds depth and warmth, balancing the sweetness and allowing the fruit flavors to shine through.
– Strawberries: Fresh strawberries are the star of this recipe. Not only do they add natural sweetness, but their bright flavor and vibrant color make the ice cream visually appealing. Using fresh fruit also means you’ll get the best taste, so choose ripe strawberries for optimal flavor.
– Mini Chocolate Chips and Crushed Cookies: These optional add-ins provide texture and variety to the ice cream. Mini chocolate chips add little bursts of chocolatey goodness, while crushed cookies can contribute a delightful crunch, making each spoonful a fun experience.
Preparation Steps
Making creamy strawberry chocolate ice cream at home is a straightforward process that involves just a few key steps:
1. Prepare the Strawberries: Start by washing and hulling the fresh strawberries. Once cleaned, slice them into small pieces and place them in a bowl. For enhanced flavor, you can sprinkle a bit of sugar over the strawberries and allow them to macerate for about 10-15 minutes. This will draw out their juices, creating a delicious syrup that will infuse the ice cream with even more flavor.
2. Whip the Heavy Cream: In a large mixing bowl, pour in the heavy cream. Using an electric mixer, whip the cream until soft peaks form. Be careful not to over-whip, as this can lead to a grainy texture. Soft peaks should hold their shape while still being smooth and creamy.
3. Combine Ingredients: In another bowl, mix the sweetened condensed milk and vanilla extract together until well blended. Gently fold the whipped cream into the condensed milk mixture using a spatula. This technique ensures that the lightness of the whipped cream is retained, giving the ice cream a fluffy texture.
4. Fold in Strawberries and Add-Ins: Carefully fold in the prepared strawberries, mini chocolate chips, and crushed cookies if using. Make sure to combine everything without deflating the whipped cream too much. The goal is to have an even distribution of strawberries and chocolate throughout the mixture.
5. Transfer to Container: Pour the ice cream mixture into a freezer-safe container. For best results, choose a container that is shallow and wide, which will help the ice cream freeze more evenly. Smooth the top with a spatula, and cover it tightly with a lid or plastic wrap to prevent ice crystals from forming.
Tips for Achieving the Perfect Soft Peaks
The key to achieving the perfect soft peaks lies in the whipping process. Make sure your mixing bowl and whisk are clean and free from any grease, as this can hinder the whipping process. It’s also essential to start at a lower speed when you first begin whipping the cream, gradually increasing to medium-high speed. Watch closely for the moment when soft peaks form—look for a texture that holds shape but still has a slight droop at the tips.
Importance of Gently Folding in Ingredients for Optimal Texture
Folding is a technique used to combine ingredients without deflating the air that has been incorporated into whipped cream. When adding the whipped cream to the condensed milk mixture, use a spatula to scoop from the bottom of the bowl and gently lift the mixture over the top. Rotate the bowl as you fold, and repeat until the ingredients are just combined. This method keeps the ice cream light and airy, ensuring a smooth and creamy texture.
Freezing and Serving Suggestions
Once you have transferred your ice cream mixture to a container, it’s time to freeze it. Place the container in the coldest part of your freezer for at least 4-6 hours or until the ice cream is solid. For a softer texture, you can let it sit at room temperature for a few minutes before scooping.
When it comes to serving your creamy strawberry chocolate ice cream, get creative! Drizzle some melted chocolate over the top for an extra treat, or sprinkle additional cookie crumbles for texture. You can also serve it in a waffle cone for a classic ice cream experience or top it with fresh strawberries for a beautiful presentation.
As we move forward, get ready to discover the refreshing and fruity fun pops, a perfect treat for hot summer days that will keep everyone smiling and cool!
Fruity Base Ingredients
When crafting your homemade popsicles, the foundation of your recipe lies in the ingredients you choose, particularly the fruit puree. Using fresh fruits not only enhances the flavor profile of your pops but also contributes numerous health benefits. Fresh fruits are packed with vitamins, minerals, and antioxidants, making your sweet treats not just delicious but nutritious. For instance, fruits like berries, mangoes, and peaches are rich in vitamin C, which boosts the immune system, while bananas provide potassium, essential for heart health.
Now, let’s discuss the choice of liquid base: coconut water versus fruit juice. Coconut water is a hydrating option that contains electrolytes, making it an excellent choice for a hot summer day. It has a subtle sweetness and a light flavor that complements fruits well without overpowering them. On the other hand, fruit juice adds a more pronounced sweetness and flavor intensity. However, when selecting fruit juice, opt for 100% juice without added sugars to keep your treats healthy. Both options can contribute to a refreshing popsicle, and the choice ultimately depends on your flavor preference and desired nutritional profile.
Sweetening agents come into play when your fruits might not be sweet enough on their own. Honey and agave syrup are popular choices. Honey, a natural sweetener, adds a lovely floral note and is unrefined, making it a healthier option than white sugar. Agave syrup, derived from the agave plant, is sweeter than honey and has a lower glycemic index, which means it won’t spike your blood sugar levels as quickly. Use these sweeteners sparingly, adjusting to taste based on the natural sweetness of your fruit puree.
Creating the Pops
Now that you have your fruity base ingredients ready, it’s time to create your pops. Start by preparing your fruit puree. This process is simple: chop your chosen fruits and blend them until smooth. If you prefer a chunkier texture, reserve a portion of the fruit, chop it into small pieces, and set it aside to mix in later.
Once you have a smooth puree, transfer it to a mixing bowl. If you’re using coconut water or fruit juice as your base, pour it in now. The ratio can vary, but a good starting point is one part liquid to two parts fruit puree. Stir gently to combine the ingredients. Taste your mixture and adjust sweetness if necessary by adding honey or agave syrup.
When it comes to adding fresh fruit chunks, ensure that they are evenly distributed throughout the mixture. This will not only enhance the visual appeal of the pops but also provide bursts of flavor in every bite. Pour the mixture into your popsicle molds, filling them almost to the top as the mixture will expand slightly when frozen. Insert sticks and place the molds in the freezer.
For even freezing, it’s best to allow the pops to freeze for at least 4-6 hours, or overnight if possible. If your popsicles stick to the mold, run warm water over the outside of the mold for a few seconds to help release them.
Serving the Pops
Once your fruity pops are frozen solid, it’s time for the fun part—serving them! To release the pops easily from their molds, gently twist the mold or run warm water over the outside. If you’re serving them for a gathering, consider a fun presentation. Arrange the pops on a colorful platter and garnish with fresh fruit slices or mint leaves for a pop of color. You can even serve them in decorative cups with a small spoon for a playful touch.
For a summer party, you can create a popsicle bar where guests can customize their pops with toppings like shredded coconut, crushed nuts, or sprinkles. This interactive element not only makes for a fun experience but also encourages creativity!
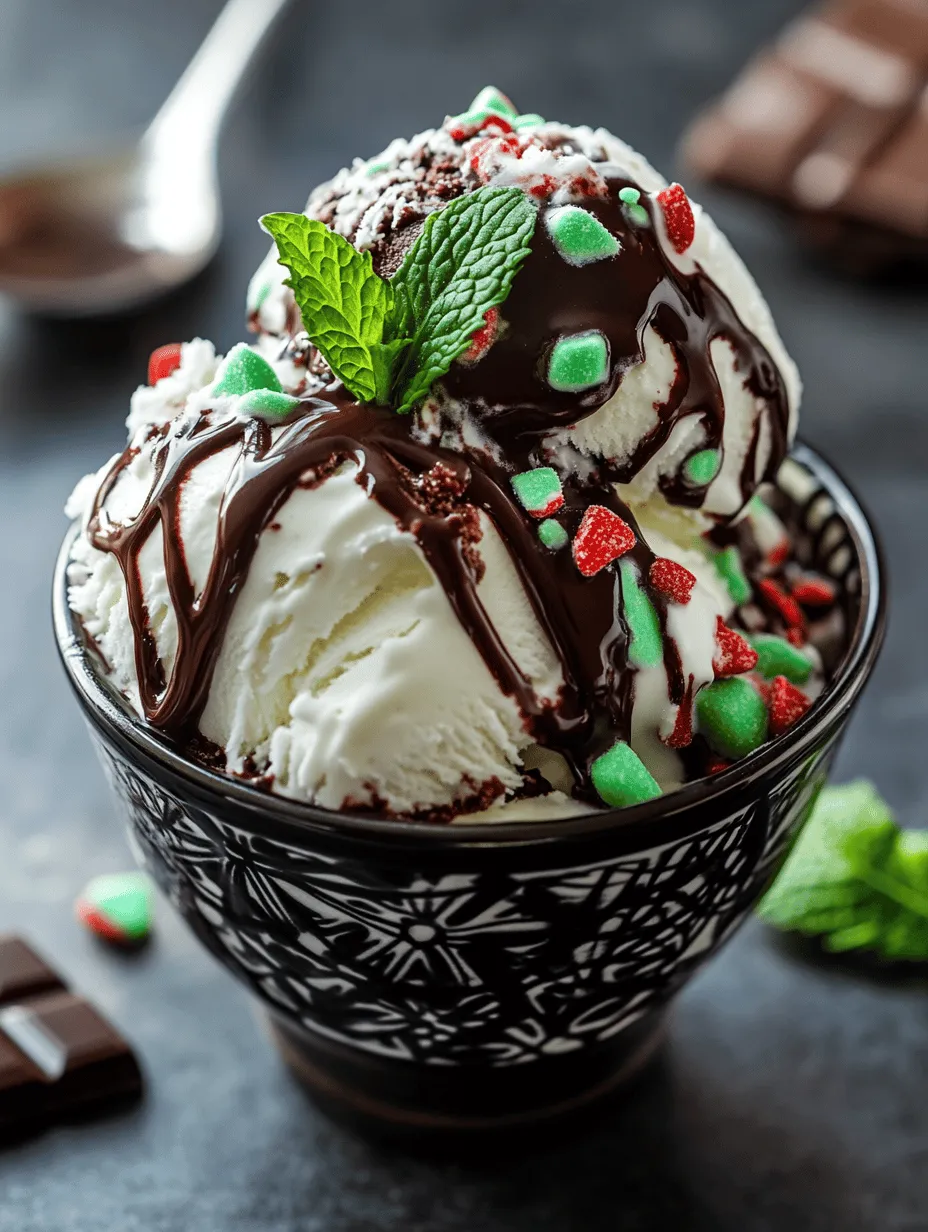
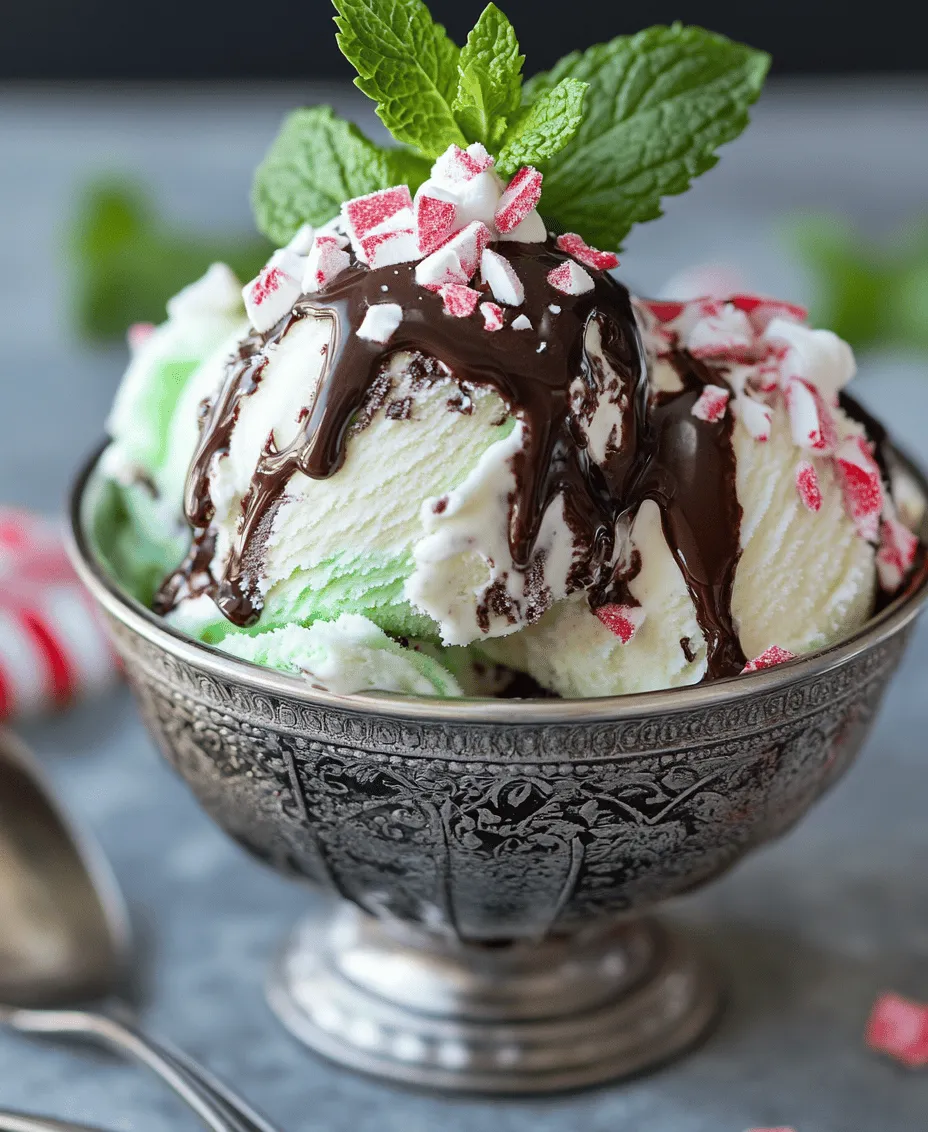
Minty Chocolate Dream Sundae
After enjoying the refreshing pops, let’s dive into a classic summer treat: the Minty Chocolate Dream Sundae. The star of this dessert is mint chocolate chip ice cream, a beloved flavor that combines the creaminess of vanilla ice cream with refreshing mint and rich chocolate flakes. Its bright green hue and distinct flavor make it a favorite among ice cream lovers, especially during the warm months.
For a decadent touch, hot fudge sauce is a must. When warming hot fudge, ensure that it reaches a smooth, pourable consistency without becoming too hot; a gentle heat method works best. If your hot fudge is too thick, add a splash of cream or milk to achieve the desired consistency.
Peppermint candies are another key ingredient, adding a delightful crunch and intensifying the mint flavor. Crush them into small pieces to sprinkle over the sundae. Lastly, whipped cream and fresh mint leaves not only enhance the presentation but also add a light, airy texture that balances the richness of the ice cream.
Assembly Instructions
Assembling your sundae is a straightforward, enjoyable process. Start with a generous scoop of mint chocolate chip ice cream in a tall glass or bowl. Drizzle warm hot fudge sauce generously over the ice cream, allowing it to cascade down the sides. For the perfect drizzle, pour the hot fudge from a height to create a beautiful effect.
Next, sprinkle crushed peppermint candies over the fudge, ensuring an even distribution for that satisfying crunch in every bite. Finish with a dollop of whipped cream on top, followed by a few mint leaves for garnish. Serve immediately to enjoy the contrast of warm fudge and cold ice cream.
Enjoying the Sundae
The Minty Chocolate Dream Sundae pairs wonderfully with other desserts. Consider serving it alongside fruit pops for a delightful contrast in textures and flavors. You can also create a sundae platter with different ice cream flavors, toppings, and sauces, allowing guests to build their own unique creations.
For gatherings, this sundae is perfect for summer barbecues, birthday parties, or just a special family treat. It’s a dessert that not only satisfies a sweet tooth but also brings everyone together to enjoy the flavors of summer.
The Joy of Homemade Ice Cream and Desserts
Creating your own sweet treats is an incredibly satisfying experience that goes beyond just enjoying the final product. The process of selecting fresh ingredients, experimenting with flavors, and assembling your creations brings a sense of accomplishment. There’s also something special about sharing these homemade desserts with family and friends. It fosters connections and creates lasting memories, whether it’s through laughter over a messy sundae or the joy of watching loved ones savor your popsicles.
Encouraging creativity in the kitchen is part of the fun. Don’t hesitate to experiment with different flavor combinations, such as adding a splash of citrus to your fruit puree or mixing in different types of chocolate with your mint ice cream. The possibilities are endless, and you can tailor your treats to suit your tastes and those of your guests.
Conclusion
As summer unfolds, these refreshing sweet treats provide a perfect way to savor the season. With a blend of creamy, fruity, and minty flavors, each recipe invites you to chill out and enjoy the delightful tastes of summer. Whether you opt for the luscious ice cream, the fruity pops, or the indulgent sundae, these desserts promise to cool you down and bring a smile to your face. Embrace the joy of homemade desserts and make lasting memories with every scoop and bite. Enjoy the season’s flavors, get creative, and most importantly, share your delicious creations with those you love.