Introduction
Welcome to a delightful journey of flavors and colors with our “Oreo Delight: A Sweet Coloring Adventure!” This dessert is not just a treat for your taste buds but also a feast for your eyes, offering a playful twist on the classic Oreo cookie. Imagine layers of creamy, rich goodness combined with the iconic crunch of Oreos, creating a dessert that is as fun to make as it is to eat. Whether you are hosting a gathering, celebrating a birthday, or simply indulging in a sweet craving at home, this recipe is sure to impress friends and family alike.
What makes the Oreo Delight truly appealing is its simplicity. With just a handful of ingredients and minimal preparation time, you can whip up this decadent dessert in no time. The sensory experience of creating Oreo Delight is unparalleled—crushing those cookies, mixing the creamy layers, and watching the colors come together will surely evoke a sense of joy and nostalgia. So, let’s dive into the world of Oreo Delight and explore what makes it a favorite among dessert lovers.
The Allure of Oreos
To truly appreciate the magic of Oreo Delight, we must first pay homage to the beloved Oreo cookie. Introduced in 1912, the Oreo has become an iconic symbol of American snack culture. What started as a simple chocolate wafer with a sweet cream filling has evolved into a versatile ingredient that inspires creativity in kitchens worldwide. The cookie’s unique combination of texture and flavor—crisp on the outside, soft and creamy on the inside—makes it the perfect base for countless desserts.
Over the years, Oreos have transcended their original purpose. From Oreo cheesecakes to ice cream sandwiches, the possibilities are endless. Bakers and home cooks alike have embraced the cookie’s versatility, transforming it into innovative treats that please audiences of all ages. The Oreo Delight is a testament to this creativity, showcasing how a simple cookie can be transformed into a stunning dessert that captivates both young and old.
Ingredients Breakdown
Now that we’ve established the allure of Oreos, let’s take a closer look at the ingredients that come together to create the delightful layers of our Oreo Delight. Each component plays a crucial role, combining to achieve that perfect balance of flavor and texture.
Oreo Cookies
At the heart of this dessert are the classic Oreo cookies. Their rich chocolate flavor and crunchy texture form the base layer of this sweet treat. When crushed, Oreos create a delightful crumb that serves as the foundation for the dessert, adding depth and a satisfying crunch to every bite. They not only provide flavor but also contribute to the overall structure of the dish.
Cream Cheese
Next, we have cream cheese, which adds a luxurious richness and creaminess to the Oreo Delight. When blended with sugar, it transforms into a smooth and velvety layer that complements the crunch of the Oreos. Cream cheese also enhances the dessert’s overall flavor profile, balancing the sweetness of the other ingredients while providing a slight tang that elevates the dish.
Whipped Topping
To achieve that fluffy, light texture, we incorporate whipped topping into the mix. This ingredient lightens the cream cheese layer, making it airy and indulgent. The whipped topping not only enhances the texture but also adds a hint of sweetness, creating a perfect harmony with the other components. It’s the secret ingredient that makes every bite feel like a cloud of deliciousness.
Chocolate Pudding
No Oreo Delight would be complete without a layer of chocolate pudding. This creamy, chocolatey indulgence brings a decadent touch to the dessert, creating a rich contrast to the lighter layers. The pudding adds an extra dimension of flavor and moisture, making the dessert incredibly satisfying. It’s this element that truly ties everything together, ensuring that each spoonful is packed with deliciousness.
Milk
Milk is an essential ingredient for achieving the right consistency in the pudding. It helps dissolve the pudding mix and ensures a smooth, creamy texture. Additionally, if you wish to soften the Oreo base slightly, a splash of milk can be added during the mixing process, allowing the flavors to meld beautifully.
Crushed Oreos
For garnishing, we use crushed Oreos to sprinkle on top of the dessert. This not only adds a visual appeal but also a delightful crunch that enhances the overall eating experience. The contrast between the creamy layers and the crunchy topping creates a fun texture that keeps every bite interesting.
Optional Decorations
While the Oreo Delight is stunning on its own, optional decorations can elevate the presentation and flavor. Consider adding colorful sprinkles, chocolate shavings, or even fresh fruit to the top. These enhancements can brighten up the dish and provide an extra layer of flavor, making it even more inviting for guests.
Step-by-Step Instructions
Now that you have a complete understanding of the ingredients, let’s move on to the exciting part—preparing the Oreo Delight. This step-by-step guide will walk you through the process, ensuring that you create a dessert that is not only beautiful but also delicious.
Preparing the Base: Techniques for Crushing Oreos Effectively
1. Gather Your Tools: Begin by gathering your tools for crushing the Oreos. A food processor is the easiest method, but if you don’t have one, a zip-top bag and a rolling pin will work just as well.
2. Crushing with a Food Processor: If you’re using a food processor, simply place the Oreo cookies in the bowl, secure the lid, and pulse until they reach a fine crumb consistency. Be sure to scrape down the sides as needed to ensure even crushing.
3. Crushing by Hand: If you’re opting for the manual method, place the Oreos in a zip-top bag, seal it tightly, and use a rolling pin to crush them into fine crumbs. This method can be a bit of a workout, but it’s also quite satisfying!
4. Measuring the Crumbs: Once you’ve crushed the Oreos, measure out the desired amount for your base and set aside. You’ll want to reserve some extra crumbs for garnishing later.
5. Mixing the Base: In a medium bowl, combine the crushed Oreos with melted butter. This mixture will serve as the base for your dessert. Stir until the crumbs are evenly coated with butter, creating a damp mixture that holds together when pressed.
6. Forming the Base Layer: Press the Oreo mixture firmly into the bottom of a 9×13 inch baking dish or a trifle dish. Use the back of a measuring cup or your hands to create an even layer, ensuring it’s well-packed for stability.
With the base firmly in place, you’re ready to move on to the next layers of this delicious dessert. The anticipation of building the creamy layers will only add to the excitement of creating your Oreo Delight. Stay tuned as we delve deeper into the next steps of layering the cream cheese, chocolate pudding, and whipped topping to bring this colorful adventure to life!
Mixing the Cream: Tips for Achieving a Smooth and Creamy Consistency
To create the perfect creamy layer for your Oreo Delight, start by mixing the cream cheese with the powdered sugar until it’s smooth and free of lumps. Using an electric mixer at medium speed can help achieve a velvety texture quickly. Incorporating the whipped topping is crucial; fold it gently into the cream cheese mixture to keep it light and airy. Avoid overmixing at this stage, as it can deflate the whipped topping, leading to a denser cream. If you wish to add flavoring or colors to your cream layer, do so in moderation; a few drops of vanilla extract or food coloring can enhance both taste and appearance without overpowering the dessert.
Layering the Pudding: The Importance of Whisking for the Right Texture
The pudding layer is the heart of your Oreo Delight, providing a luscious contrast to the creamy layer. Begin by whisking the instant pudding mix with cold milk until it thickens, which should take about two minutes. It’s essential to ensure there are no lumps in the pudding for a smooth finish. If you want to add a twist, consider using flavored pudding mixes, such as vanilla, chocolate, or even butterscotch, to diversify your layers. The key to achieving the ideal texture lies in whisking vigorously and allowing it to sit for a few minutes before layering, as this ensures it sets perfectly.
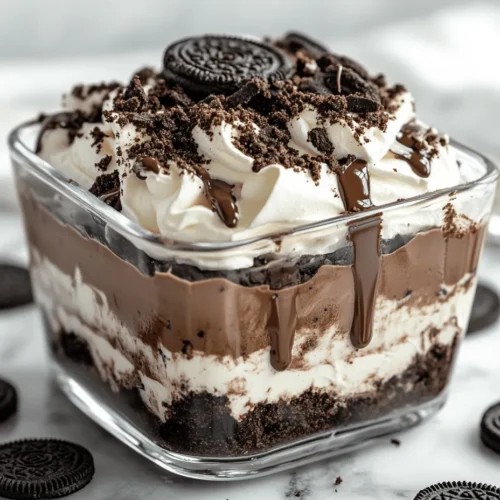
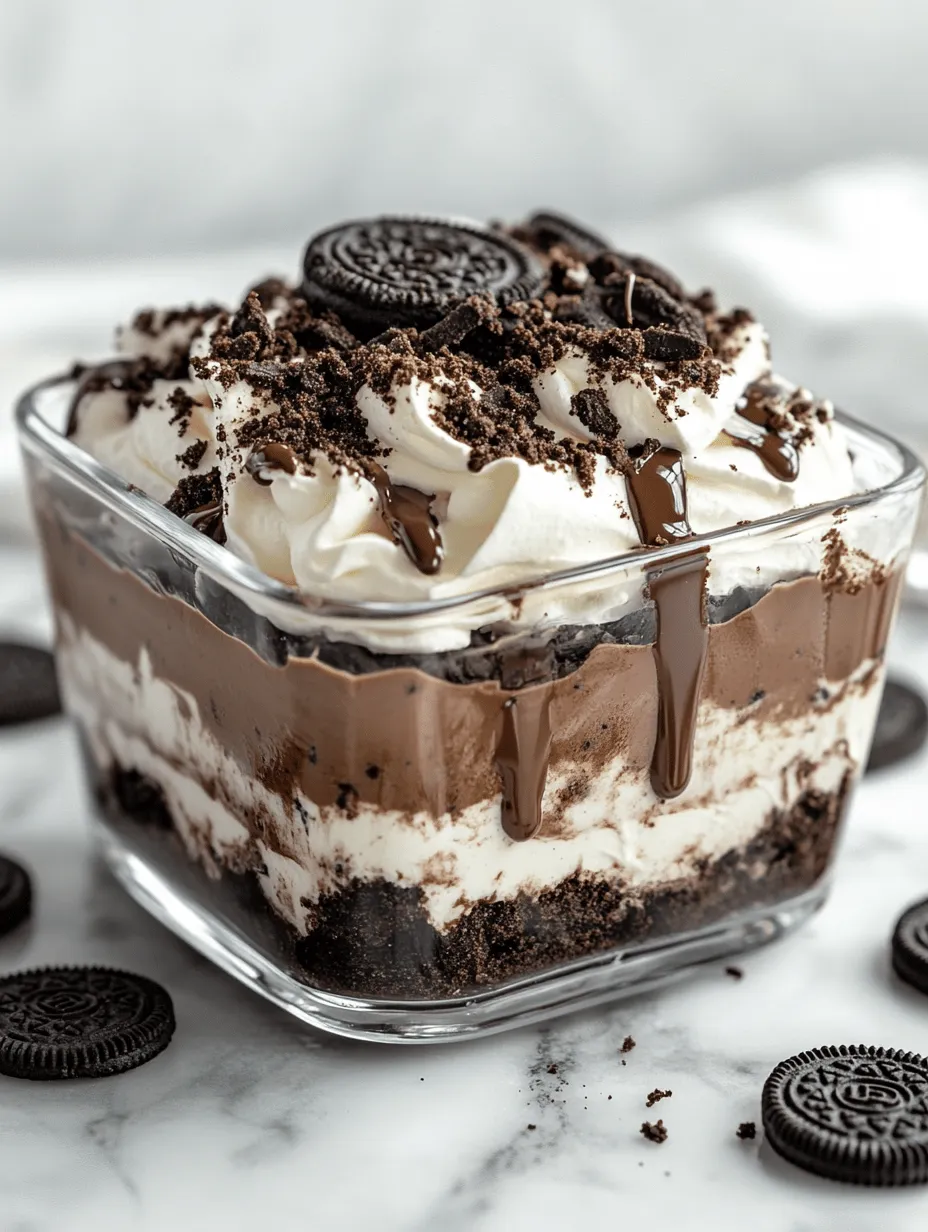
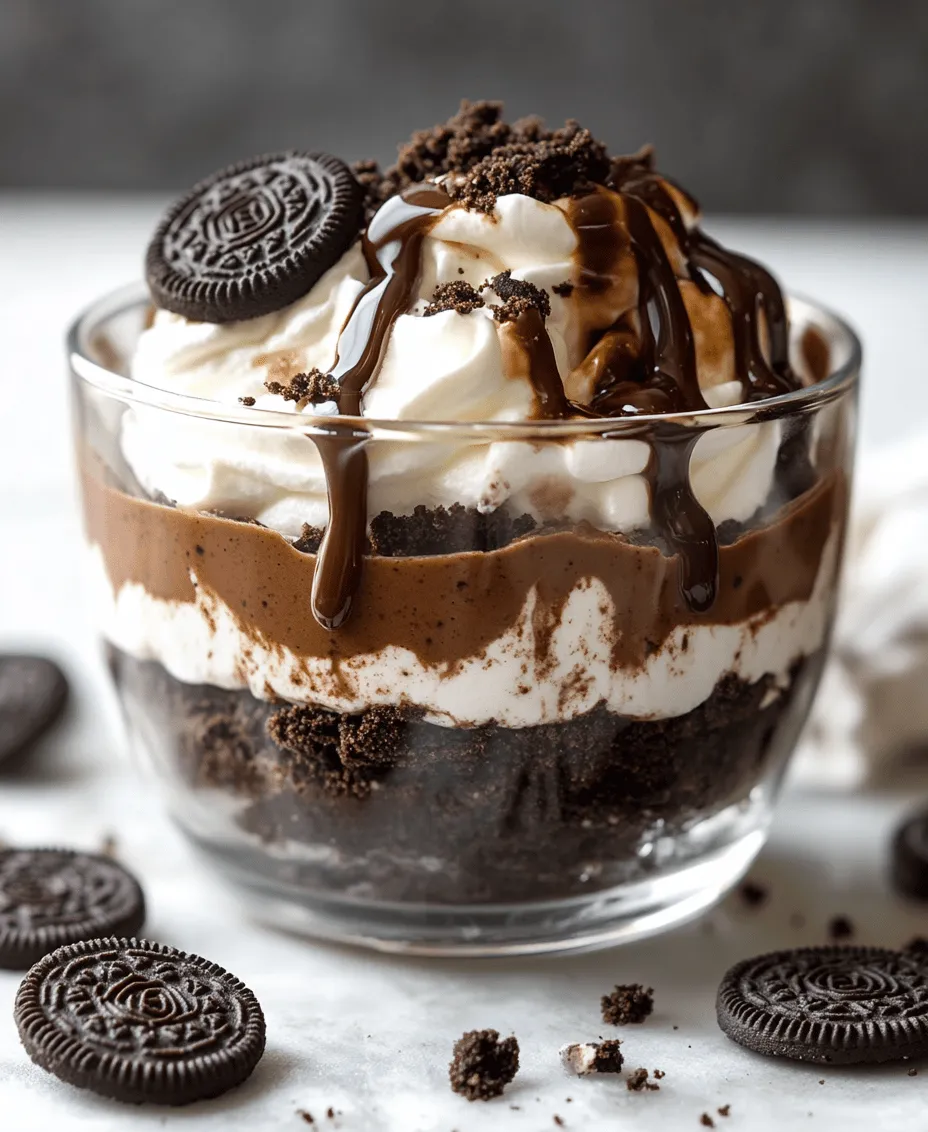
Assembling the Dessert: Creative Ideas for Layering in Clear Glass Dishes or Cups
Once you have your layers ready—creamy, pudding, and crushed Oreos—it’s time to assemble your dessert. Clear glass dishes or cups are ideal, as they showcase the vibrant colors and textures of each layer. Start with a layer of crushed Oreos at the bottom for a crunchy base. Follow this with a layer of the creamy mixture, then a layer of the pudding. Repeat this process, alternating the layers until you reach the top of your dish. For added flair, consider incorporating different colored layers using food coloring in the cream or pudding. This not only enhances the visual appeal but also creates a delightful surprise with each scoop.
Topping It Off: Suggestions for Garnishing and Enhancing Visual Appeal
The final touch on your Oreo Delight can elevate its presentation and flavor. Consider garnishing with additional crushed Oreos sprinkled on top for a classic finish. For a pop of color, fresh berries like strawberries or raspberries can provide a beautiful contrast and a burst of freshness. Chocolate shavings or a drizzle of chocolate syrup can intensify the dessert’s indulgence. If you’re feeling adventurous, whipped cream can be piped on top for an elegant touch. The goal is to create an inviting and visually appealing dessert that beckons guests to dive in.
Chilling: Importance of Refrigeration Time for Optimal Texture
After assembling your Oreo Delight, the next crucial step is chilling. Refrigerate the dessert for at least 4-6 hours, although overnight is ideal. This chilling period allows the flavors to meld and the layers to set properly, resulting in a cohesive and delightful dessert. The cold temperature enhances the creamy texture, making each spoonful melt in your mouth. If you’re in a hurry, allowing it to chill for a shorter time can still yield a tasty result, but the texture may not be as firm.
Garnishing: Ideas for Last-Minute Touches Before Serving
Just before serving, add those last-minute garnishes to make your Oreo Delight truly shine. A sprinkle of colorful edible glitter can add a festive touch, perfect for celebrations. If you have leftover whipped topping, dollop it on each serving for added creaminess. You might also consider a light dusting of cocoa powder or powdered sugar for an elegant finish. For a unique twist, try adding a few mini chocolate chips or a candy garnish that matches the theme of your event. These small details can make a significant impact on the overall presentation.
The Creative Process
Creating Oreo Delight is not just about following a recipe; it’s an opportunity for creativity and personal expression. As you prepare each layer, take the chance to experiment with colors and textures. Whether you choose to dye your cream layers with vibrant colors or mix in different flavors, every decision adds a unique touch to your dessert. Encourage yourself to play with different combinations, like adding crushed fruit or nuts into the layers. The process should be enjoyable and reflect your personality.
When it comes to presentation, get creative with your dishware. Using decorative cups, jars, or even tiered stands can significantly enhance the visual appeal. Consider the themes of your gathering—bright colors for a children’s party or elegant glassware for a formal dinner. The possibilities are endless, and personalizing your Oreo Delight will surely impress your guests.
Serving Suggestions
Oreo Delight is incredibly versatile and can be served on various occasions. Whether it’s a birthday party, family gathering, or holiday celebration, this dessert is sure to be a crowd-pleaser. It can also serve as a delightful ending to a casual weeknight dinner, offering a sweet treat that feels indulgent yet easy to prepare.
For an enhanced dining experience, consider pairing Oreo Delight with a complementary beverage. A rich coffee or espresso can balance the sweetness of the dessert, while a chilled glass of milk is a classic pairing that evokes nostalgia. If you’re looking to create a full dessert table, consider serving Oreo Delight alongside other desserts, such as brownies or fruit tarts, to offer guests a variety of flavors and textures.
Presentation is key when serving your Oreo Delight. Arrange the glasses or cups on a decorative platter, and consider adding fresh flowers or greenery to enhance the table’s aesthetic. A well-set table can elevate the experience and make your dessert feel like a centerpiece.
Nutritional Information
While Oreo Delight is undeniably a treat, it’s also important to consider its nutritional aspects. Each serving contains a balance of sugars and fats due to the cream, pudding, and Oreos. If you’re looking for lighter alternatives, consider using reduced-fat cream cheese or sugar-free pudding mixes. For those with dietary restrictions, gluten-free Oreos are available, making this dessert accessible to a wider audience. Additionally, you can explore dairy-free whipped toppings to cater to lactose-intolerant guests.
Understanding the nutritional value can help you make informed decisions about portion sizes and ingredient selections, allowing you to enjoy this delightful dessert without compromise.
Conclusion
Making Oreo Delight is not just about indulging in a delicious dessert; it’s about the joy and creativity that comes with the process. Each layer represents a new opportunity to express your culinary flair, whether through color, flavor, or presentation. The experience of creating and sharing this dessert with loved ones can make any occasion special.
As you embark on your own Oreo Delight adventure, remember to experiment and personalize your creation. Whether you stick to the classic recipe or make it your own, the result is sure to be a delicious treat that brings smiles and satisfaction. Enjoy the indulgence this delightful dessert offers, and let it be a staple at your gatherings for years to come.