Introduction
Layer desserts have captivated dessert lovers for generations, and it’s easy to see why. Their visual appeal, combined with an array of textures and flavors, makes each bite a delightful experience. Imagine digging into a dessert that not only satisfies your sweet tooth but also dazzles your eyes with its colorful layers. One such treat that embodies this concept is our recipe for “Sweet Layers of Joy.” This easy layer dessert is perfect for any occasion, whether you’re hosting a dinner party, celebrating a birthday, or simply indulging in a sweet escape after a long day.
This recipe showcases how a simple layering technique can transform basic ingredients into an exquisite dessert that looks as good as it tastes. Each layer is carefully constructed to provide a balanced combination of flavors and textures, resulting in a dessert that is both visually stunning and deliciously satisfying. The best part? It’s versatile enough to allow for personal touches and variations, making it a perfect canvas for your culinary creativity.
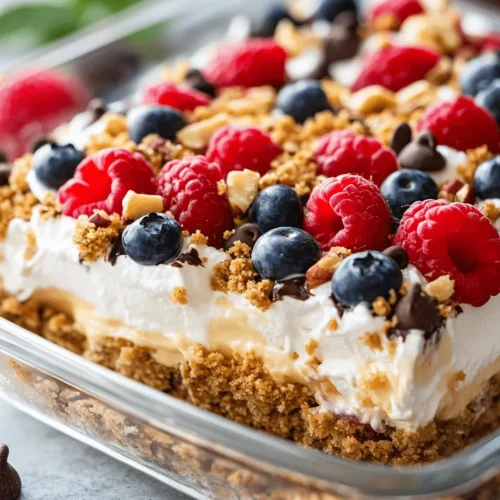
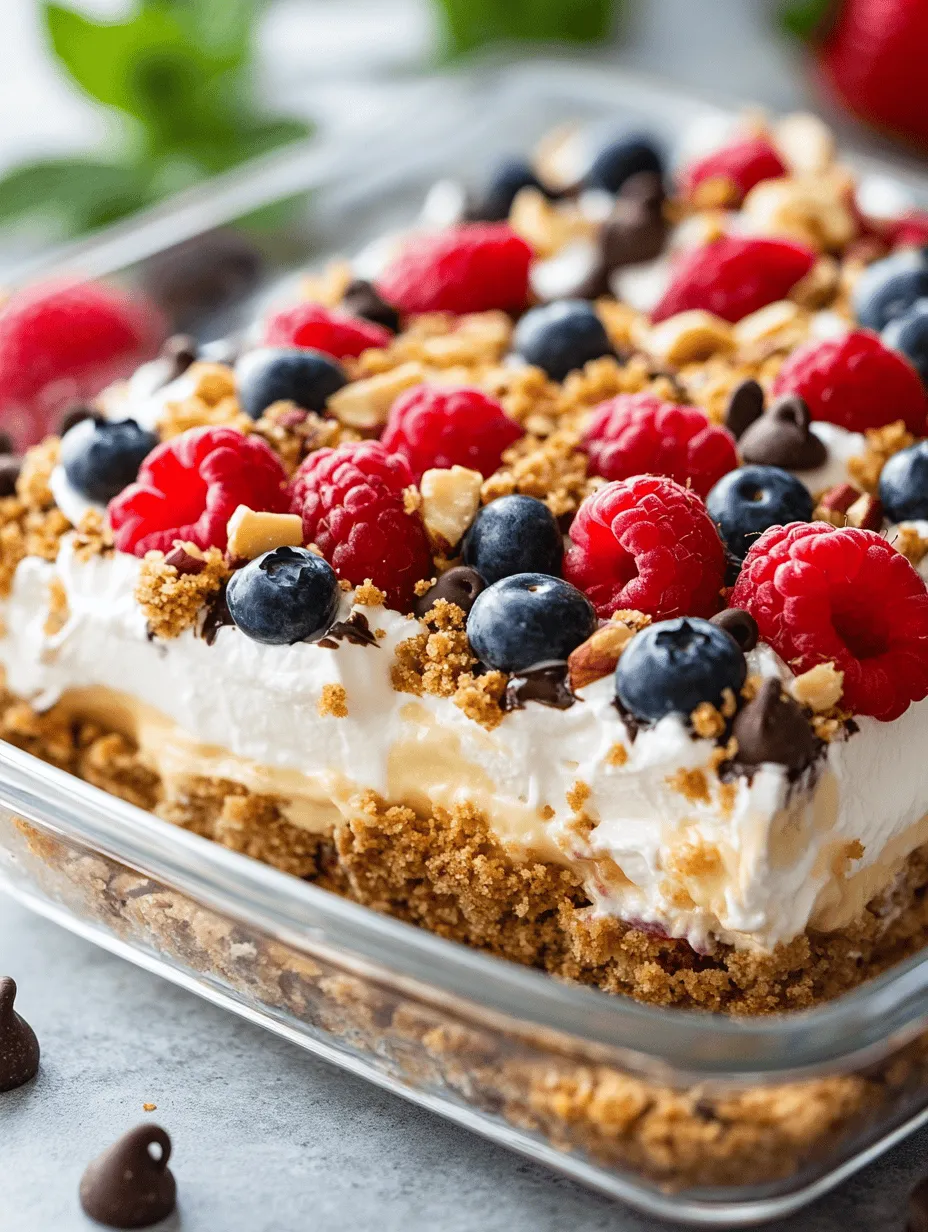
In the world of desserts, presentation is key, and “Sweet Layers of Joy” excels in this aspect. The vibrant colors of fresh berries against the creamy layers of pudding and whipped cream create a feast for the eyes, while the crunch of the graham cracker crust adds a delightful contrast. As we delve into this recipe, you’ll discover how the combination of taste and aesthetics can elevate your dessert game to new heights.
The Allure of Layered Desserts
Layered desserts are a culinary delight that brings together various components to create a harmonious balance of flavors and textures. These desserts typically consist of multiple layers—each contributing its unique taste and mouthfeel—that are stacked or arranged in a transparent dish to showcase their beauty. The appeal of layered desserts goes beyond just their stunning appearance; they are a sensory experience that engages the palate with every spoonful.
Historically, layered desserts have roots in many cultures around the world. From the classic English trifle to the French charlotte, these desserts have evolved over time, incorporating local ingredients and culinary techniques. Their popularity can be attributed to their versatility and the ability to adapt to seasonal ingredients. Layered desserts can be found at celebrations, holidays, and family gatherings, symbolizing togetherness and indulgence.
The benefits of layered desserts extend beyond their aesthetic charm. One of the main attractions is the textural contrast they offer. Imagine the creamy smoothness of pudding complemented by the crunch of a cookie or graham cracker base, and the freshness of fruit. Each layer invites the taster to experience a new flavor profile, making every bite an adventure. Additionally, the variety of flavors that can be incorporated—ranging from rich chocolate to refreshing citrus—further enhances their appeal.
Ingredient Breakdown
To create the “Sweet Layers of Joy,” we will use a selection of simple yet flavorful ingredients. Each component plays a critical role in building the layers of this delightful dessert. Below is a detailed breakdown of each ingredient, along with tips for making the best choices.
Crushed Graham Crackers
The base of our layered dessert is made from crushed graham crackers. These are not only delicious but also provide a sturdy foundation for the layers above. When selecting graham crackers, consider experimenting with flavored varieties, such as honey or cinnamon, to add an extra dimension to your dessert. If you prefer a healthier option, you can opt for whole grain graham crackers, which provide more fiber and nutrients without compromising on taste.
Melted Butter
Melted butter is essential for binding the crushed graham crackers together, creating a crumbly yet cohesive crust. While traditional recipes call for regular unsalted butter, you can explore healthier alternatives such as coconut oil or vegan butter if you’re looking to cut down on saturated fats or accommodate dietary preferences. These substitutes can impart unique flavors to the crust while maintaining its structure.
Whipped Cream
Whipped cream adds a luscious, airy texture to the layers of our dessert. You can choose to use store-bought whipped cream for convenience or whip up your own from heavy cream for a fresher taste. Making homemade whipped cream is simple: just beat heavy cream with a bit of sugar and vanilla extract until soft peaks form. This allows you to control the sweetness and flavor, ensuring it perfectly complements the other layers.
Pudding Options
The pudding serves as a rich and creamy layer in our dessert. For this recipe, we recommend using both vanilla and chocolate pudding options to create a delightful contrast. Vanilla pudding offers a classic flavor that pairs beautifully with fresh fruit, while chocolate pudding adds a decadent touch. Both options can be made from scratch for a homemade taste or purchased pre-made for a quick and easy dessert.
Fresh Berries
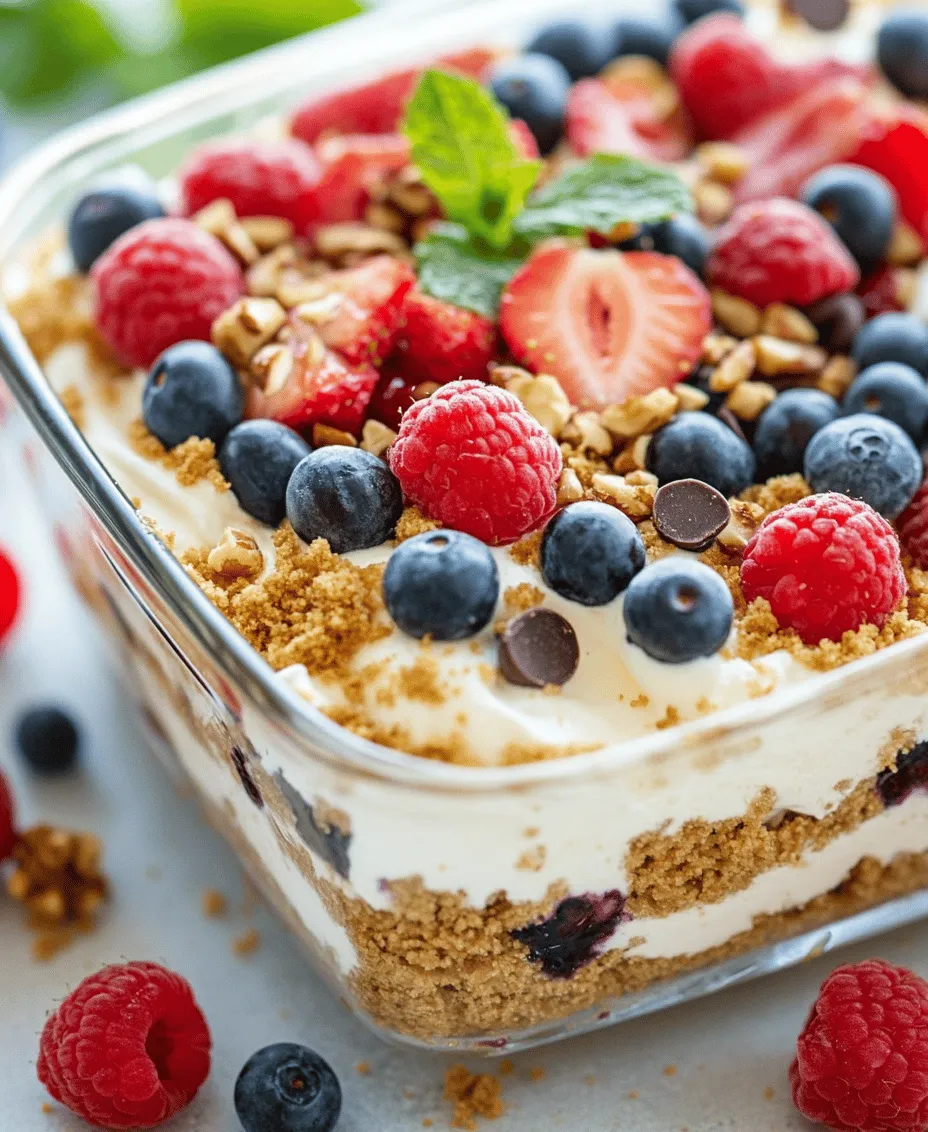
Fresh berries are the star of this dessert, adding a burst of color and natural sweetness. Strawberries, blueberries, raspberries, or a mix of your favorites can be used to create a vibrant layer. Beyond their visual appeal, berries are packed with vitamins, antioxidants, and fiber, making them a nutritious choice. When selecting berries, look for ripe, seasonal options to maximize flavor and freshness.
Optional Ingredients
To elevate your layered dessert even further, consider adding optional ingredients such as chocolate chips, shredded coconut, or chopped nuts. These additions can introduce new textures and flavors, enhancing the overall experience. For instance, chocolate chips can add a delightful surprise in each bite, while shredded coconut contributes a tropical flair. Chopped nuts can provide a satisfying crunch and nutty flavor that complements the sweetness of the other layers.
Role of Fresh Mint in Garnishing
Finally, don’t underestimate the power of garnishing! A few sprigs of fresh mint can add a pop of color and a refreshing hint of flavor to your dessert. Not only does mint enhance the visual appeal, but it also provides a delightful contrast to the sweet layers. When serving, simply place a sprig of mint on top of the final layer to make your dessert look restaurant-worthy.
Step-by-Step Instructions for Sweet Layers of Joy
Now that we’ve covered the ingredients, let’s dive into the preparation of the “Sweet Layers of Joy.” The first step is to create the crust, which is crucial for providing stability and texture to the layers above.
Preparing the Crust
1. Crush the Graham Crackers: Begin by placing the graham crackers in a food processor and pulse them until they are finely crushed. If you don’t have a food processor, you can place the crackers in a zip-top bag and crush them using a rolling pin.
2. Combine with Melted Butter: In a mixing bowl, combine the crushed graham crackers with the melted butter. Use a fork to mix until all the crumbs are evenly coated and resemble wet sand. This mixture should hold together when pressed.
3. Press into a Dish: Choose a clear glass dish or individual serving cups for your layered dessert. Evenly distribute the graham cracker mixture across the bottom of the dish, pressing down firmly to create a solid crust. This step is vital to ensure that the crust holds together when you scoop out the dessert later.
4. Chill the Crust: Place the dish in the refrigerator for about 15-20 minutes to allow the crust to set. This chilling time helps to solidify the butter and provides a firmer base for the layers that will follow.
5. Prepare the Pudding: While the crust is chilling, you can prepare the pudding. If using instant pudding mixes, combine them according to the package instructions. If you’re making homemade pudding, follow your recipe to achieve a smooth and creamy consistency.
6. Whip the Cream: If you’re making homemade whipped cream, now is the time to whip the heavy cream until soft peaks form. Be careful not to overwhip, as this can create a grainy texture.
With the crust prepared and the pudding and whipped cream ready, you’re all set to assemble your “Sweet Layers of Joy.” Each layer will bring together the flavors and textures we’ve discussed, culminating in a beautiful dessert that will surely impress your family and friends. Stay tuned for the next part of this article, where we will delve into the assembly process and tips for achieving the perfect presentation!
Layering the Pudding: Tips for Achieving the Perfect Consistency
Creating the ideal layered dessert starts with the pudding. Here are some essential tips to ensure your pudding has the perfect consistency:
1. Use Cold Ingredients: Begin with cold milk or a non-dairy substitute when preparing your pudding mix. This helps create a smoother, creamier texture.
2. Whisk Thoroughly: As you mix your pudding, whisk it vigorously to eliminate lumps. A hand mixer can also ensure a silky smooth consistency.
3. Allow to Thicken: After mixing, let the pudding sit for a few minutes to reach the desired thickness. If it’s too runny, consider allowing it to chill in the refrigerator for a short while.
4. Layering Technique: When layering, use a spatula to gently spread the pudding over the crust or previous layer to avoid disturbing the structure. This will give you clean, defined layers in your dessert.
Adding Whipped Cream: Techniques for a Fluffy Texture
Whipped cream is a crucial component that adds a light, airy factor to your layered dessert. Here’s how to create that fluffy texture:
1. Chill Your Equipment: Before whipping your cream, chill your mixing bowl and beaters for about 10 minutes in the freezer. This helps maintain the temperature of the cream, leading to better whipping results.
2. Opt for Heavy Cream: Use heavy whipping cream, which has a higher fat content, leading to a richer and fluffier texture.
3. Gradual Sweetening: Start whipping the cream on low speed, then gradually increase to high. Add powdered sugar slowly to ensure it mixes thoroughly without deflating the cream.
4. Perfect Peaks: Whip until you reach soft to medium peaks—this means the cream should be thick enough to hold its shape but soft enough to blend smoothly with the pudding.
Incorporating Fresh Berries: Choosing the Right Mix for Flavor and Color
Berries not only enhance the dessert’s flavor but also add vibrant colors. Here are some tips for selecting and incorporating them:
1. Mix of Berries: Combine strawberries, blueberries, raspberries, and blackberries for a colorful and flavorful mix. Each berry contributes unique flavors and nutritional benefits.
2. Freshness is Key: Select ripe, fresh berries for the best taste. Avoid those that are overly soft or have blemishes.
3. Preparation: Rinse the berries gently under cool water and pat them dry with a paper towel. For strawberries, consider slicing them for easier layering.
4. Layering with Berries: Distribute the berries evenly between the layers. You can also create a berry puree by blending some of them to drizzle between layers for an artistic touch.
Repeating the Layers: How to Balance Flavors and Presentation
The beauty of layered desserts lies in their visual appeal and balanced flavors. Here’s how to achieve that:
1. Layer Order: Start with a base layer, such as crushed cookies or graham crackers, followed by pudding, whipped cream, and berries. Repeat this order to create a consistent and appealing structure.
2. Proportions: Keep each layer similar in thickness to maintain balance. For example, if you use a cup of pudding, aim for a cup of whipped cream and a similar amount of berries in each section.
3. Visual Appeal: Use clear glass containers to showcase the layers. Ensure that each layer is visible, creating a beautiful presentation that draws attention.
Garnishing: Enhancing the Visual Appeal
Don’t overlook the finishing touches that elevate your dessert:
1. Additional Berries: Top your dessert with a few whole berries for color and freshness.
2. Mint Leaves: A sprig of mint adds a pop of color and a refreshing aroma.
3. Drizzles: Consider drizzling chocolate or berry sauce on top for an extra layer of flavor and visual interest.
4. Decorative Sprinkles: For a playful touch, sprinkle edible glitter or colorful sprinkles on top.
Chilling and Serving Suggestions
Importance of Chilling for Flavor Development
Chilling your layered dessert is crucial for developing flavors and firming up the structure. Here’s why:
– Flavor Infusion: Allowing the dessert to chill for at least 2-4 hours (or overnight) lets the flavors meld, resulting in a more cohesive taste experience.
– Firm Texture: Chilling helps the pudding and whipped cream set properly, making it easier to scoop and serve.
Best Practices for Serving: Scooping and Presentation Ideas
When it’s time to serve your dessert, consider these tips for a beautiful presentation:
1. Use a Spatula or Scoop: A large serving spoon or spatula can help you lift layers without disturbing them too much. This allows for clean scoops.
2. Layer Visibility: Serve the dessert in transparent cups or glasses to showcase the beautiful layers. This creates an enticing presentation that invites guests to dig in.
3. Individual Portions: Consider serving in individual cups for easy handling and a more personal touch.
Suggested Pairings with Beverages or Other Desserts
To complement your layered dessert, consider these pairing options:
– Coffee or Tea: A light brew can balance the sweetness of the dessert. Consider serving with a cappuccino or herbal tea for a sophisticated touch.
– Sparkling Water: For a refreshing option, serve with sparkling water infused with slices of lemon or cucumber.
– Ice Cream: A scoop of vanilla or berry-flavored ice cream can add an extra layer of indulgence.
Creative Variations on Layered Desserts
Suggestions for Alternative Flavor Combinations
While the classic pudding and berry layers are delicious, don’t hesitate to get creative with different flavors:
1. Chocolate Layer: Use chocolate pudding instead of vanilla, alternating with layers of crushed cookies for a decadent treat.
2. Coconut Cream: Substitute coconut milk for a tropical twist, layering with toasted coconut flakes and pineapple chunks.
3. Matcha Green Tea: Incorporate matcha pudding and layer with almond cookies and whipped coconut cream for a unique flavor profile.
Dietary Adaptations: Gluten-Free, Dairy-Free, and Vegan Options
Creating a layered dessert that caters to various dietary needs is easier than you think:
– Gluten-Free: Use gluten-free cookies or graham crackers for the base layer.
– Dairy-Free: Opt for non-dairy milk and whipped coconut cream to make this dessert suitable for those avoiding dairy.
– Vegan: Choose plant-based pudding mixes and ensure all ingredients are vegan-friendly, such as using aquafaba for whipped cream.
Seasonal Variations to Celebrate Different Occasions
Make your layered dessert suitable for various occasions with these seasonal adaptations:
– Fall: Incorporate pumpkin puree into the pudding layers and spice it with cinnamon and nutmeg, topped with pecans.
– Winter: Use peppermint extract in the whipped cream and layer with crushed candy canes for a festive touch.
– Spring: Create a floral theme with lavender-infused pudding and fresh edible flowers as garnishes.
The Art of Coloring Your Dessert Experience
Introduction to the Idea of Coloring Books for Adults and Children
Incorporating creativity into your dessert experience can be as enjoyable as the dessert itself. Adult and children’s coloring books have gained popularity, allowing for relaxation and artistic expression:
– Coloring Together: Set up a coloring station alongside dessert preparation. This can serve as a fun, interactive way to bond with family or friends.
– Dessert-Themed Artwork: Consider using dessert-inspired coloring pages to spark creativity while you bake and layer.
How to Incorporate Creativity into the Dessert Process
Creativity can enhance your dessert-making process in various ways:
1. Personalize Your Layers: Encourage everyone involved to pick their favorite flavors and colors for a unique dessert experience.
2. Create Edible Art: Use food-safe markers to draw on dessert plates or create colorful garnishes that tie into your coloring theme.
Engaging with Kids or Friends Through Coloring While Enjoying Dessert
Turn dessert time into a fun event by combining coloring and eating:
– Coloring Contests: Challenge friends or family to a coloring contest while enjoying their desserts, sharing laughter and creativity.
– Themed Gatherings: Host a “layered dessert party” where guests bring their own coloring pages and favorite dessert toppings to share.
Conclusion
This layered dessert recipe is not just about the flavors; it embodies creativity, joy, and the pleasure of sharing delightful moments with loved ones. By following the steps outlined, you can create a visually stunning and delicious treat that will impress your guests and satisfy your sweet tooth.
Experiment with various flavors, engage your creativity through coloring, and enjoy the process of making and sharing your layered desserts. Whether it’s a casual family gathering or a festive celebration, these sweet layers of joy will surely bring smiles to everyone’s faces. Embrace the art of layering, and let your culinary creativity shine!